In this lab, you will create a Traffic Manager profile to deliver high availability for the fictional Exceedlabs Ltd organization’s web application.
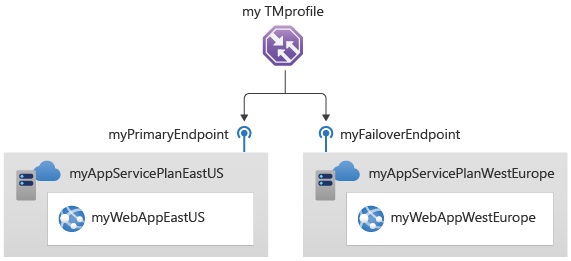
You will create two instances of a web application deployed in two different regions (East US and West Europe). The East US region will act as a primary endpoint for Traffic Manager, and the West Europe region will act as a failover endpoint.
You will then create a Traffic Manager profile based on endpoint priority. This profile will direct user traffic to the primary site running the web application. Traffic Manager will continuously monitor the web application, and if the primary site in East US is unavailable, it will provide automatic failover to the backup site in West Europe.
The diagram below approximately illustrates the environment you will be deploying in this lab.
In this lab, you will:
- Task 1: Create the web apps
- Task 2: Create a Traffic Manager profile
- Task 3: Add Traffic Manager endpoints
- Task 4: Test the Traffic Manager profile
Prerequisites for this labs : Azure Account
Task 1: Create the web apps
In this section, you will create two instances of a web application deployed in the two different Azure regions.
- On the Azure portal home page, click Create a resource, then select Web App (if this resource type is not listed on the page, use the search box at the top of the page to search for it and select it).
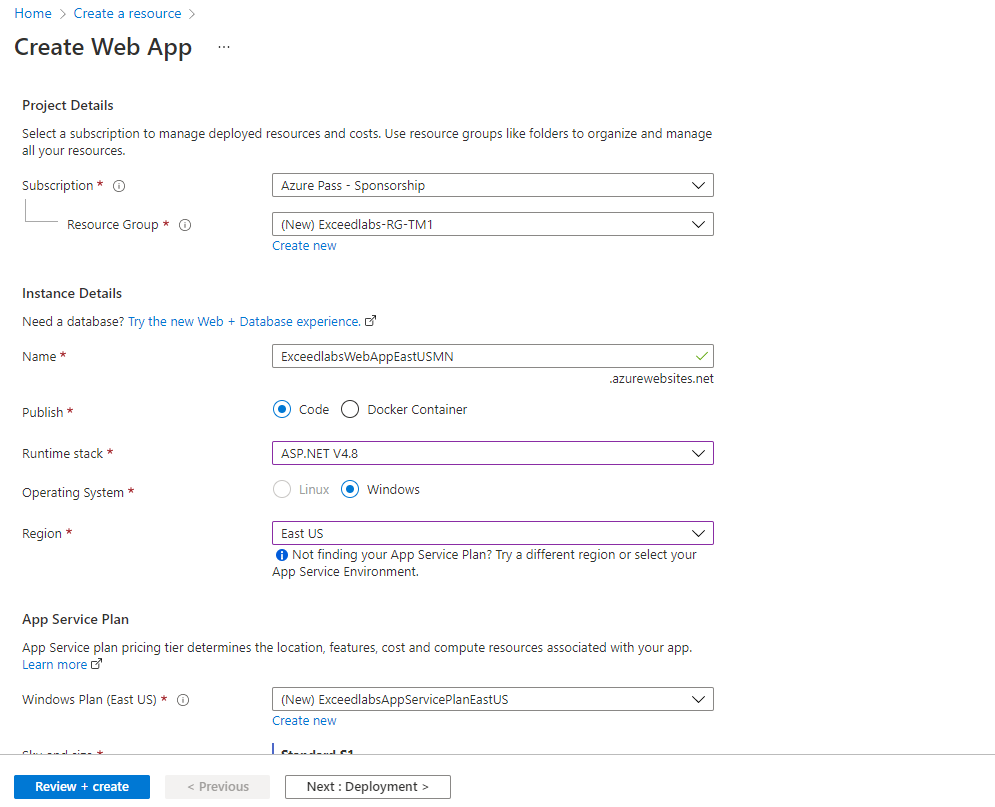
- On the Create Web App page, on the Basics tab, use the information in the table below to create the first web application.
| Setting | Value |
| Subscription | Select your subscription |
| Resource group | Select Create new Name: Exceedlabs-RG-TM1 |
| Name | ExceedlabsWebAppEastUSMN (where xx are your initials to make the name unique) |
| Publish | Code |
| Runtime stack | ASP.NET V4.8 |
| Operating system | Windows |
| Region | East US |
| Windows Plan | Select Create new Name: ExceedlabsAppServicePlanEastUS |
| Sku and size | Standard S1 100 total ACU, 1.75-GB memory |
- Click Next : Deployment (Preview), then click Next : Monitoring.
- On the Monitoring tab, select the No option for Enable Application Insights.

Click Review + create.
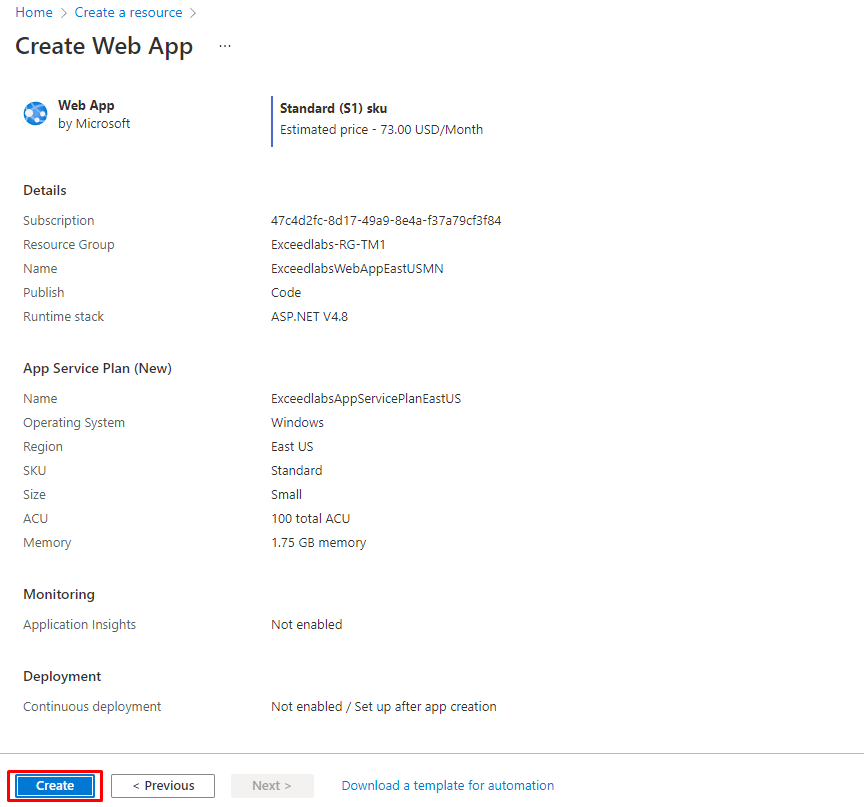
- Click Create. When the Web App successfully deploys, it creates a default web site.
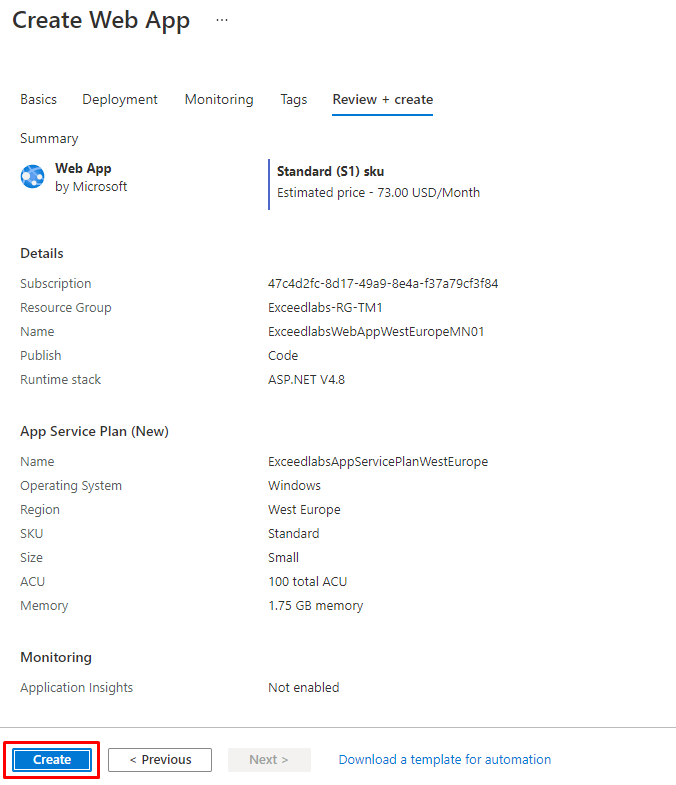
- Repeat steps 1-6 above to create a second web app. Use the same settings as before except for the information in the table below.
| Setting | Value |
| Resource group | Select Create new Name: Exceedlabs-RG-TM2 |
| Name | ExceedlabsWebAppWestEuropeMN01 (where xx are your initials to make the name unique) |
| Region | West Europe |
| Windows Plan | Select Create new Name: ExceedlabsAppServicePlanWestEurope |

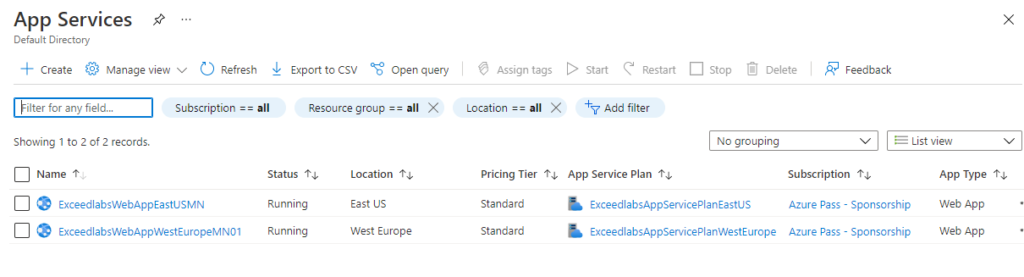
- On the Azure home page, click All services, in the left navigation menu, select Web, and then click App Services.
- You should see the two new web apps listed.
Task 2: Create a Traffic Manager profile
Now you will create a Traffic Manager profile that directs user traffic based on endpoint priority.
- On the Azure portal home page, click Create a resource.
- In the search box at the top of the page, type Traffic Manager profile, and then select it from the pop-up list.
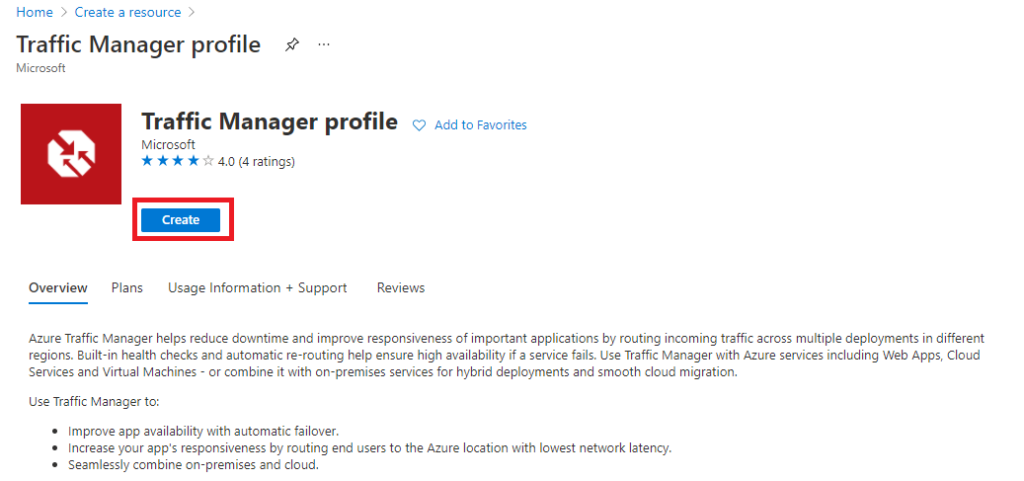
- Click Create.
- On the Create Traffic Manager profile page, use the information in the table below to create the Traffic Manager profile.
| Setting | Value |
| Name | Exceedlabs-TMProfileMN01 (where xx are your initials to make the name unique) |
| Routing method | Priority |
| Subscription | Select your subscription |
| Resource group | Exceedlabs-RG-TM1 |
| Resource group location | East US |
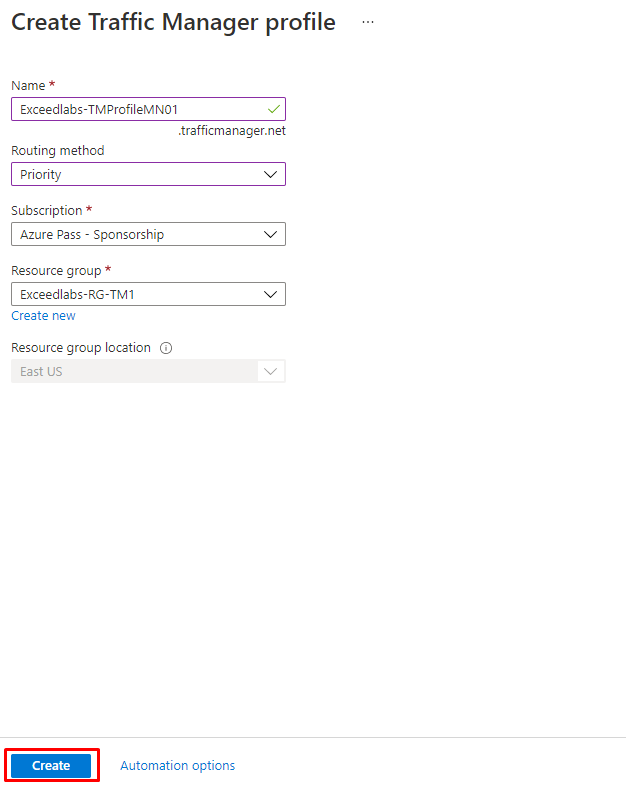
Click Create.
Task 3: Add Traffic Manager endpoints
In this section, you will add the website in the East US as the primary endpoint to route all the user traffic. You will then add the website in West Europe as a failover endpoint. If the primary endpoint becomes unavailable, then traffic will automatically be routed to the failover endpoint.
- On the Azure portal home page, click All resources, then click on Exceedlabs-TMProfileMN in the resources list.
- Under Settings, select Endpoints, and then click Add.

- On the Add endpoint page, enter the information from the table below.
| Setting | Value |
| Type | Azure endpoint |
| Name | myPrimaryEndpoint |
| Target resource type | App Service |
| Target resource | ExceedlabsWebAppEastUSMN (East US) |
| Priority | 1 |
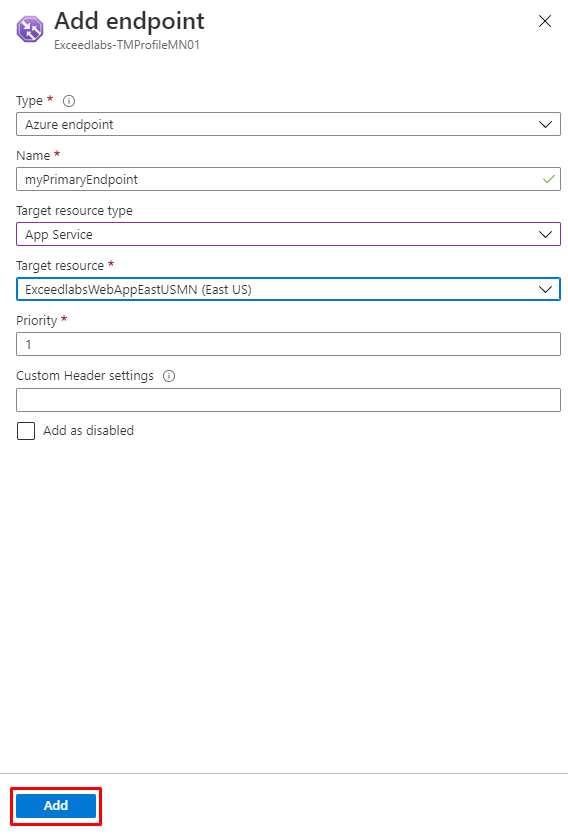
- Click Add.
- Repeat steps 2-4 above to create the failover endpoint. Use the same settings as before except for the information in the table below.
| Setting | Value |
| Name | myFailoverEndpoint |
| Target resource | ExceedlabsWebAppWestEurope (West Europe) |
| Priority | 2 |
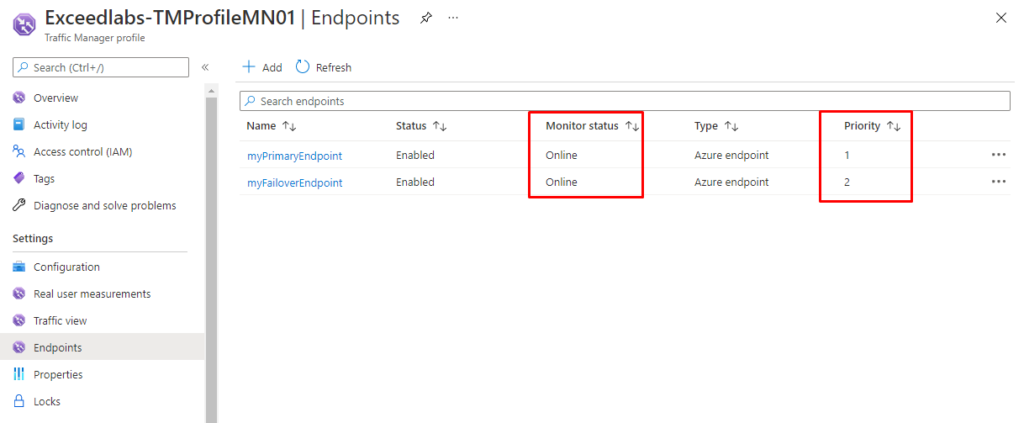
- Setting a priority of 2 means that traffic will route to this failover endpoint if the configured primary endpoint becomes unhealthy.
- The two new endpoints are displayed in the Traffic Manager profile. Notice that after a few minutes the Monitoring status should change to Online.
Task 4: Test the Traffic Manager profile
In this section, you will check the DNS name of your Traffic Manager profile, and then you will configure the primary endpoint so that it is unavailable. You will then verify that the web app is still available, to test that the Traffic Manager profile is successfully sending traffic to the failover endpoint.
- On the Exceedlabs-TMProfile page, click Overview.
- On the Overview screen, copy the DNS name entry to the clipboard (or take note of it somewhere).

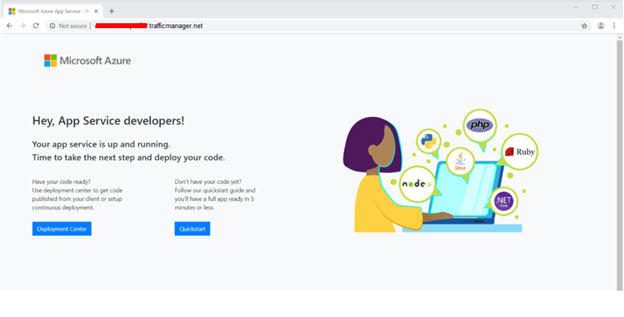
- Open a web browser tab, and paste (or enter) the DNS name entry (http://exceedlabs-tmprofilemn01.trafficmanager.net) into the address bar, and press Enter.
- The web app’s default web site should be displayed.
- Currently all traffic is being sent to the primary endpoint as you set its Priority to 1.
- To test the failover endpoint is working properly, you need to disable the primary site.
- On the Exceedlabs-TMProfile page, on the overview screen, select myPrimaryEndpoint.
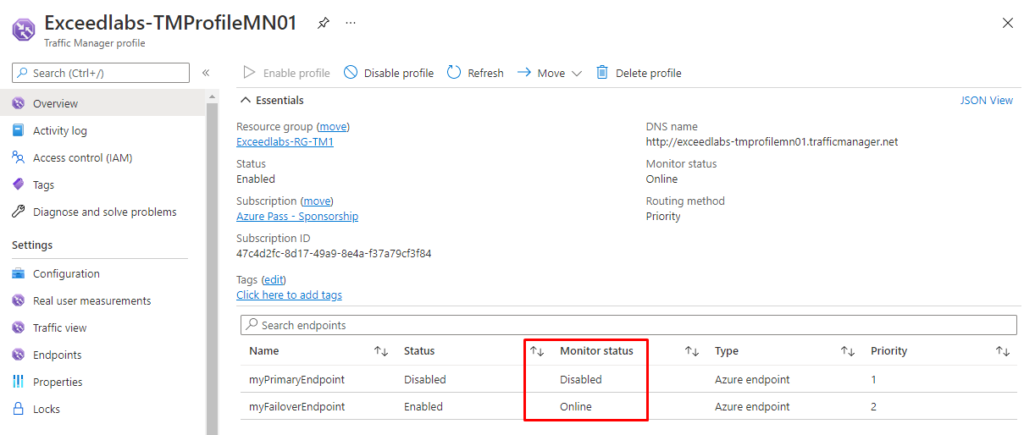
- On the myPrimaryEndpoint page, under Status, click Disabled, and then click Save.

- Close the myPrimaryEndpoint page (click the X in the top right corner of the page).
- On the Exceedlabs-TMProfile page, the Monitor status for myPrimaryEndpoint should now be Disabled.
- Open a new web browser session, and paste (or enter) the DNS name entry (Exceedlabs-tmprofile.trafficmanager.net) into the address bar, and press Enter.
- Verify that the web app is still responding. As the primary endpoint was not available, the traffic was instead routed to the failover endpoint to allow the web site to still function.
Reminder: Don’t forget to delete or shutdown all unused Azure resources after your labs for cost saving
Azure Traffic Manager reference documentation: https://docs.microsoft.com/en-us/azure/traffic-manager/
Leave a Reply