In this lab, you use the Azure portal to create an application gateway. Then you test it to make sure it works correctly.
The application gateway directs application web traffic to specific resources in a backend pool. You assign listeners to ports, create rules, and add resources to a backend pool. For the sake of simplicity, this article uses a simple setup with a public front-end IP, a basic listener to host a single site on the application gateway, a basic request routing rule, and two virtual machines in the backend pool.
For Azure to communicate between the resources that you create, it needs a virtual network. You can either create a new virtual network or use an existing one. In this example, you’ll create a new virtual network while you create the application gateway. Application Gateway instances are created in separate subnets. You create two subnets in this example: one for the application gateway, and another for the backend servers.
In this lab, you will:
- Task 1: Create an application gateway
- Task 2: Create virtual machines
- Task 3: Add backend servers to backend pool
- Task 4: Test the application gateway
Prerequisites for this labs : Azure Account / Download Labs Files here
Task 1: Create an application gateway
- Sign in to the Azure portal with your Azure account.
On any Azure Portal page, in Search resources, services and docs (G+/), enter application gateway, and then select Application gateways from the results.
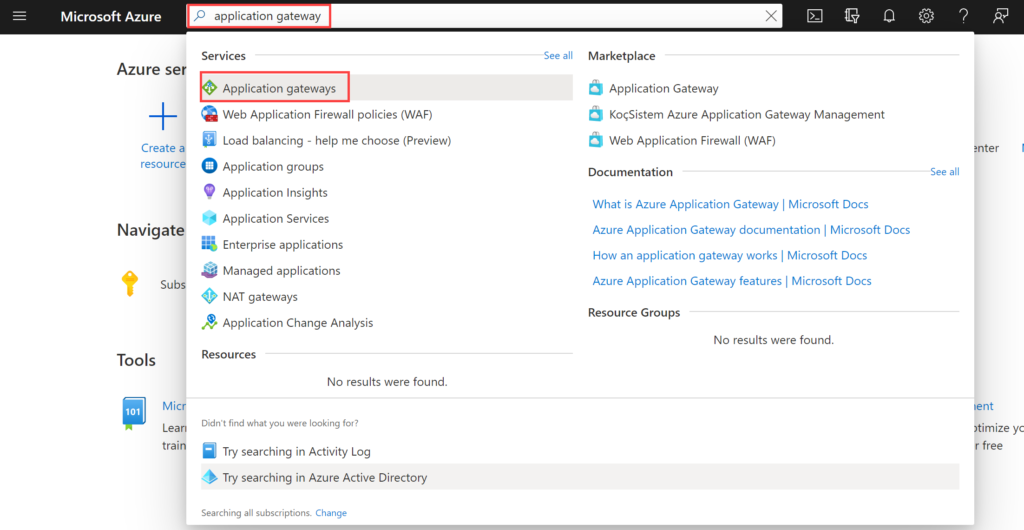
- On the Application gateways page, select + Create.
- On the Create application gateway Basics tab, enter, or select the following information:
| Setting | Value |
| Subscription | Select your subscription. |
| Resource group | Select Create new ExceedlabsResourceGroup |
| Application Gateway | ExceedlabsAppGateway |
| Region | Select East US |
| Virtual Network | Select Create new |
- In Create virtual network, enter, or select the following information:
| Setting | Value |
| Name | ExceedlabsVNet |
| ADDRESS SPACE | |
| Address range | 10.0.0.0/16 |
| SUBNETS | |
| Subnet name | Change default to AGSubnet |
| Address range | 10.0.0.0/24 |
| Subnet name | BackendSubnet |
| Address range | 10.0.1.0/24 |

Select OK to return to the Create application gateway Basics tab.
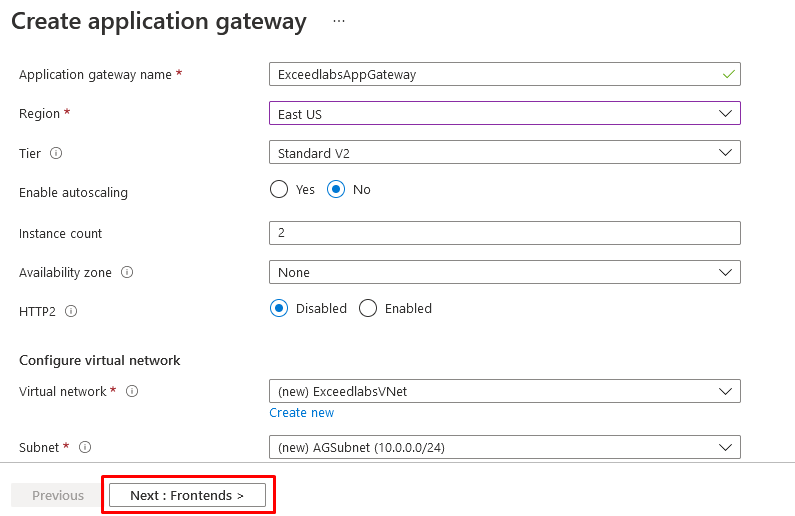
- Accept the default values for the other settings and then select Next: Frontends.
- On the Frontends tab, verify Frontend IP address type is set to Public.
- Select Add new for the Public IP address and enter AGPublicIPAddress for the public IP address name, and then select OK.
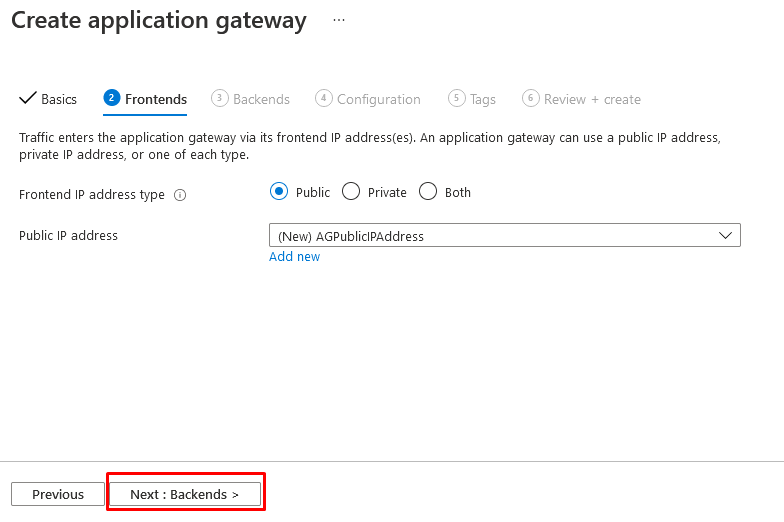
- Select Next: Backends.
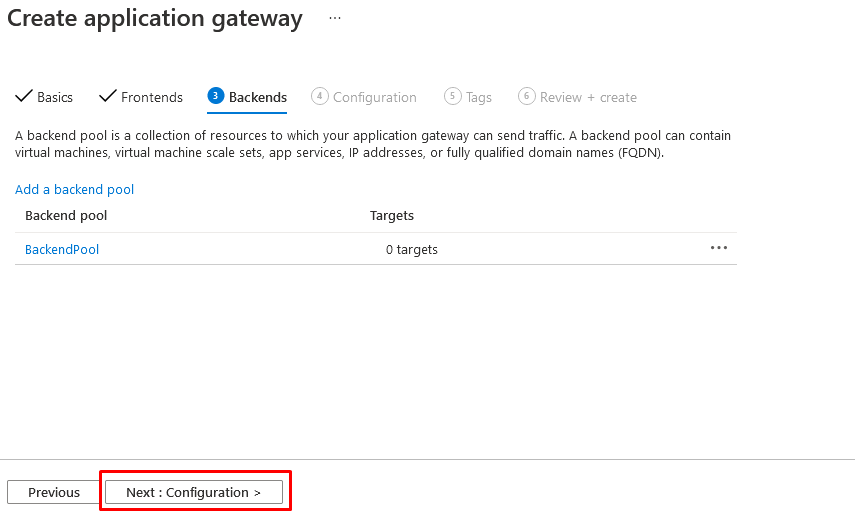
- On the Backends tab, select Add a backend pool.
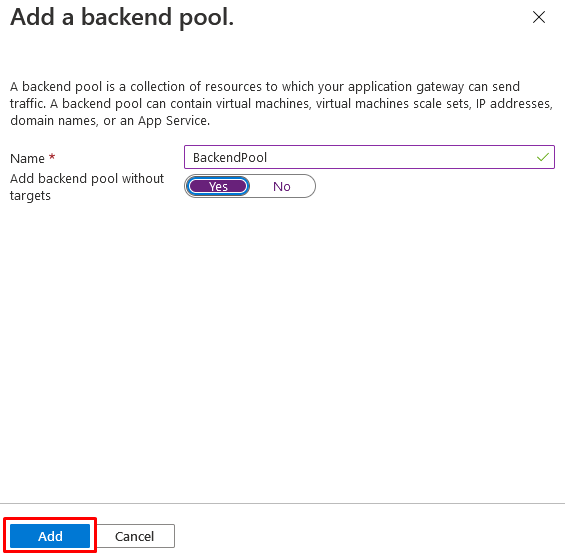
- In the Add a backend pool window that opens, enter the following values to create an empty backend pool:
| Setting | Value |
| Name | BackendPool |
| Add backend pool without targets | Yes |
- In the Add a backend pool window, select Add to save the backend pool configuration and return to the Backends tab.
On the Backends tab, select Next: Configuration.
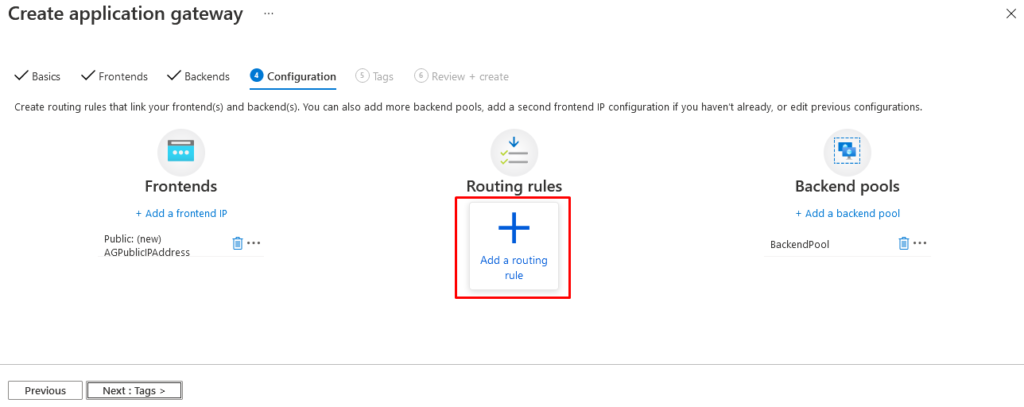
- On the Configuration tab, you’ll connect the frontend and backend pool you created using a routing rule.
- In the Routing rules column, select Add a routing rule.
- In the Rule name box, enter RoutingRule.
- On the Listener tab, enter or select the following information:
| Setting | Value |
| Listener name | Listener |
| Frontend IP | Select Public |
- Accept the default values for the other settings on the Listener tab.
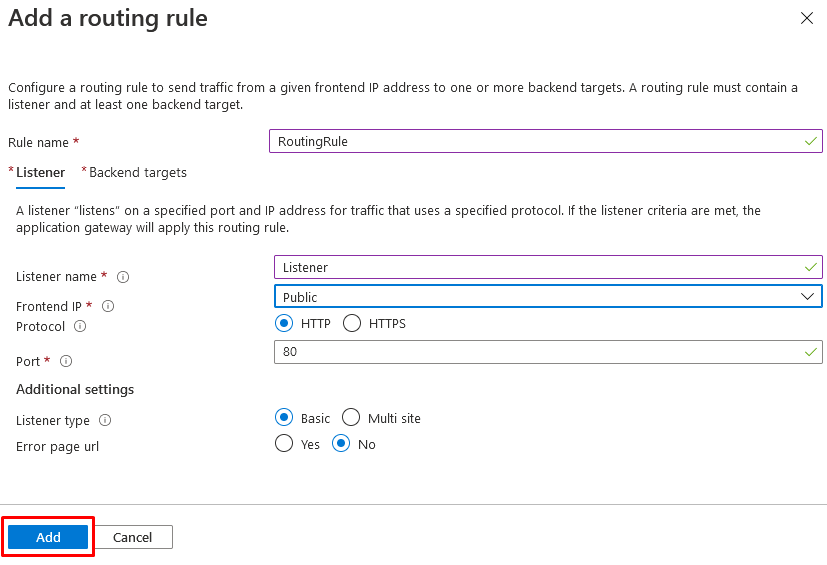
- Select the Backend targets tab to configure the rest of the routing rule.
- On the Backend targets tab, enter or select the following information:
| Setting | Value |
| Target type | Backend pool |
| HTTP Settings | Create new |
- In Add a HTTP setting, enter or select the following information:
| Setting | Value |
| HTTP settings name | HTTPSetting |
| Backend port | 80 |
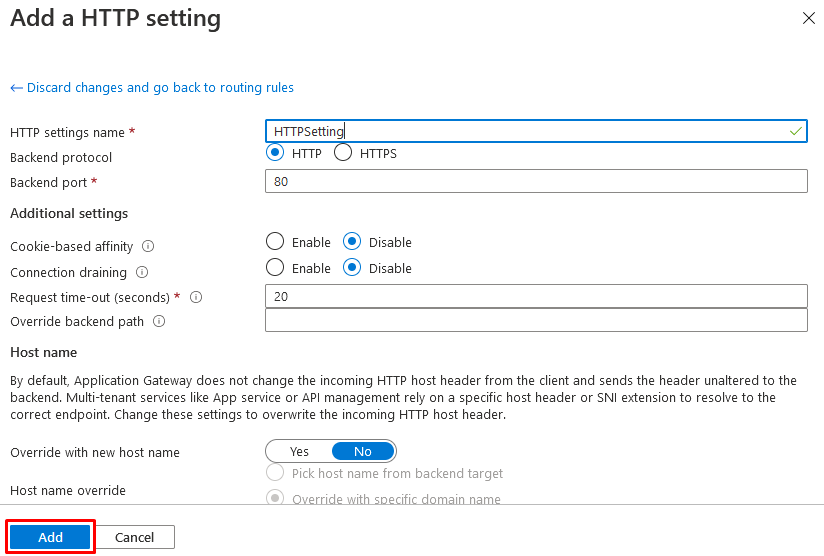
Accept the default values for the other settings in the Add an HTTP setting window, then select Add to return to Add a routing rule.
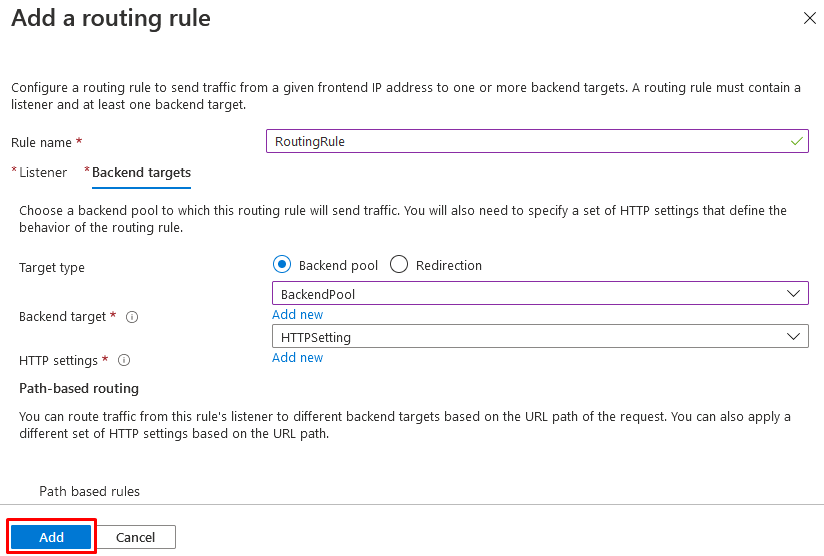
Select Add to save the routing rule and return to the Configuration tab
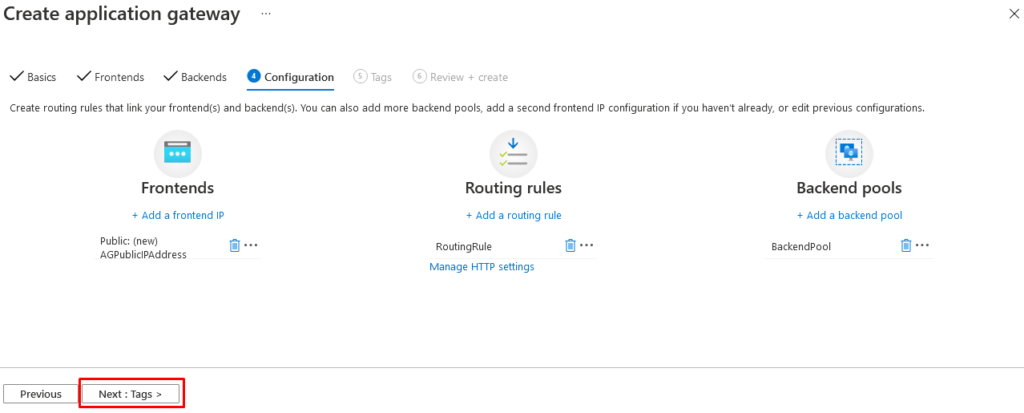
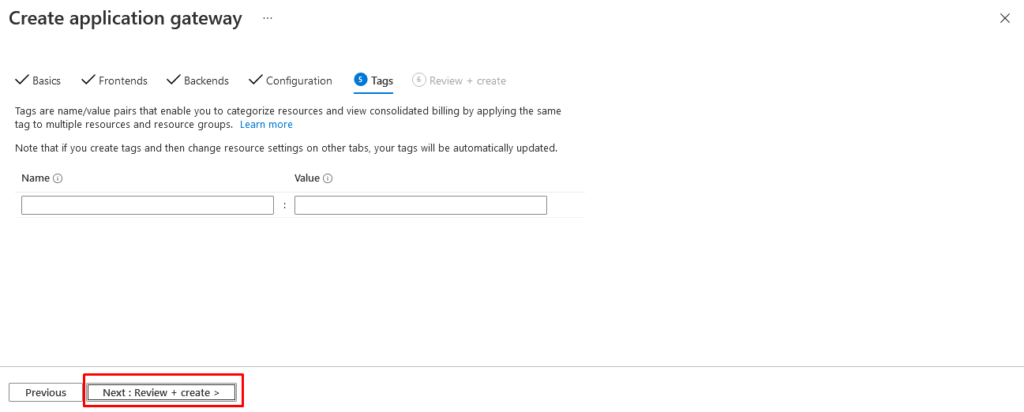
Select Next: Tags and then Next: Review + create.
- Review the settings on the Review + create tab
- Select Create to create the virtual network, the public IP address, and the application gateway.
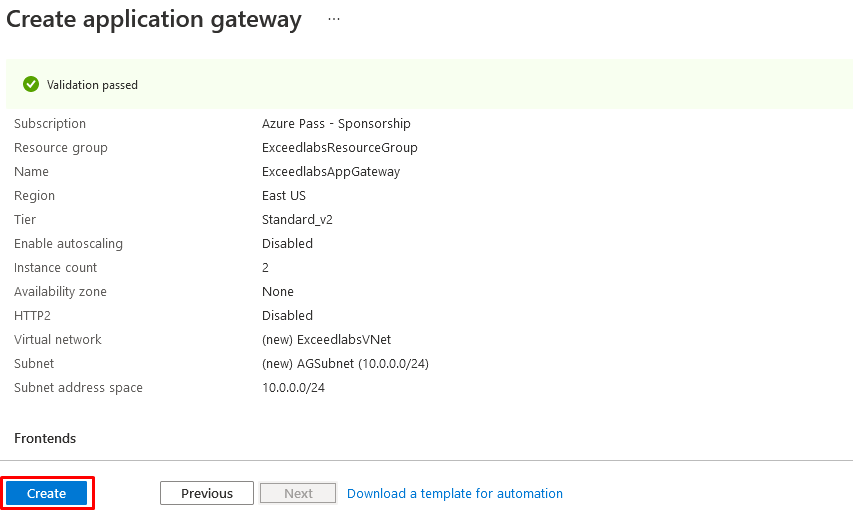
It may take several minutes for Azure to create the application gateway. Wait until the deployment finishes successfully before moving on to the next section.
Task 2: Create virtual machines
- In the Azure portal, open the PowerShell session within the Cloud Shell pane.
- In the toolbar of the Cloud Shell pane, select the Upload/Download files icon, in the drop-down menu, select Upload and upload the following files backend.json and backend.parameters.json into the Cloud Shell home directory from the source folder F:\Allfiles\Labs\M05.
- Deploy the following ARM templates to create the VMs needed for this lab:
code
$RGName = "ExceedlabsResourceGroup"

New-AzResourceGroupDeployment -ResourceGroupName $RGName -TemplateFile backend.json -TemplateParameterFile backend.parameters.json

- When the deployment is complete, go to the Azure portal home page, and then select Virtual Machines.
- Verify that both virtual machines have been created.

Task 3: Add backend servers to backend pool
- On the Azure portal menu, select All resources or search for and select All resources. Then select ExceedlabsAppGateway.
- Under Settings, select Backend pools.
- Select BackendPool.
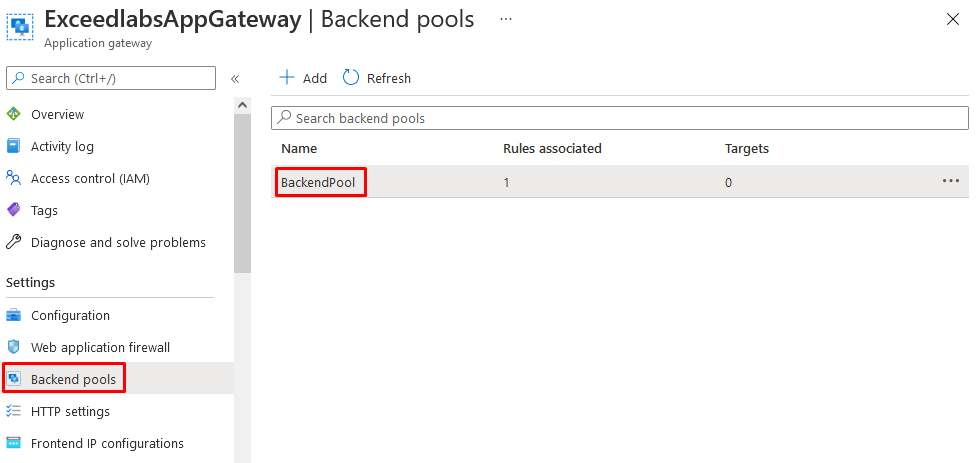
- On the Edit backend pool page, under Backend targets, in Target type, select Virtual machine.
- Under Target, select BackendVM1.
- In Target type, select Virtual machine.
- Under Target, select BackendVM2.
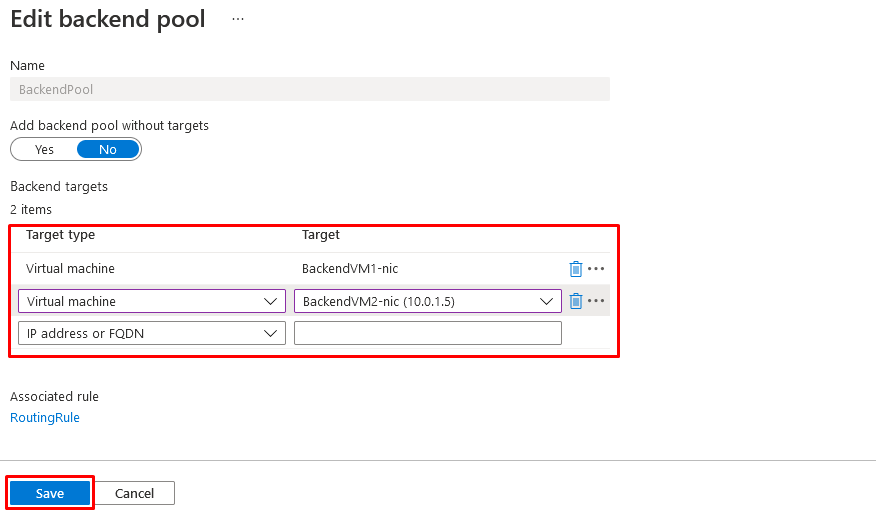
Select Save.
Wait for the deployment to complete before proceeding to the next step.
Task 4: Test the application gateway
Although IIS isn’t required to create the application gateway, you installed it in this lab to verify if Azure successfully created the application gateway.
Use IIS to test the application gateway:
- Find the public IP address for the application gateway on its Overview page.

- Copy the public IP address, and then paste it into the address bar of your browser to browse that IP address.
- Check the response. A valid response verifies that the application gateway was successfully created and can successfully connect with the backend.
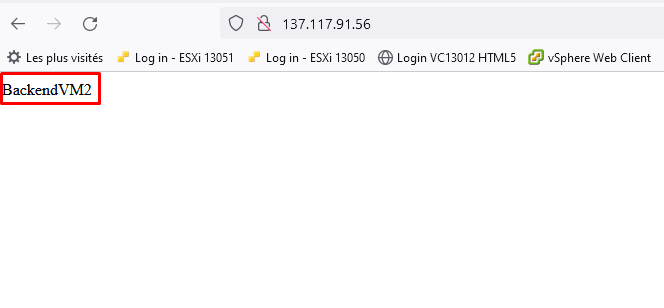
Refresh the browser multiple times and you should see connections to both BackendVM1 and BackendVM2.
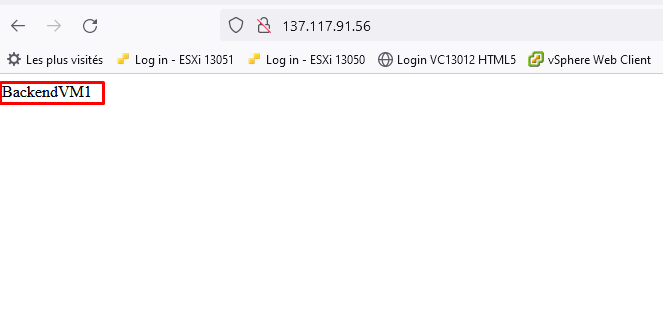
Congratulations! You have configured and tested an Azure Application Gateway.
Reminder: Don’t forget to delete or shutdown all unused Azure resources after your labs for cost saving
Leave a Reply