Being part of the Network Security team at Exceedlabs, your next task is to create firewall rules to allow/deny access to certain websites. The following steps walk you through creating a resource group, a virtual network and subnets, and a virtual machine as environment preparation tasks, and then deploying a firewall and firewall policy, configuring default routes and application, network and DNAT rules, and finally testing the firewall.
In this lab, you will:
- Task 1: Create a resource group
- Task 2: Create a virtual network and subnets
- Task 3: Create a virtual machine
- Task 4: Deploy the firewall and firewall policy
- Task 5: Create a default route
- Task 6: Configure an application rule
- Task 7: Configure a network rule
- Task 8: Configure a Destination NAT (DNAT) rule
- Task 9: Change the primary and secondary DNS address for the server’s network interface
- Task 10: Test the firewall
Prerequisites for this labs : Azure Account / Download Labs Files here
Task 1: Create a resource group
In this task, you will create a new resource group.
- Log in to your Azure account.
- On the Azure portal home page, select Resource groups.
- Click Create.
- On the Basics tab, in Resource group, enter Test-FW-RG.
- In Region, select your region from the list.
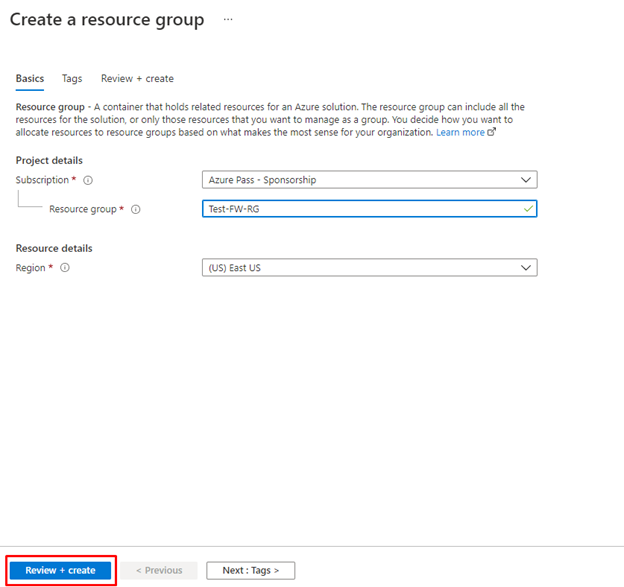
Click Review + create.
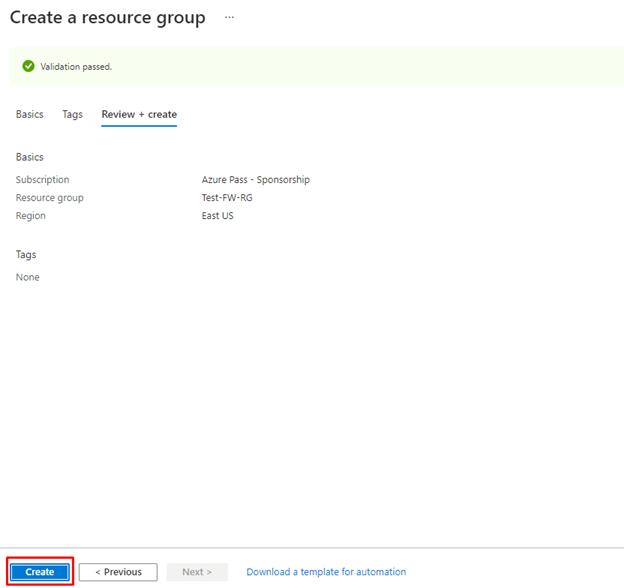
- Click Create.
Task 2: Create a virtual network and subnets
In this task, you will create a single virtual network with two subnets.
- On the Azure portal home page, in the search box, type virtual network and select Virtual Network when it appears.
- Click Create.
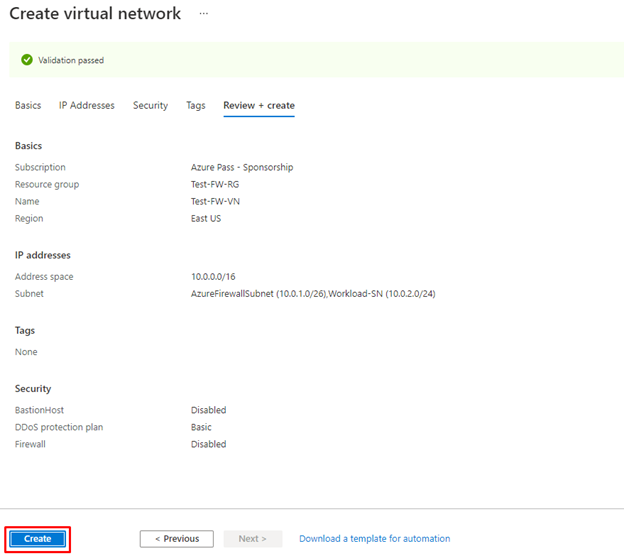
- Select the Test-FW-RG resource group you created previously.
- In the Name box, enter Test-FW-VN.
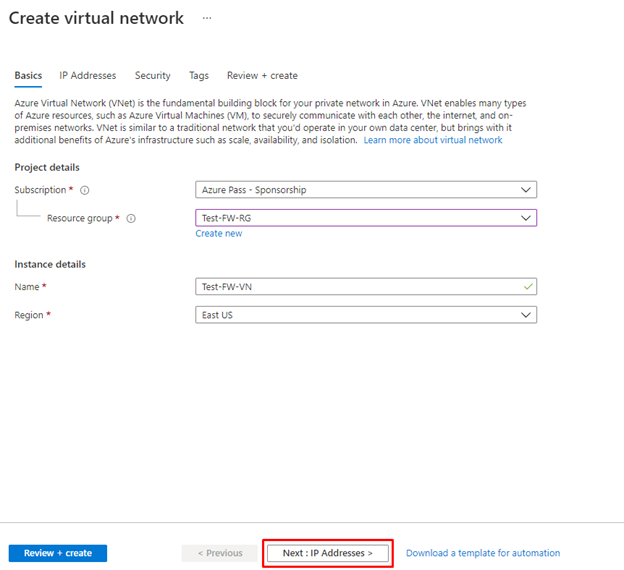
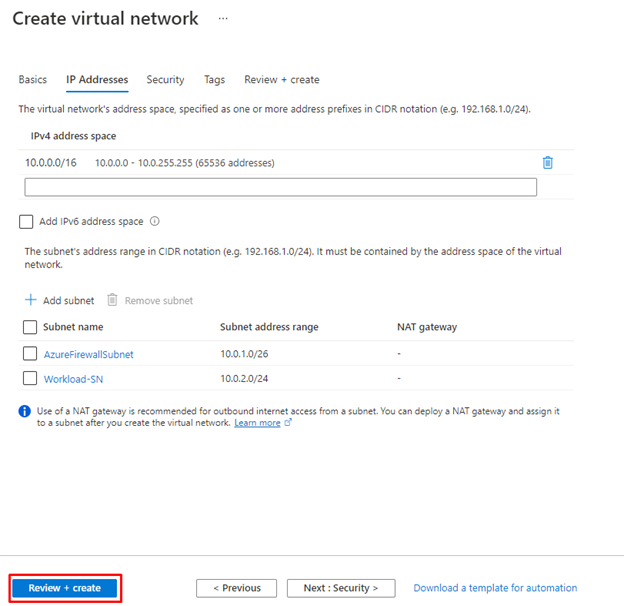
- Click Next: IP Addresses. Enter IPv4 address space 10.0.0.0/16 if not already there by default.
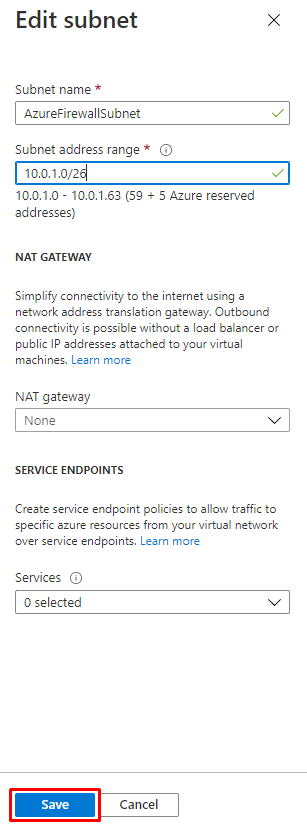
- Under Subnet name, click the word default.
- In the Edit subnet dialog box, change the name to AzureFirewallSubnet.
- Change the Subnet address range to 10.0.1.0/26.
- Click Save.
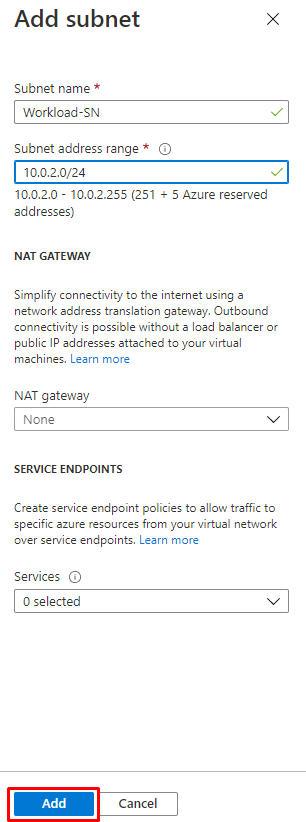
Click Add subnet, to create another subnet, which will host the workload server that you will create shortly.
- In the Edit subnet dialog box, change the name to Workload-SN.
- Change the Subnet address range to 10.0.2.0/24.
- Click Add.
Click Review + create.
Click Create.
Task 3: Create a virtual machine
In this task, you will create the workload virtual machine and place it in the Workload-SN subnet created previously.
- In the Azure portal, open the PowerShell session within the Cloud Shell pane.
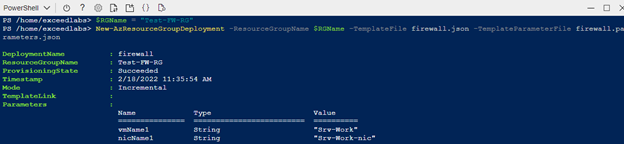
- In the toolbar of the Cloud Shell pane, select the Upload/Download files icon, in the drop-down menu, select Upload and upload the following files firewall.json and firewall.parameters.json into the Cloud Shell home directory from the source folder F:\Allfiles\Exercises\M06.
- Deploy the following ARM templates to create the VM needed for this exercise:
code
$RGName = "Test-FW-RG"

New-AzResourceGroupDeployment -ResourceGroupName $RGName -TemplateFile firewall.json -TemplateParameterFile firewall.parameters.json
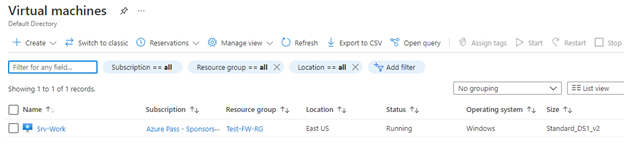
- When the deployment is complete, go to the Azure portal home page, and then select Virtual Machines.
- Verify that the virtual machine has been created.
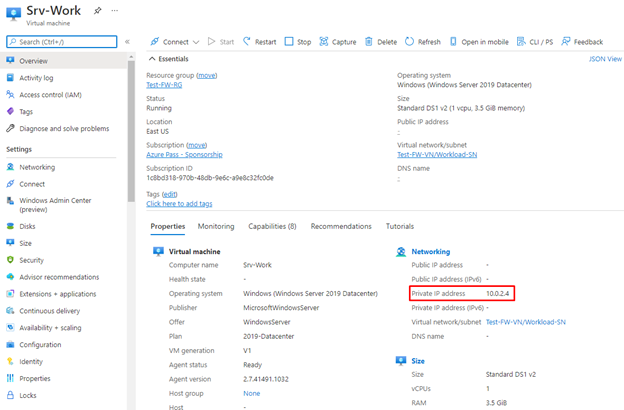
- When deployment of the VM completes, select Go to resource.
- On the Overview page of Srv-Work, on the right of the page under Networking, take a note of the Private IP address for this VM (e.g., 10.0.2.4).
Task 4: Deploy the firewall and firewall policy
In this task, you will deploy the firewall into the virtual network with a firewall policy configured.
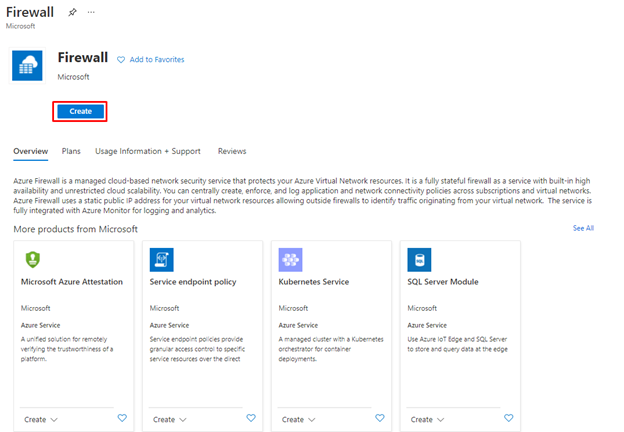
- On the Azure portal home page, select Create a resource, then in the search box, type firewall and select Firewall when it appears.
- On the Firewall page, click Create.
- On the Basics tab, create a firewall using the information in the table below.
| Setting | Value |
| Subscription | Select your subscription |
| Resource group | Test-FW-RG |
| Firewall name | Test-FW01 |
| Region | Your region |
| Firewall tier | Standard |
| Firewall management | Use a Firewall Policy to manage this firewall |
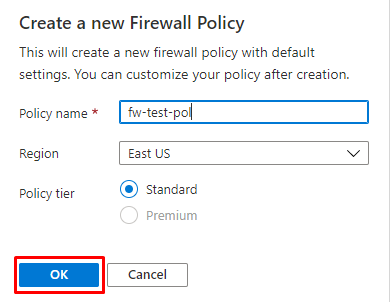
| Firewall policy | Select Add new Name: fw-test-pol Region: your region |
| Choose a virtual network | Use existing |
| Virtual network | Test-FW-VN |
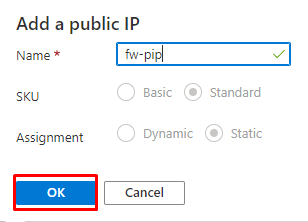
| Public IP address | Select Add new Name: fw-pip |
Review all the settings to ensure they match the screenshot below.
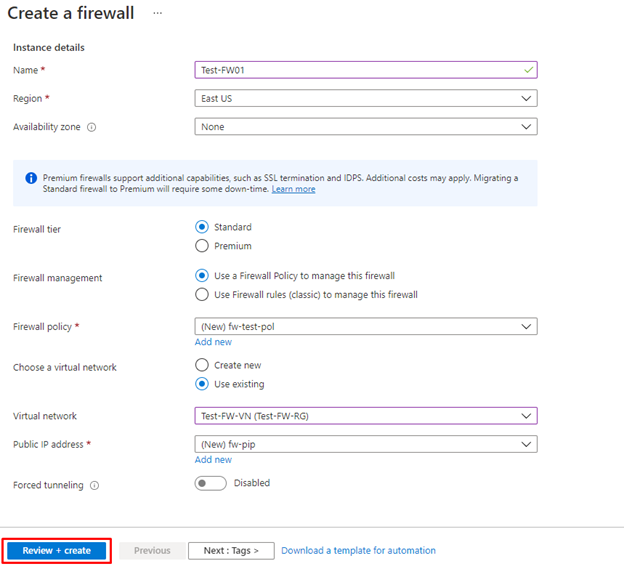
Click Review + create.
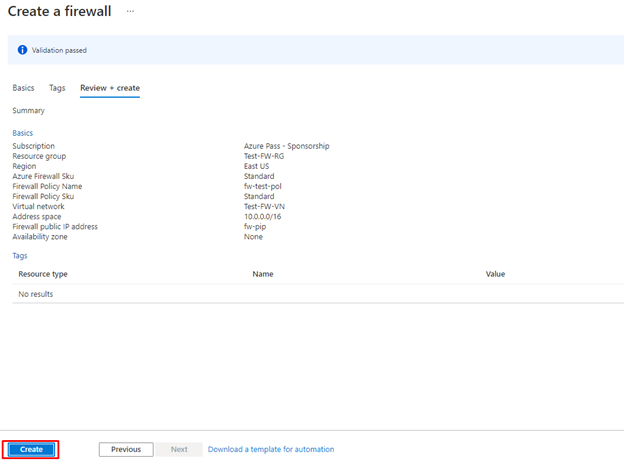
- Click Create and wait for the firewall deployment to complete.
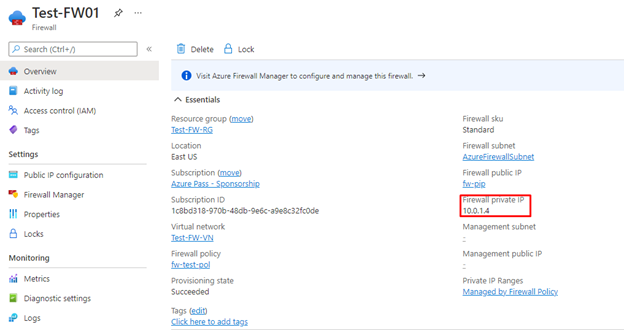
- When deployment of the firewall is completed, click Go to resource.
- On the Overview page of Test-FW01, on the right of the page, take a note of the Firewall private IP for this firewall (e.g., 10.0.1.4).
In the menu on the left, under Settings, click Public IP configuration.
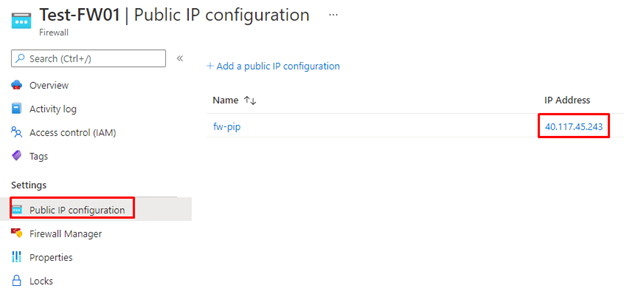
- Take a note of the address under IP Address for the fw-pip public IP configuration (e.g., 40.117.45.243).
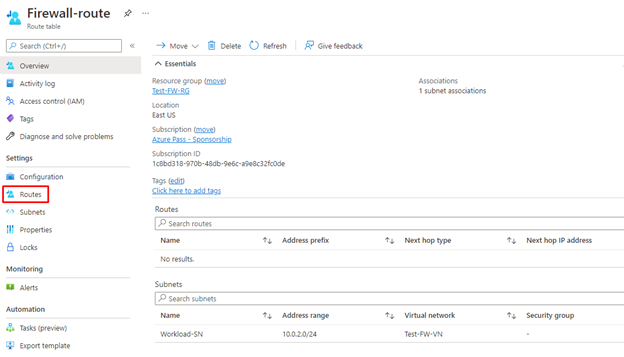
Task 5: Create a default route
In this task, on the Workload-SN subnet, you will configure the outbound default route to go through the firewall.
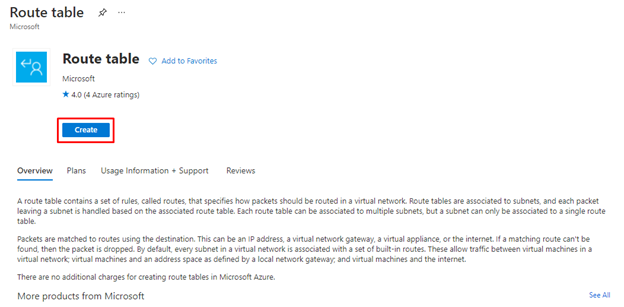
- On the Azure portal home page, select Create a resource, then in the search box, type route and select Route table when it appears.
- On the Route table page, click Create.
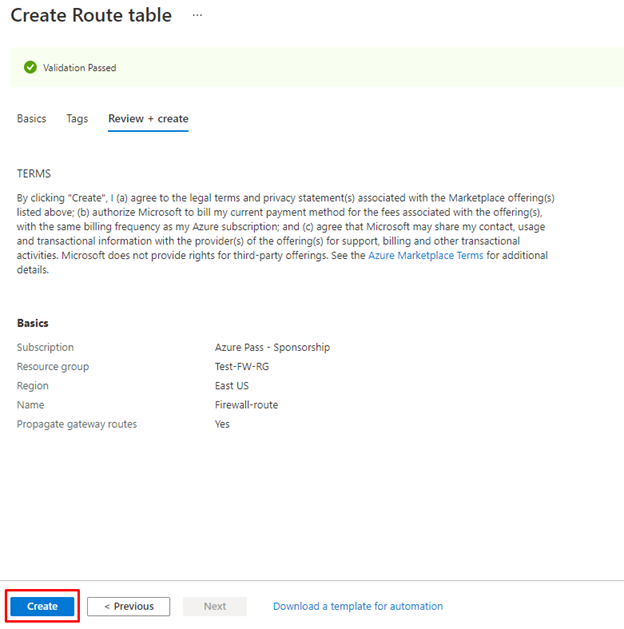
- On the Basics tab, create a new route table using the information in the table below.
| Setting | Value |
| Subscription | Select your subscription |
| Resource group | Test-FW-RG |
| Region | Your region |
| Name | Firewall-route |
| Propagate gateway routes | Yes |
- Click Review + create.

Click Create.
- After deployment completes, select Go to resource.
- On the Firewall-route page, under Settings, click Subnets and then click Associate.


- In Virtual network, select Test-FW-VN.
- In Subnet, select Workload-SN. Make sure that you select only the Workload-SN subnet for this route, otherwise your firewall won’t work correctly.
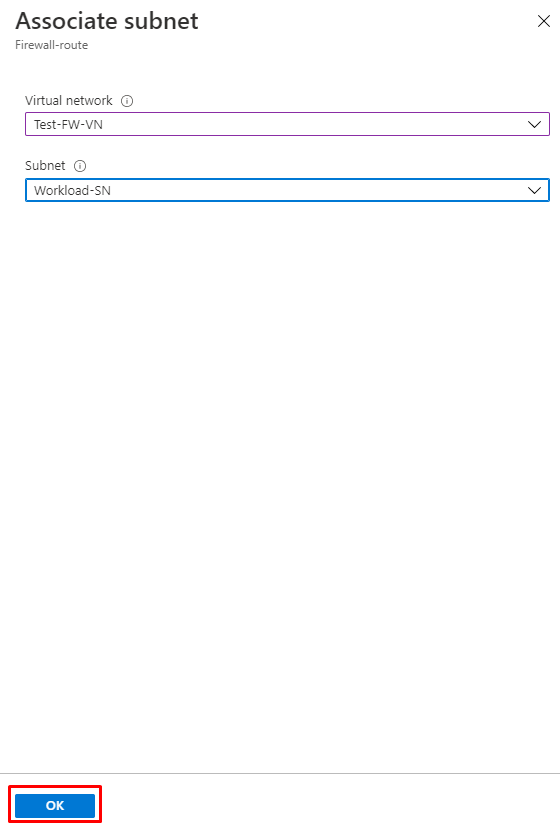
- Click OK.
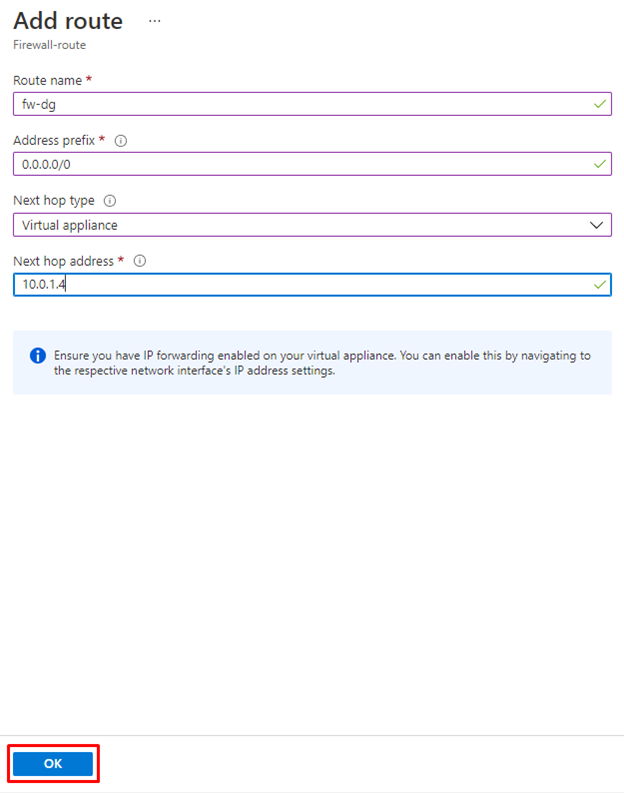
- Under Settings, select Routes and then click Add.

- In Route name, enter fw-dg.
- In Address prefix, enter 0.0.0.0/0.
- In Next hop type, select Virtual appliance.
- In Next hop address, type the private IP address for the firewall that you noted previously (e.g., 10.0.1.4)
- Click OK.
Task 6: Configure an application rule
In this task, you will add an application rule that allows outbound access to www.google.com.
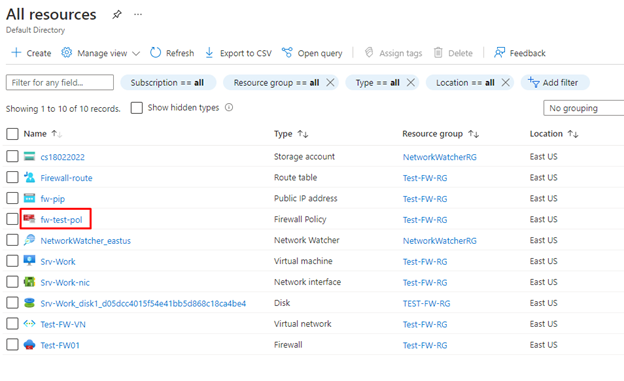
- On the Azure portal home page, select All resources.
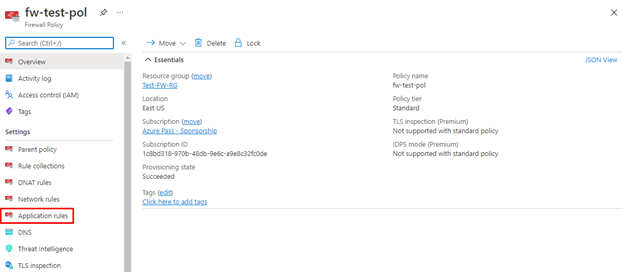
- In the list of resources, click your firewall policy, fw-test-pol.
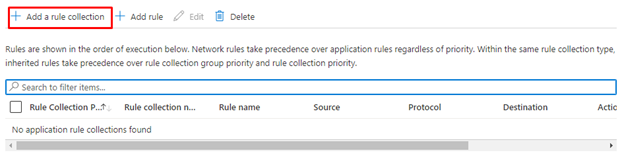
Under Settings, click Application Rules.
Click Add a rule collection.
- On the Add a rule collection page, create a new application rule using the information in the table below.
| Setting | Value |
| Name | App-Coll01 |
| Rule collection type | Application |
| Priority | 200 |
| Rule collection action | Allow |
| Rule collection group | DefaultApplicationRuleCollectionGroup |
| Rules Section | |
| Name | Allow-Google |
| Source type | IP Address |
| Source | 10.0.2.0/24 |
| Protocol | http,https |
| Destination type | FQDN |
| Destination | www.google.com |
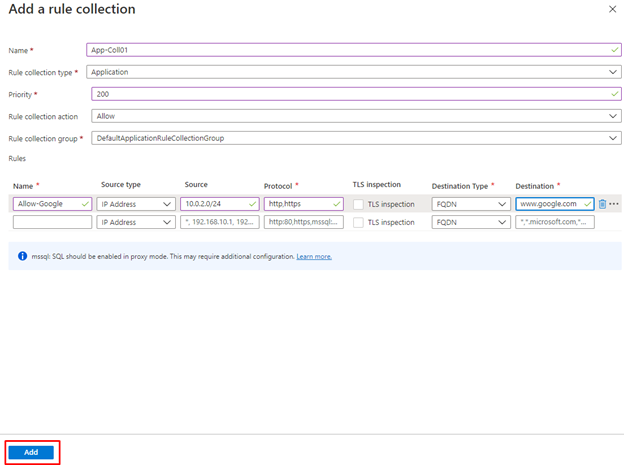
- Click Add.
Task 7: Configure a network rule
In this task, you will add a network rule that allows outbound access to two IP addresses at port 53 (DNS).
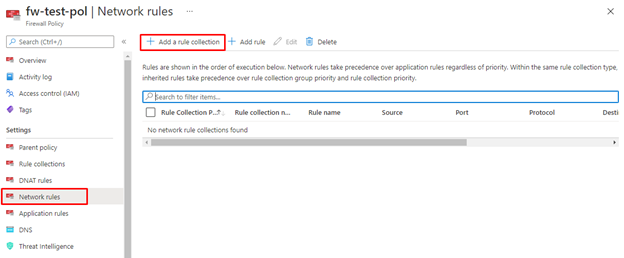
- On the fw-test-pol page, under Settings, click Network Rules.
- Click Add a rule collection.
- On the Add a rule collection page, create a new network rule using the information in the table below.
| Setting | Value |
| Name | Net-Coll01 |
| Rule collection type | Network |
| Priority | 200 |
| Rule collection action | Allow |
| Rule collection group | DefaultNetworkRuleCollectionGroup |
| Rules Section | |
| Name | Allow-DNS |
| Source type | IP Address |
| Source | 10.0.2.0/24 |
| Protocol | UDP |
| Destination Ports | 53 |
| Destination Type | IP Address |
| Destination | 209.244.0.3, 209.244.0.4 These are public DNS servers operated by Century Link |
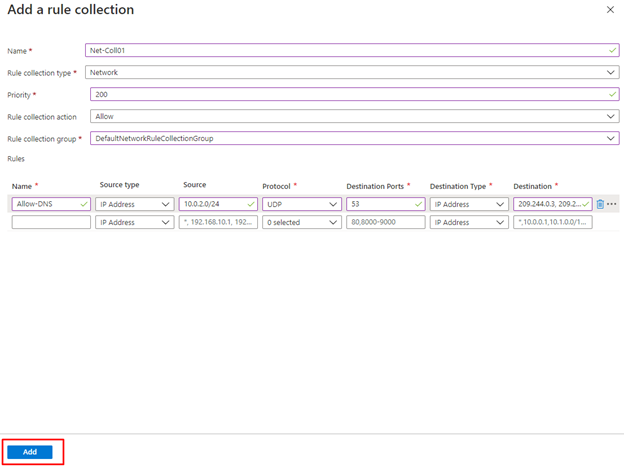
- Click Add.
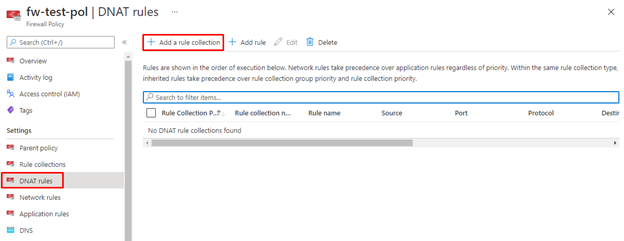
Task 8: Configure a Destination NAT (DNAT) rule
In this task, you will add a DNAT rule that allows you to connect a remote desktop to the Srv-Work virtual machine through the firewall.
- On the fw-test-pol page, under Settings, click DNAT Rules.
- Click Add a rule collection.
- On the Add a rule collection page, create a new DNAT rule using the information in the table below.
| Setting | Value |
| Name | rdp |
| Rule collection type | DNAT |
| Priority | 200 |
| Rule collection group | DefaultDnatRuleCollectionGroup |
| Rules Section | |
| Name | rdp-nat |
| Source type | IP Address |
| Source | * |
| Protocol | TCP |
| Destination Ports | 3389 |
| Destination Type | IP Address |
| Destination | Enter the firewall public IP address from fw-pip that you noted earlier. e.g. – 40.117.45.243 |
| Translated address | Enter the private IP address from Srv-Work that you noted earlier. e.g. – 10.0.2.4 |
| Translated port | 3389 |
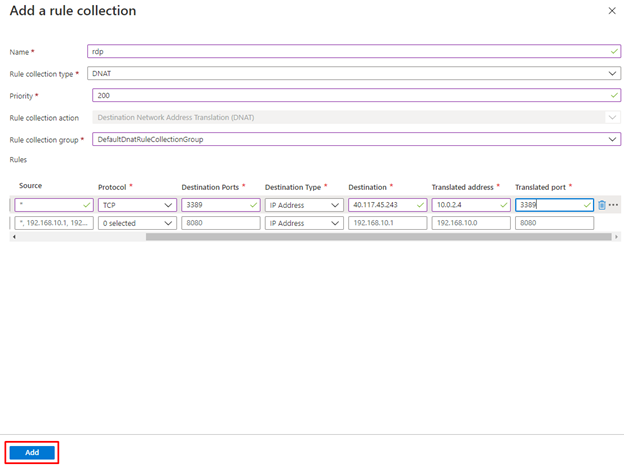
- Click Add.
Task 9: Change the primary and secondary DNS address for the server’s network interface
For testing purposes in this exercise, in this task, you will configure the Srv-Work server’s primary and secondary DNS addresses. However, this is not a general Azure Firewall requirement.
- On the Azure portal home page, select Resource groups.
- In the list of resource groups, click your resource group, Test-FW-RG.
- In the list of resources in this resource group, select the network interface for the Srv-Work virtual machine (e.g., srv-work).
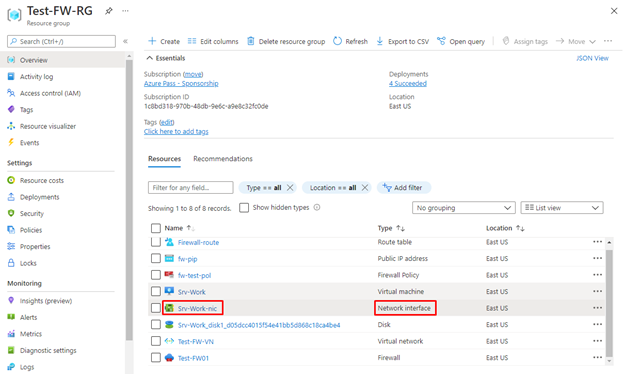
- Under Settings, select DNS servers.
- Under DNS servers, select Custom.
- Type 209.244.0.3 in the Add DNS server text box, and 209.244.0.4 in the next text box.
- Select Save.
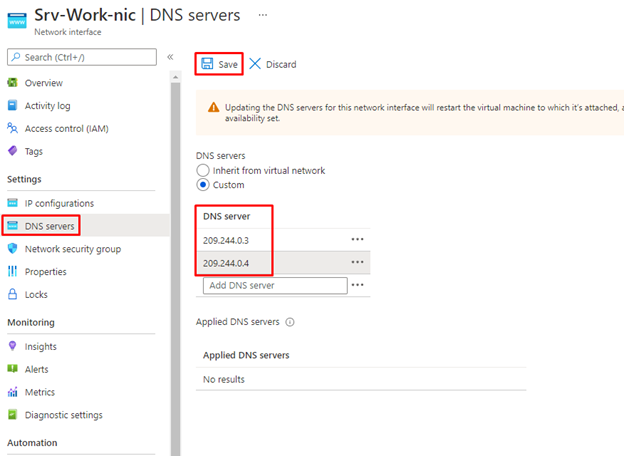
- Restart the Srv-Work virtual machine.
Task 10: Test the firewall
In this final task, you will test the firewall to verify that the rules are configured correctly and working as expected. This configuration will enable you to connect a remote desktop connection to the Srv-Work virtual machine through the firewall, via the firewall’s public IP address.
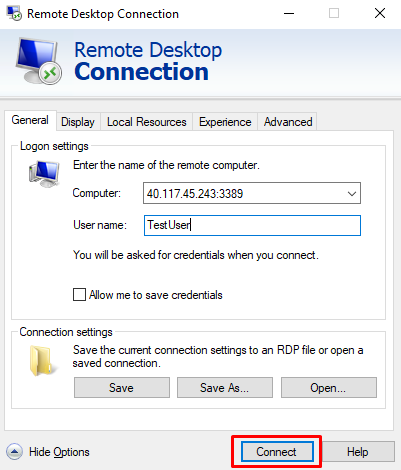
- Open Remote Desktop Connection on your PC.
- In the Computer box, enter the firewall’s public IP address (e.g., 40.117.45.243) followed by :3389 (e.g., 40.117.45.243:3389).
- In the Username box, enter TestUser.
- Click Connect.
In the Enter your credentials dialog box, log into the Srv-Work server virtual machine, by using the password, TestPa$$w0rd!.
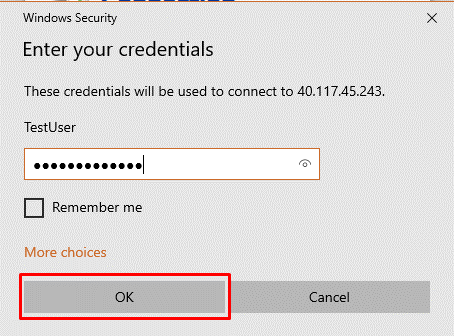
- Click OK.
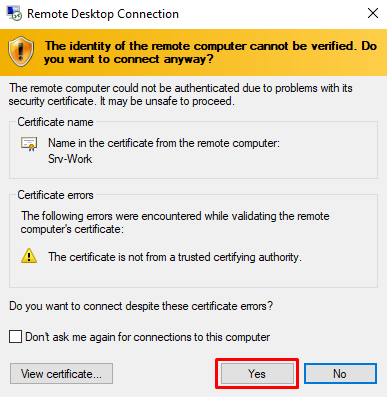
- Click Yes on the certificate message.
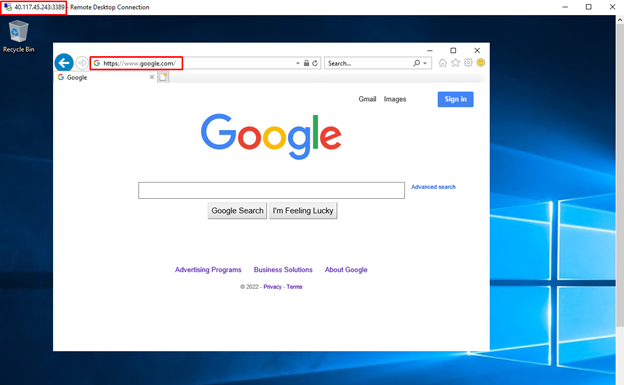
- Open Internet Explorer and browse to https://www.google.com.
- In the Security Alert dialog box, click OK.
- Click Close on the Internet Explorer security alerts that may pop-up.
- You should see the Google home page.
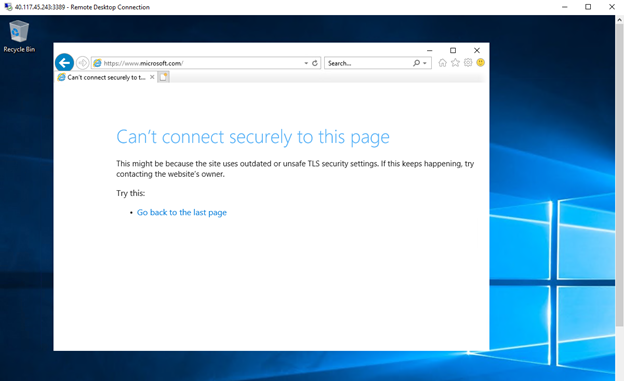
- Browse to https://www.microsoft.com.
- You should be blocked by the firewall.
Congratulations! You have configured and tested an Azure Firewall.
Reminder: Don’t forget to delete or shutdown all unused Azure resources after your labs for cost saving
Leave a Reply