Get started with Azure Private Link by using a Private Endpoint to connect securely to an Azure web app. There are many ways to create Endpoints including Portal, CLI, PowerShell etc.
You’ll create a Private Endpoint for an Azure web app and deploy a virtual machine to test the private connection.
Private Endpoints can be created for different kinds of Azure services, such as Azure SQL and Azure Storage.
Prerequisites
- Prerequisites for this labs : Azure Account / Download Labs Files here
- An Azure Web App with a PremiumV2-tier or higher app service plan deployed in your Azure subscription.
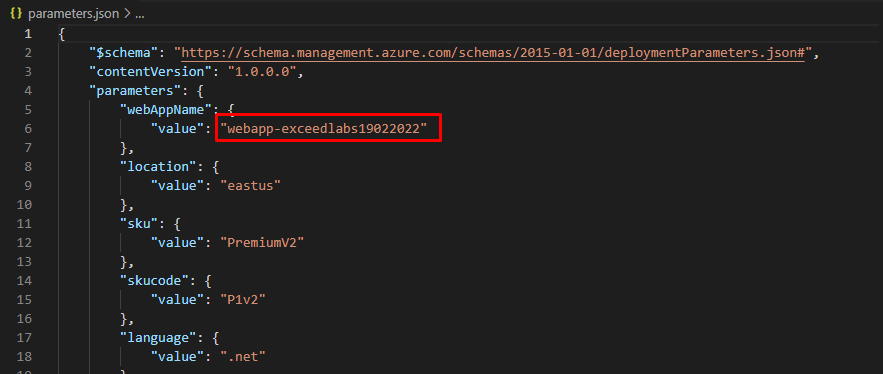
- Find and open parameters.json in Azurelabs08 folder. Open it in Notepad and find the line “value”: “GEN-UNIQUE”. Replace the placeholder GEN-UNIQUE string with a unique value for your webapp name. Save this change.
- In the Azure portal, open the PowerShell session within the Cloud Shell pane.
- In the toolbar of the Cloud Shell pane, click the Upload/Download files icon, in the drop-down menu, click Upload and upload the following files template.json and parameters.json into the Cloud Shell home directory.
If you choose to install and use PowerShell locally, this example requires the Azure PowerShell module version 5.4.1 or later. Run Get-Module -ListAvailable Az to find the installed version. If you need to upgrade, see Install Azure PowerShell module. If you’re running PowerShell locally, you also need to run Connect-AzAccount to create a connection with Azure.

In this exercise, you will:
- Task 1: Create a resource group
- Task 2: Create a virtual network and bastion host
- Task 3: Create a test virtual machine
- Task 4: Create a Private Endpoint
- Task 5: Configure the private DNS zone
- Task 6: Test connectivity to the Private Endpoint
Task 1: Create a resource group and deploy the prerequisite web app
An Azure resource group is a logical container into which Azure resources are deployed and managed.
Create a resource group with New-AzResourceGroup:
code
New-AzResourceGroup -Name 'CreatePrivateEndpointQS-rg' -Location 'eastus'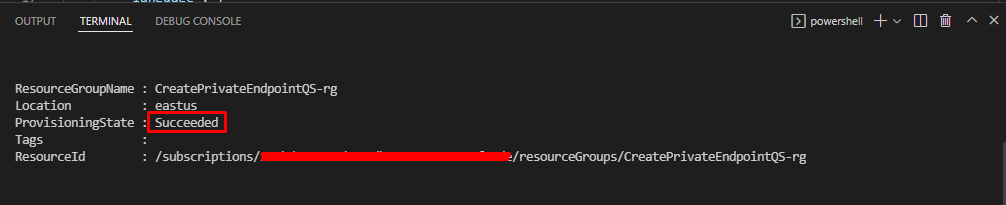
Deploy the following ARM templates to create the PremiumV2-tier Azure Web App needed for this lab:
code
$RGName = “CreatePrivateEndpointQS-rg”

 New-AzResourceGroupDeployment -ResourceGroupName $RGName -TemplateFile template.json -TemplateParameterFile parameters.json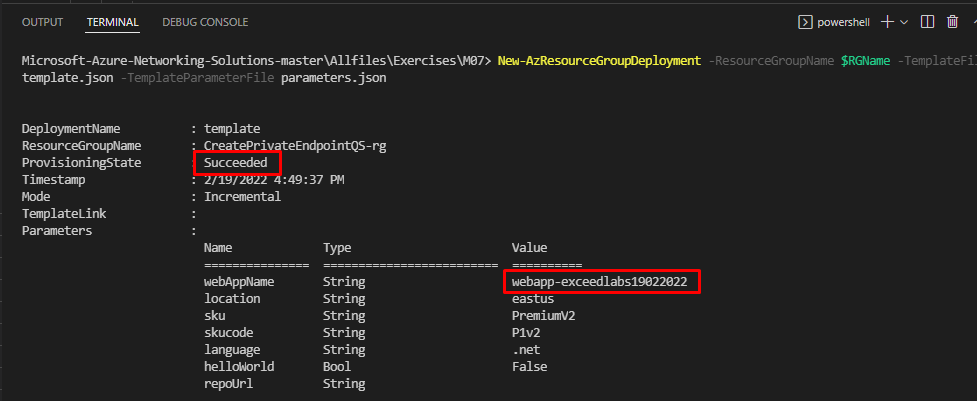
Task 2: Create a virtual network and bastion host
You’ll create a virtual network, subnet, and bastion host.
The bastion host will be used to connect securely to the virtual machine for testing the Private Endpoint.
Create a virtual network and bastion host with:
- New-AzVirtualNetwork
- New-AzPublicIpAddress
- New-AzBastion
code
## Create backend subnet config. ##

$subnetConfig = New-AzVirtualNetworkSubnetConfig -Name myBackendSubnet -AddressPrefix 10.0.0.0/24

## Create Azure Bastion subnet. ##

$bastsubnetConfig = New-AzVirtualNetworkSubnetConfig -Name AzureBastionSubnet -AddressPrefix 10.0.1.0/24

## Create the virtual network. ##

$parameters1 = @{

 Name = 'MyVNet'

 ResourceGroupName = 'CreatePrivateEndpointQS-rg'

 Location = 'eastus'

 AddressPrefix = '10.0.0.0/16'

 Subnet = $subnetConfig, $bastsubnetConfig

}

$vnet = New-AzVirtualNetwork @parameters1

## Create public IP address for bastion host. ##

$parameters2 = @{

 Name = 'myBastionIP'

 ResourceGroupName = 'CreatePrivateEndpointQS-rg'

 Location = 'eastus'

 Sku = 'Standard'

 AllocationMethod = 'Static'

}

$publicip = New-AzPublicIpAddress @parameters2

## Create bastion host ##

$parameters3 = @{

 ResourceGroupName = 'CreatePrivateEndpointQS-rg'

 Name = 'myBastion'

 PublicIpAddress = $publicip

 VirtualNetwork = $vnet

}

New-AzBastion @parameters3
Task 3: Create a test virtual machine
In this section, you’ll create a virtual machine that will be used to test the Private Endpoint.
- Create the virtual machine with:
- Get-Credential (Note: when prompted enter a local admin account credentials for the VM (i.e. Student and Pa55w.rd1234)).
- New-AzNetworkInterface
- New-AzVM
- New-AzVMConfig
- Set-AzVMOperatingSystem
- Set-AzVMSourceImage
- Add-AzVMNetworkInterface
code
## Set credentials for server admin and password. ##

$cred = Get-Credential

## Command to get virtual network configuration. ##

$vnet = Get-AzVirtualNetwork -Name myVNet -ResourceGroupName CreatePrivateEndpointQS-rg

## Command to create network interface for VM ##

$parameters1 = @{

 Name = ‘myNicVM’

 ResourceGroupName = ‘CreatePrivateEndpointQS-rg’

 Location = ‘eastus’

 Subnet = $vnet.Subnets[0]

}

$nicVM = New-AzNetworkInterface @parameters1

## Create a virtual machine configuration.##

$parameters2 = @{

 VMName = ‘myVM’

 VMSize = ‘Standard_DS1_v2’

}

$parameters3 = @{

 ComputerName = ‘myVM’

 Credential = $cred

}

$parameters4 = @{

 PublisherName = ‘MicrosoftWindowsServer’

 Offer = ‘WindowsServer’

 Skus = ‘2019-Datacenter’

 Version = ‘latest’

}

$vmConfig = New-AzVMConfig @parameters2 | Set-AzVMOperatingSystem -Windows @parameters3 | Set-AzVMSourceImage @parameters4 | Add-AzVMNetworkInterface -Id $nicVM.Id

## Create the virtual machine ##

New-AzVM -ResourceGroupName ‘CreatePrivateEndpointQS-rg’ -Location ‘eastus’ -VM $vmConfig
Azure provides an ephemeral IP for Azure Virtual Machines which aren’t assigned a public IP address, or are in the backend pool of an internal Basic Azure Load Balancer. The ephemeral IP mechanism provides an outbound IP address that isn’t configurable.
The ephemeral IP is disabled when a public IP address is assigned to the virtual machine or the virtual machine is placed in the backend pool of a Standard Load Balancer with or without outbound rules. If a Azure Virtual Network NAT gateway resource is assigned to the subnet of the virtual machine, the ephemeral IP is disabled.
For more information on outbound connections in Azure, see Using Source Network Address Translation (SNAT) for outbound connections.
Task 4: Create a Private Endpoint
In this section, you’ll create the Private Endpoint and connection using:
- New-AzPrivateLinkServiceConnection
- New-AzPrivateEndpoint
code
## Place web app into variable. This assumes that only one web app exists in the resource group. ##

$webapp = Get-AzWebApp -ResourceGroupName CreatePrivateEndpointQS-rg

## Create Private Endpoint connection. ##

$parameters1 = @{

 Name = ‘myConnection’

 PrivateLinkServiceId = $webapp.ID

 GroupID = ‘sites’

}

$privateEndpointConnection = New-AzPrivateLinkServiceConnection @parameters1

## Place virtual network into variable. ##

$vnet = Get-AzVirtualNetwork -ResourceGroupName ‘CreatePrivateEndpointQS-rg’ -Name ‘myVNet’

## Disable private endpoint network policy ##

$vnet.Subnets[0].PrivateEndpointNetworkPolicies = “Disabled”

$vnet | Set-AzVirtualNetwork

## Create private endpoint

$parameters2 = @{

 ResourceGroupName = ‘CreatePrivateEndpointQS-rg’

 Name = ‘myPrivateEndpoint’

 Location = ‘eastus’

 Subnet = $vnet.Subnets[0]

 PrivateLinkServiceConnection = $privateEndpointConnection

}

New-AzPrivateEndpoint @parameters2
Task 5: Configure the private DNS zone
In this section you’ll create and configure the private DNS zone using:
- New-AzPrivateDnsZone
- New-AzPrivateDnsVirtualNetworkLink
- New-AzPrivateDnsZoneConfig
- New-AzPrivateDnsZoneGroup
code
## Place virtual network into variable. ##

$vnet = Get-AzVirtualNetwork -ResourceGroupName ‘CreatePrivateEndpointQS-rg’ -Name ‘myVNet’

## Create private dns zone. ##

$parameters1 = @{

 ResourceGroupName = ‘CreatePrivateEndpointQS-rg’

 Name = ‘privatelink.azurewebsites.net’

}

$zone = New-AzPrivateDnsZone @parameters1

## Create dns network link. ##

$parameters2 = @{

 ResourceGroupName = ‘CreatePrivateEndpointQS-rg’

 ZoneName = ‘privatelink.azurewebsites.net’

 Name = ‘myLink’

 VirtualNetworkId = $vnet.Id

}

$link = New-AzPrivateDnsVirtualNetworkLink @parameters2

## Create DNS configuration ##

$parameters3 = @{

 Name = ‘privatelink.azurewebsites.net’

 PrivateDnsZoneId = $zone.ResourceId

}

$config = New-AzPrivateDnsZoneConfig @parameters3

## Create DNS zone group. ##

$parameters4 = @{

 ResourceGroupName = ‘CreatePrivateEndpointQS-rg’

 PrivateEndpointName = ‘myPrivateEndpoint’

 Name = ‘myZoneGroup’

 PrivateDnsZoneConfig = $config

}

New-AzPrivateDnsZoneGroup @parameters4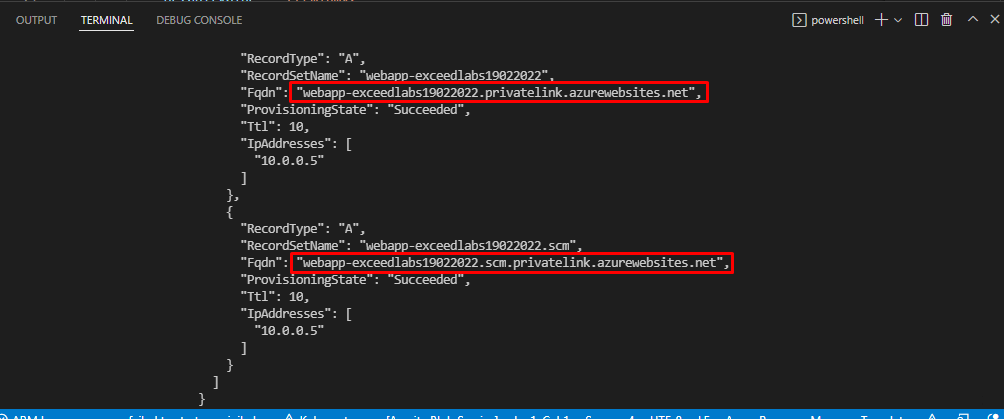
Task 6: Test connectivity to the Private Endpoint
In this section, you’ll use the virtual machine you created in the previous step to connect to the SQL server across the Private Endpoint.
- Sign in to the Azure portal
- Select Resource groups in the left-hand navigation pane.
- Select CreatePrivateEndpointQS-rg.
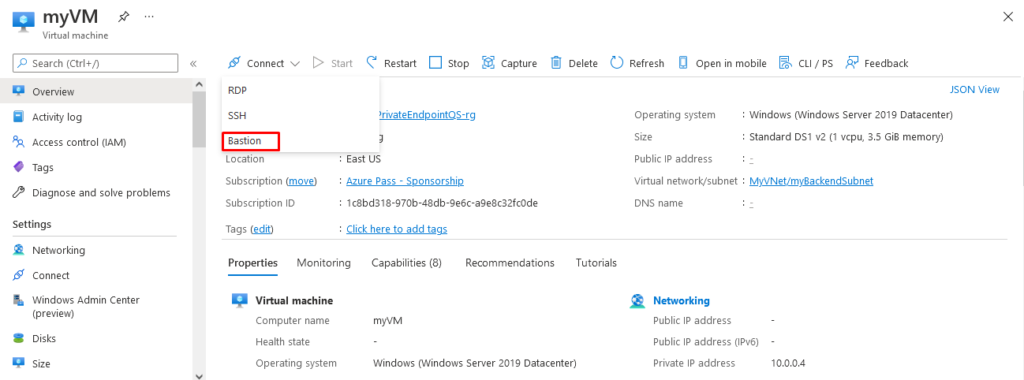
- Select myVM.
- On the overview page for myVM, select Connect then Bastion.
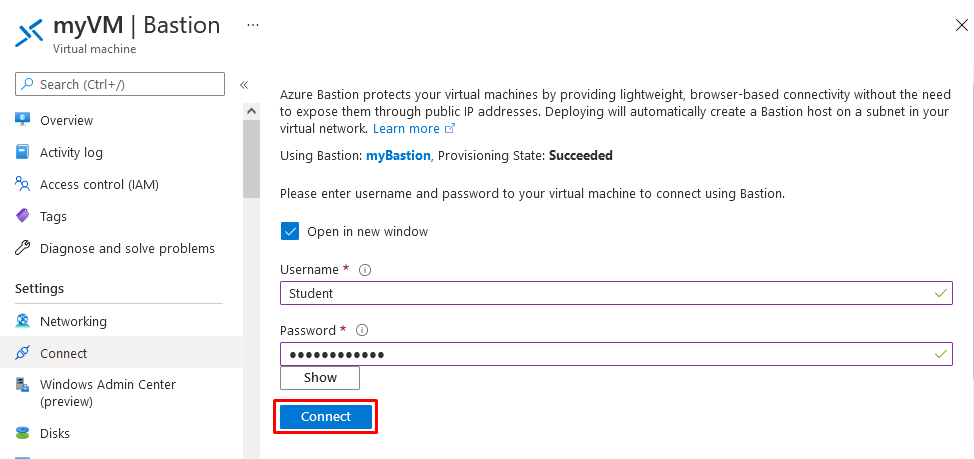
- Select the blue Use Bastion button.
- Enter the username and password that you entered during the virtual machine creation.
- Open Windows PowerShell on the server after you connect.
- Enter
nslookup webapp-exceedlabs19022022.azurewebsites.net. Replace <your-webapp-name> with the name of the web app you created in the previous steps. You’ll receive a message similar to what is displayed below:
code
PS C:\Users\Student> nslookup webapp-exceedlabs19022022.azurewebsites.net
Server:  UnKnown
Address:  168.63.129.16

Non-authoritative answer:
Name:    webapp-exceedlabs19022022.privatelink.azurewebsites.net
Address:  10.0.0.5
Aliases:  webapp-exceedlabs19022022.azurewebsites.net
app name. This address is in the subnet of the virtual network you created previously.
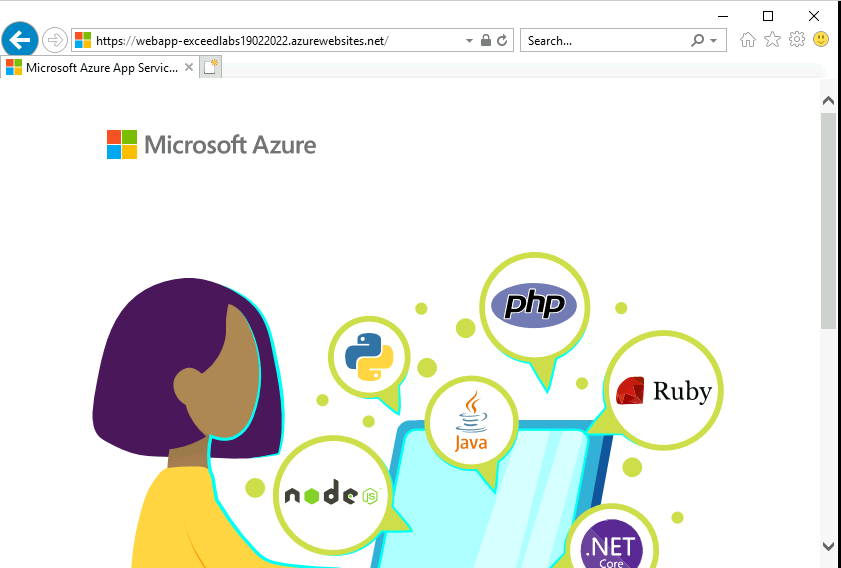
- In the bastion connection to myVM, open Internet Explorer.
- Enter the url of your web app, https:// webapp-exceedlabs19022022.azurewebsites.net
- You’ll receive the default web app page if your application hasn’t been deployed:
Close the connection to myVM.
Congratulations! You have created and tested an Azure private endpoint using PowerShell.
Reminder: Don’t forget to delete or shutdown all unused Azure resources after your labs for cost saving
Leave a Reply