Here are some key questions that can help you in the design of your Azure Virtual Desktop infrastructure:
Will everyone get one or just a selected group of users?
Are these staff all based in the same country or are some on the other side of the world? You need to think about round trip latency for the end users and choose an Azure datacenter region accordingly.
Once you define what your organizations needs are, we highlight the fact that you will need to make sure you have all the necessary components. Here’s what you need to set up AVD:
● Azure AD
● An Azure subscription
● A Domain Controller that is synced with Azure AD
● A virtual network for the session hosts
● Azure VD session hosts
● FSLogix for user profile containers
● A central storage location for the FSLogix user profile disks
Your Azure VDs need to be joined to a domain, which is why you need a domain controller (DC). we outline here three keys component for this AVD infrastructure:
● Azure Active Directory Domain Services (Azure AD DS)
● An Azure Virtual Machine configured as a DC
● An existing on-premises DC with a site to site VPN from on-premises to the Azure Vnet
Prerequisites for this labs : Azure Account / Download Labs Files here
- An Azure subscription you will be using in this lab.
- A Microsoft account or an Azure AD account with the Owner or Contributor role in the Azure subscription you will be using in this lab and with the Global Administrator role in the Azure AD tenant associated with that Azure subscription.
Note: Provisioning of an Azure AD DS takes involves about 90-minute wait time.
Lab scenario
You need to prepare for deployment of an Active Directory Domain Services (AD DS) environment
Objectives
After completing this lab, you will be able to:
- Deploy an Active Directory Domain Services (AD DS) single-domain forest by using Azure VMs
- Integrate an AD DS forest with an Azure Active Directory (Azure AD) tenant
Lab 0: Increase the number of vCPU quotas
The main tasks for this lab are as follows:
- Identify current vCPU usage
- Request vCPU quota increase
Task 1: Identify current vCPU usage
- From your lab computer, start a web browser, navigate to the Azure portal, and sign in by providing credentials of a user account with the Owner role in the subscription you will be using in this lab.
- In the Azure portal, open Cloud Shell pane by selecting the toolbar icon directly to the right of the search textbox.
- If prompted to select either Bash or PowerShell, select PowerShell.
Note: If this is the first time you are starting Cloud Shell and you are presented with the You have no storage mounted message, select the subscription you are using in this lab, and select Create storage.
- In the Azure portal, in the PowerShell session of the Cloud Shell, run the following to register the Microsoft.Compute resource provider, in case it’s not registered:
Register-AzResourceProvider -ProviderNamespace 'Microsoft.Compute'
In the Azure portal, in the PowerShell session of the Cloud Shell, run the following to verify the registration status of the Microsoft.Compute resource provider:
Get-AzResourceProvider -ListAvailable | Where-Object {$_.ProviderNamespace -eq 'Microsoft.Compute'}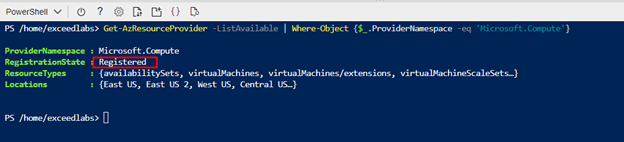
Note: Verify that the status is listed as Registered. If not, wait a few minutes and repeat this step.
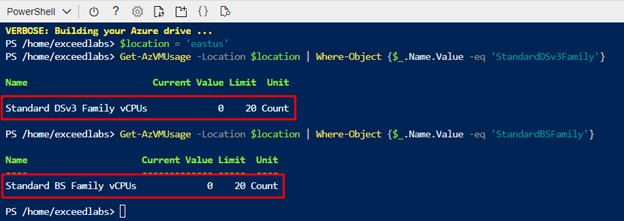
- In the Azure portal, in the PowerShell session of the Cloud Shell, run the following to identify the current usage of vCPUs and the corresponding limits for the StandardDSv3Family and StandardBSFamily Azure VMs (replace the <Azure_region> placeholder with the name of the Azure region that you intend to use for this lab, such as, for example, eastus):
$location = 'eastus'
Get-AzVMUsage -Location $location | Where-Object {$_.Name.Value -eq 'StandardDSv3Family'}
Get-AzVMUsage -Location $location | Where-Object {$_.Name.Value -eq 'StandardBSFamily'}
Note: To identify the names of Azure regions, in the Cloud Shell, at the PowerShell prompt, run (Get-AzLocation).Location.
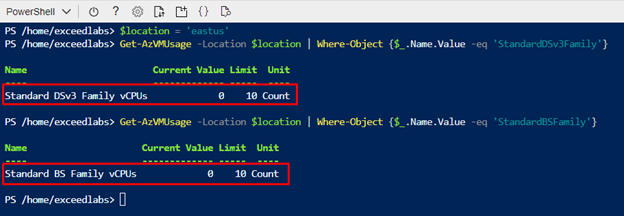
- Review the output of the command executed in the previous step and ensure that you have at least 20 available vCPUs in both the Standard DSv3 Family and StandardBSFamily of Azure VMs in the target Azure region. If that’s already the case, proceed directly to the next lab. Otherwise, proceed to the next task of this lab.
Task 2: Request vCPU quota increase
- In the Azure portal, search for and select Subscriptions and, from the Subscriptions blade, select the entry representing the Azure subscription you intend to use for this lab.
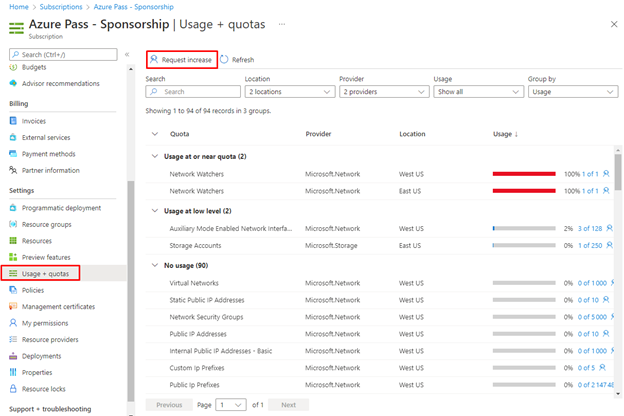
- In the Azure portal, on the subscription blade, in the vertical menu on the left side, in the Settings section, select Usage + quotas.
- On the subscription’s Usage + quotas blade, select Request Increase.
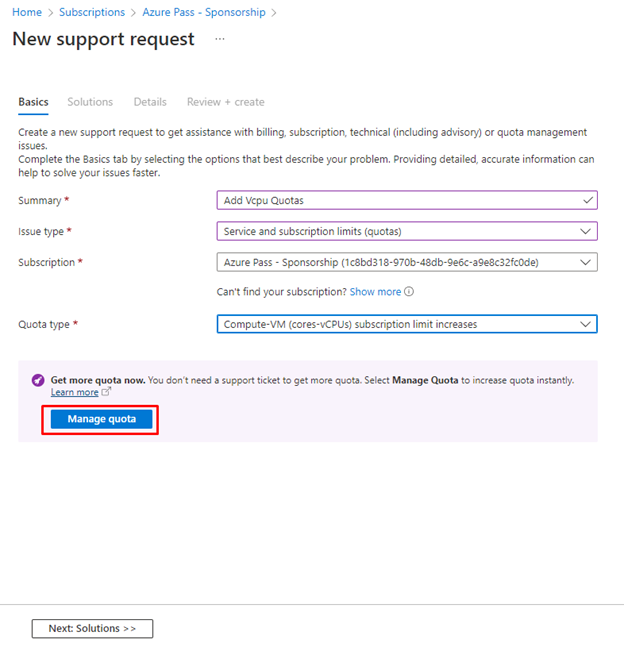
- On the 1. Problem description tab of the New support request blade, specify the following and select Manage quota >:
| Setting | Value |
| Issue type | Service and subscription limits (quotas) |
| Subscription | the name of the Azure subscription you will be using in this lab |
| Quota type | Compute-VM (cores-vCPUs) subscription limit increases |
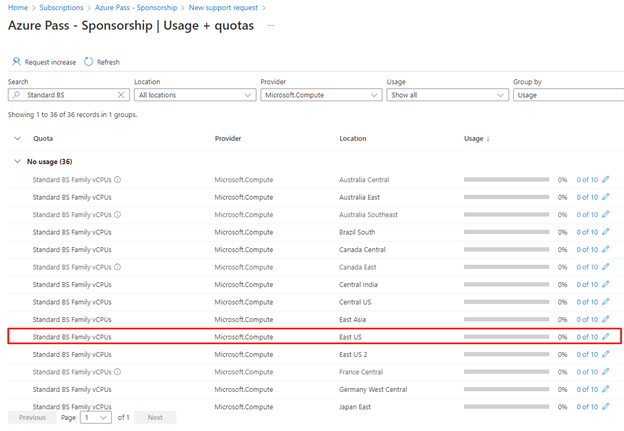
- On the Azure Pass – Sponsorship | Usage + quotas blade, select the following drop down arrows from the top search bar:
| Setting | Value |
| Search | Standard BS |
| All locations | Clear all, and then check your location |
- In the returned Standard BS Family vCPUs item, select the pencil icon, Edit.
In the Quota Details blade, in the New limit column text box, type 20, and then select Save and continue.
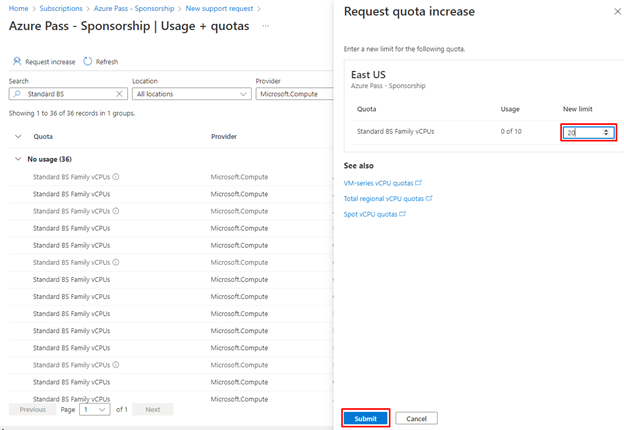
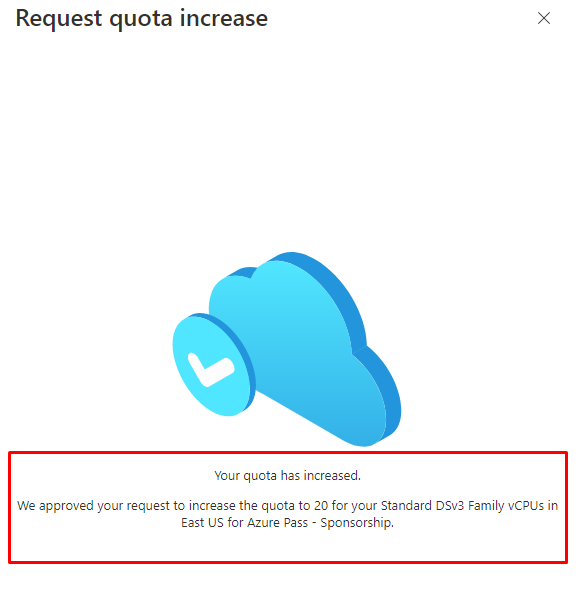
Allow the quota request to complete. After a few moments, the Quota Details blade will specify the request has been approved and Quota increased. Close the Quota Details blade.

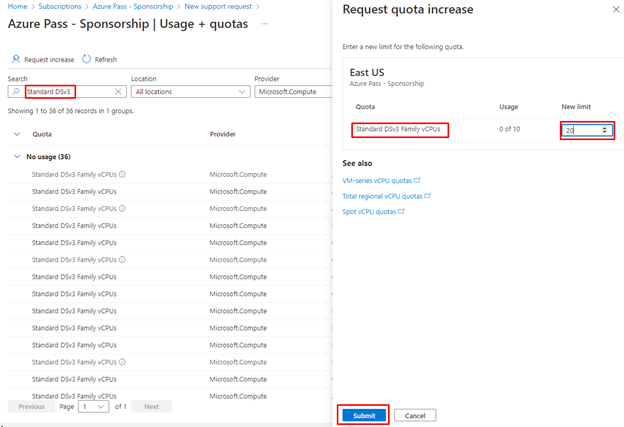
Complete steps 5-8 above, using the Standard DSv3 in the Search text box from step 5.
$location = 'eastus'
Get-AzVMUsage -Location $location | Where-Object {$_.Name.Value -eq 'StandardDSv3Family'}
Get-AzVMUsage -Location $location | Where-Object {$_.Name.Value -eq 'StandardBSFamily'}
Lab 1: Deploy an Active Directory Domain Services (AD DS) domain
The main tasks for this lab are as follows:
- Prepare for an Azure VM deployment
- Deploy an Azure VM running an AD DS domain controller by using an Azure Resource Manager QuickStart template
- Deploy an Azure VM running Windows 10 by using an Azure Resource Manager QuickStart template
- Deploy Azure Bastion
Task 1: Prepare for an Azure VM deployment
- From your lab computer, start a web browser, navigate to the Azure portal, and sign in by providing credentials of a user account with the Owner role in the subscription you will be using in this lab.
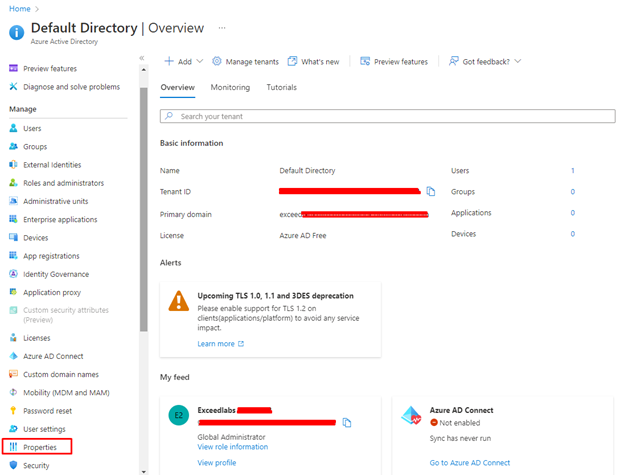
- In the web browser displaying the Azure portal, navigate to the Overview blade of the Azure AD tenant and, in the vertical menu on the left side, in the Manage section, click Properties.
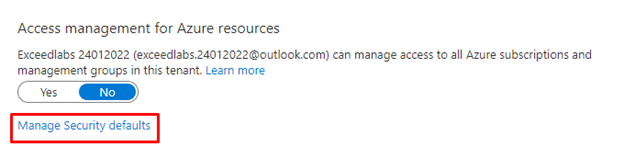
On the Properties blade of your Azure AD tenant, at the very bottom of the blade, select the Manage Security defaults link.
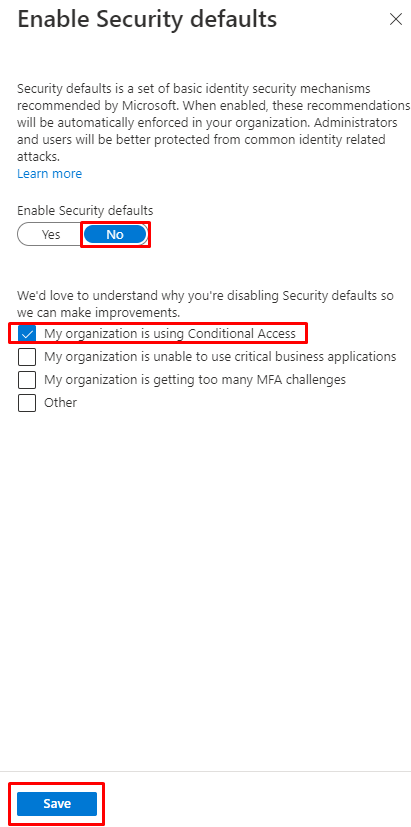
On the Enable Security defaults blade, if needed, select No, select the My organization is using Conditional Access checkbox, and select Save.
- In the Azure portal, open Cloud Shell pane by selecting on the toolbar icon directly to the right of the search textbox.
- If prompted to select either Bash or PowerShell, select PowerShell.
Note: If this is the first time you are starting Cloud Shell and you are presented with the You have no storage mounted message, select the subscription you are using in this lab, and select Create storage.
Task 2: Deploy an Azure VM running an AD DS domain controller by using an Azure Resource Manager QuickStart template
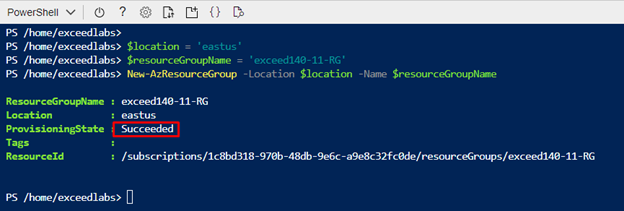
- On the lab computer, in the web browser displaying the Azure portal, from the PowerShell session in the Cloud Shell pane, run the following to create a resource group (replace the <Azure_region> placeholder with the name of the Azure region that you intend to use for this lab, such as, for example, eastus)::
$location = 'eastus'
$resourceGroupName = 'exceed140-11-RG'
New-AzResourceGroup -Location $location -Name $resourceGroupName
- In the Azure portal, close the Cloud Shell pane.
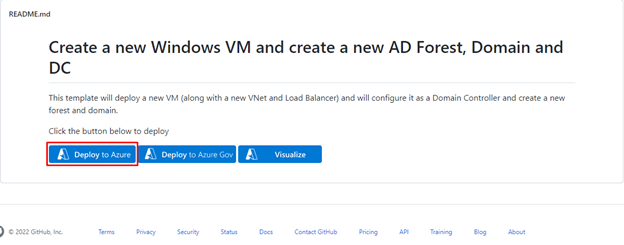
- From your lab computer, in the same web browser window, open another web browser tab and navigate a customized version of QuickStart template named Create a new Windows VM and create a new AD Forest, Domain and DC.
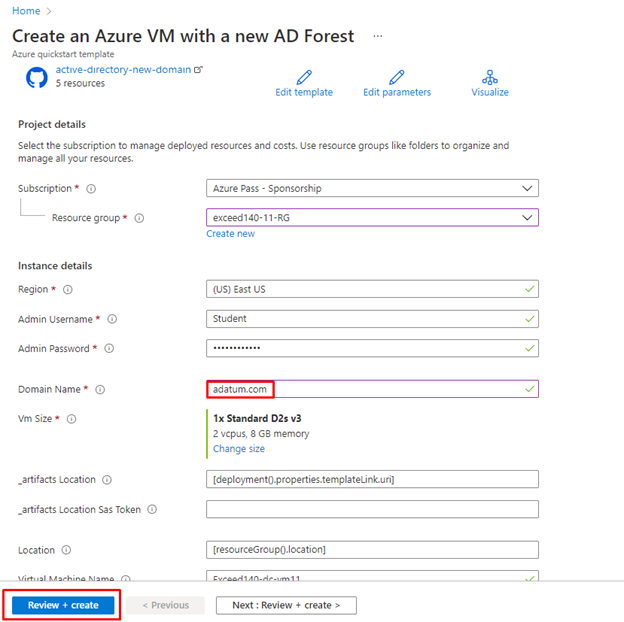
- On the Create a new Windows VM and create a new AD Forest, Domain and DC page, select Deploy to Azure. This will automatically redirect the browser to the Create an Azure VM with a new AD Forest blade in the Azure portal.
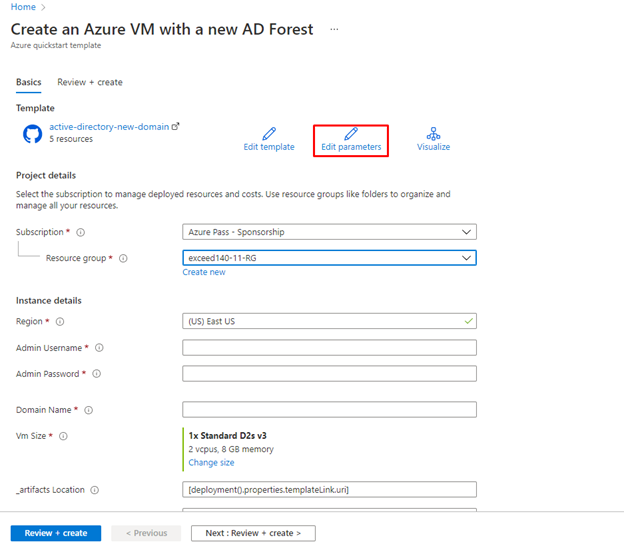
On the Create an Azure VM with a new AD Forest blade, select Edit parameters.
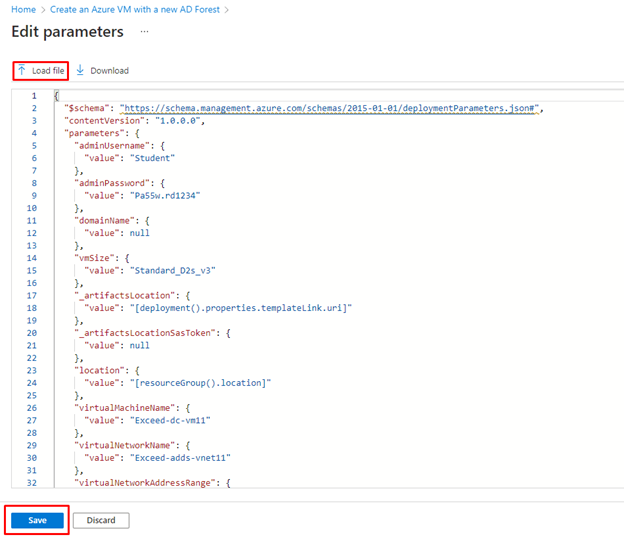
On the Edit parameters blade, select Load file, in the Open dialog box, select exceed140-11_azuredeploydc11.parameters.json, select Open, and then select Save.
- On the Create an Azure VM with a new AD Forest blade, specify the following settings (leave others with their existing values):
| Setting | Value |
| Subscription | the name of the Azure subscription you are using in this lab |
| Resource group | exceed140-11-RG |
| Domain name | adatum.com |
- On the Create an Azure VM with a new AD Forest blade, select Review + create and select Create.
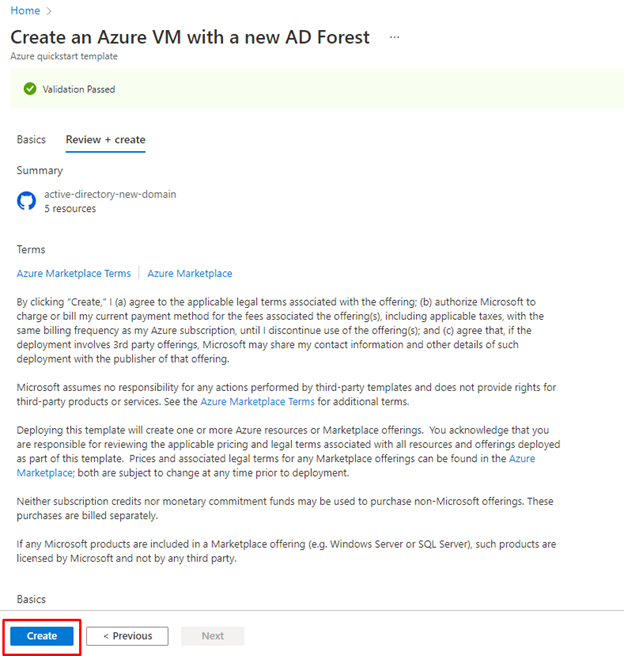
Note: Wait for the deployment to complete before you proceed to the next lab. This might take about 15 minutes.
Task 3: Deploy an Azure VM running Windows 10 by using an Azure Resource Manager QuickStart template
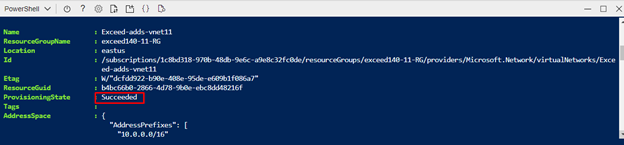
- On the lab computer, in the web browser displaying the Azure portal, open a PowerShell session in the Cloud Shell pane, and run the following to add a subnet named cl-Subnet to the virtual network named exceed-adds-vnet11 you created in the previous task:
$resourceGroupName = 'exceed140-11-RG'
$vnet = Get-AzVirtualNetwork -ResourceGroupName $resourceGroupName -Name 'exceed-adds-vnet11'
$subnetConfig = Add-AzVirtualNetworkSubnetConfig `
-Name 'cl-Subnet' `
-AddressPrefix 10.0.255.0/24 `
-VirtualNetwork $vnet
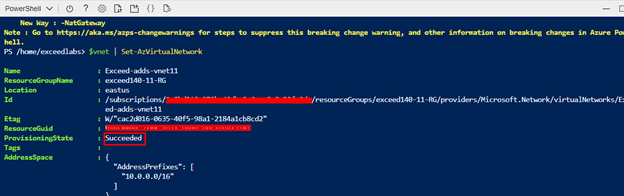
$vnet | Set-AzVirtualNetwork
- In the Azure portal, in the toolbar of the Cloud Shell pane, select the Upload/Download files icon, in the drop-down menu select Upload, and upload the files exceed140-11_azuredeploycl11.json and exceed140-11_azuredeploycl11.parameters.json into the Cloud Shell home directory.
- From the PowerShell session in the Cloud Shell pane, run the following to deploy an Azure VM running Windows 10 that will serve as a client into the newly created subnet:
$location = (Get-AzResourceGroup -ResourceGroupName $resourceGroupName).Location
New-AzResourceGroupDeployment `
  -ResourceGroupName $resourceGroupName `
  -Location $location `
  -Name exceed140lab0101vmDeployment `
  -TemplateFile $HOME/exceed140-11_azuredeploycl11.json `
-TemplateParameterFile $HOME/exceed140-11_azuredeploycl11.parameters.json
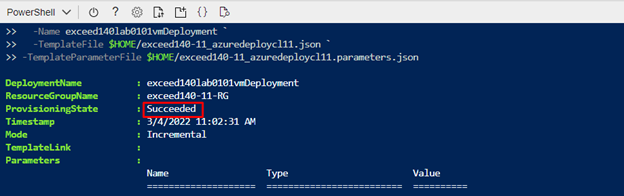
Note: Do not wait for the deployment to complete but instead proceed to the next task. The deployment might take about 10 minutes.
Task 4: Deploy Azure Bastion
Note: Azure Bastion allows for connection to the Azure VMs without public endpoints which you deployed in the previous task of this lab, while providing protection against brute force exploits that target operating system level credentials.
Note: Ensure that your browser has the pop-up functionality enabled.
- In the browser window displaying the Azure portal, open another tab and, in the browser tab, navigate to the Azure portal.
- In the Azure portal, open Cloud Shell pane by selecting on the toolbar icon directly to the right of the search textbox.
- From the PowerShell session in the Cloud Shell pane, run the following to add a subnet named AzureBastionSubnet to the virtual network named exceed-adds-vnet11 you created earlier in this lab:
$resourceGroupName = 'exceed140-11-RG'
$vnet = Get-AzVirtualNetwork -ResourceGroupName $resourceGroupName -Name 'exceed-adds-vnet11'
$subnetConfig = Add-AzVirtualNetworkSubnetConfig `
  -Name 'AzureBastionSubnet' `
  -AddressPrefix 10.0.254.0/24 `
  -VirtualNetwork $vnet
$vnet | Set-AzVirtualNetwork
- Close the Cloud Shell pane.
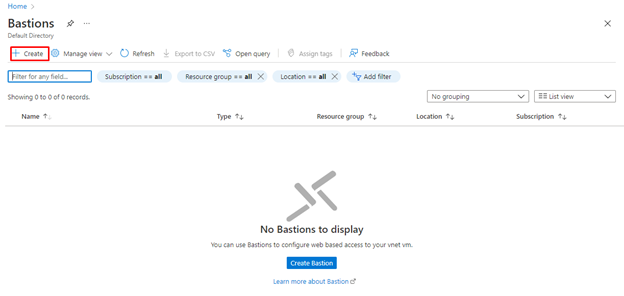
- In the Azure portal, search for and select Bastions and, from the Bastions blade, select + Create.
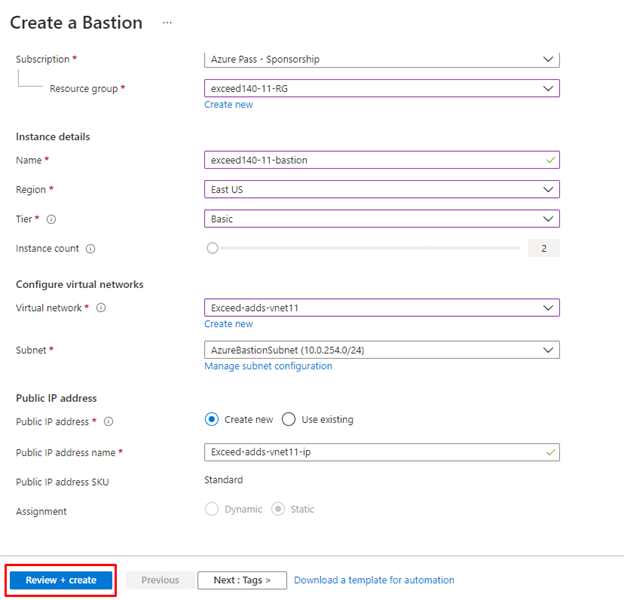
- On the Basic tab of the Create a Bastion blade, specify the following settings and select Review + create:
| Setting | Value |
| Subscription | the name of the Azure subscription you are using in this lab |
| Resource group | exceed140-11-RG |
| Name | exceed140-11-bastion |
| Region | the same Azure region to which you deployed the resources in the previous tasks of this lab |
| Tier | Basic |
| Virtual network | exceed-adds-vnet11 |
| Subnet | AzureBastionSubnet (10.0.254.0/24) |
| Public IP address | Create new |
| Public IP name | exceed-adds-vnet11-ip |
On the Review + create tab of the Create a Bastion blade, select Create:
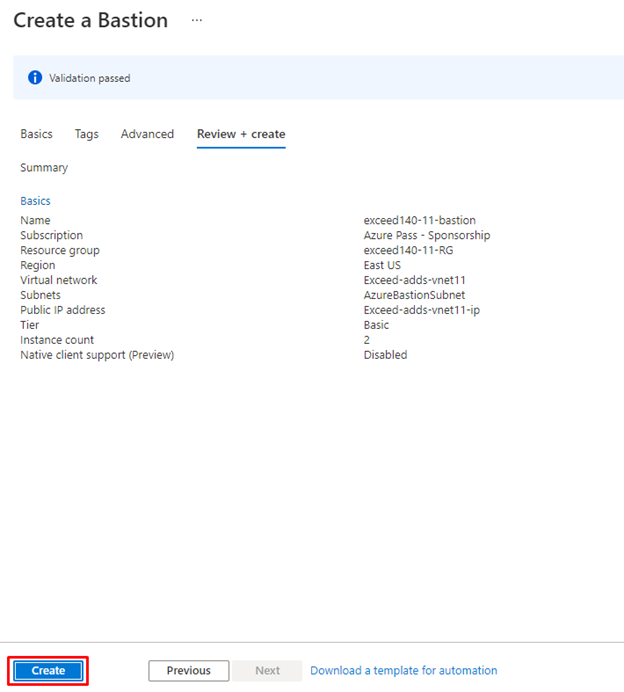
Note: Wait for the deployment to complete before you proceed to the next lab. The deployment might take about 5 minutes.
Lab 2: Integrate an AD DS forest with an Azure AD tenant
The main tasks for this lab are as follows:
- Create AD DS users and groups that will be synchronized to Azure AD
- Configure AD DS UPN suffix
- Create an Azure AD user that will be used to configure synchronization with Azure AD
- Install Azure AD Connect
- Configure hybrid Azure AD join
Task 1: Create AD DS users and groups that will be synchronized to Azure AD
- On the lab computer, in the web browser displaying the Azure portal, search for and select Virtual machines and, from the Virtual machines blade, select exceed-dc-vm11.
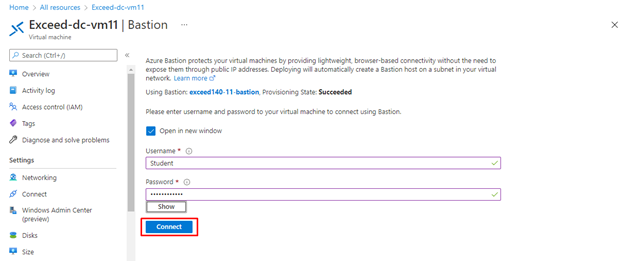
- On the exceed-dc-vm11 blade, select Connect, in the drop-down menu, select Bastion, on the Bastion tab of the exceed-dc-vm11 | Connect blade, select Use Bastion.
- When prompted, provide the following credentials and select Connect:
| Setting | Value |
| User Name | Student |
| Password | Pa55w.rd1234 |
- Within the Remote Desktop session to exceed-dc-vm11, start Windows PowerShell ISE as administrator.
- From the Administrator: Windows PowerShell ISE script pane, run the following to disable Internet Explorer Enhanced Security for Administrators:
$adminRegEntry = 'HKLM:\SOFTWARE\Microsoft\Active Setup\Installed Components\{A509B1A7-37EF-4b3f-8CFC-4F3A74704073}'
Set-ItemProperty -Path $AdminRegEntry -Name 'IsInstalled' -Value 0
Stop-Process -Name Explorer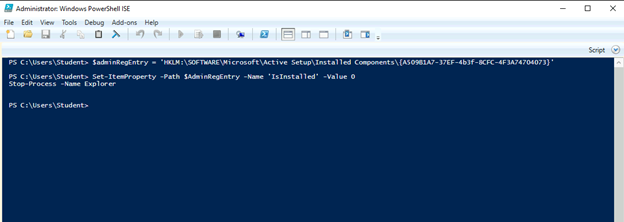
From the Administrator: Windows PowerShell ISE console, run the following to create an AD DS organizational unit that will contain objects included in the scope of synchronization to the Azure AD tenant used in this lab:
New-ADOrganizationalUnit 'ToSync' -path 'DC=adatum,DC=com' -ProtectedFromAccidentalDeletion $falseFrom the Administrator: Windows PowerShell ISE console, run the following to create an AD DS organizational unit that will contain computer objects of Windows 10 domain-joined client computers:
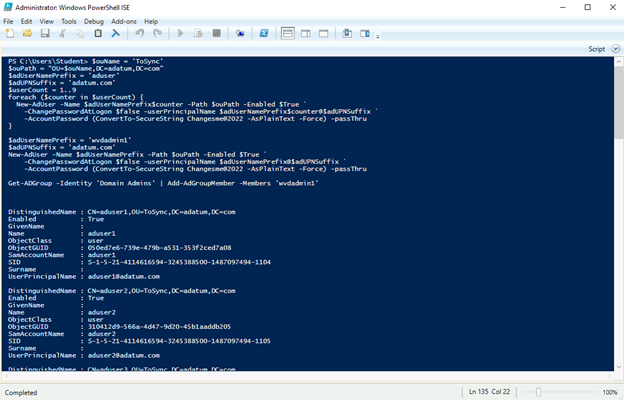
New-ADOrganizationalUnit 'WVDClients' -path 'DC=adatum,DC=com' -ProtectedFromAccidentalDeletion $false- From the Administrator: Windows PowerShell ISE script pane, run the following to create AD DS user accounts that will be synchronized to the Azure AD tenant used in this lab (replace the <password> placeholder with a random, complex password):
Note: Ensure that you remember the password you used. You will need it later in this and subsequent labs.
$ouName = 'ToSync'
$ouPath = "OU=$ouName,DC=adatum,DC=com"
$adUserNamePrefix = 'aduser'
$adUPNSuffix = 'adatum.com'
$userCount = 1..9
foreach ($counter in $userCount) {
  New-AdUser -Name $adUserNamePrefix$counter -Path $ouPath -Enabled $True `
    -ChangePasswordAtLogon $false -userPrincipalName $adUserNamePrefix$counter@$adUPNSuffix `
    -AccountPassword (ConvertTo-SecureString Changesme@2022 -AsPlainText -Force) -passThru
}

$adUserNamePrefix = 'wvdadmin1'
$adUPNSuffix = 'adatum.com'
New-AdUser -Name $adUserNamePrefix -Path $ouPath -Enabled $True `
    -ChangePasswordAtLogon $false -userPrincipalName $adUserNamePrefix@$adUPNSuffix `
    -AccountPassword (ConvertTo-SecureString Changesme@2022 -AsPlainText -Force) -passThru

Get-ADGroup -Identity 'Domain Admins' | Add-AdGroupMember -Members 'wvdadmin1'Note: The script creates nine non-privileged user accounts named aduser1 – aduser9 and one privileged account that is a member of the ADATUM\Domain Admins group named wvdadmin1.
From the Administrator: Windows PowerShell ISE script pane, run the following to create AD DS group objects that will be synchronized to the Azure AD tenant used in this lab:
New-ADGroup -Name 'exceed140-wvd-pooled' -GroupScope 'Global' -GroupCategory Security -Path $ouPath

New-ADGroup -Name 'exceed140-wvd-remote-app' -GroupScope 'Global' -GroupCategory Security -Path $ouPath

New-ADGroup -Name 'exceed140-wvd-personal' -GroupScope 'Global' -GroupCategory Security -Path $ouPath

New-ADGroup -Name 'exceed140-wvd-users' -GroupScope 'Global' -GroupCategory Security -Path $ouPath

New-ADGroup -Name 'exceed140-wvd-admins' -GroupScope 'Global' -GroupCategory Security -Path $ouPath
From the Administrator: Windows PowerShell ISE console, run the following to add members to the groups you created in the previous step:
Get-ADGroup -Identity 'exceed140-wvd-pooled' | Add-AdGroupMember -Members 'aduser1','aduser2','aduser3','aduser4'
Get-ADGroup -Identity 'exceed140-wvd-remote-app' | Add-AdGroupMember -Members 'aduser1','aduser5','aduser6'
Get-ADGroup -Identity 'exceed140-wvd-personal' | Add-AdGroupMember -Members 'aduser7','aduser8','aduser9'
Get-ADGroup -Identity 'exceed140-wvd-users' | Add-AdGroupMember -Members 'aduser1','aduser2','aduser3','aduser4','aduser5','aduser6','aduser7','aduser8','aduser9'
Get-ADGroup -Identity 'exceed140-wvd-admins' | Add-AdGroupMember -Members 'wvdadmin1'
Task 2: Configure AD DS UPN suffix
- Within the Remote Desktop session to exceed-dc-vm11, from the Administrator: Windows PowerShell ISE script pane, run the following to install the latest version of the PowerShellGet module (select Yes when prompted for confirmation):
[Net.ServicePointManager]::SecurityProtocol = [Net.SecurityProtocolType]::Tls12
Install-Module -Name PowerShellGet -Force -SkipPublisherCheck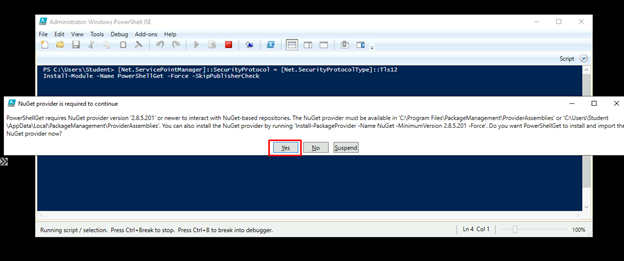
From the Administrator: Windows PowerShell ISE console, run the following to install the latest version of the Az PowerShell module (select Yes to All when prompted for confirmation):
Install-Module -Name Az -AllowClobber -SkipPublisherCheck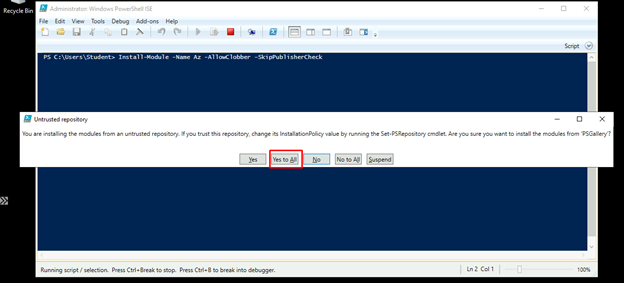
From the Administrator: Windows PowerShell ISE console, run the following to sign in to your Azure subscription:
Connect-AzAccount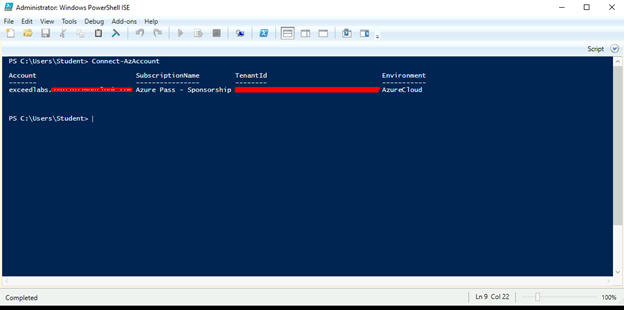
- When prompted, provide the credentials of the user account with the Owner role in the subscription you are using in this lab.
- From the Administrator: Windows PowerShell ISE console, run the following to retrieve the Id property of the Azure AD tenant associated with your Azure subscription:
$tenantId = (Get-AzContext).Tenant.IdFrom the Administrator: Windows PowerShell ISE console, run the following to install and import the latest version of the Azure AD PowerShell module:
Install-Module -Name AzureAD -Force
Import-Module -Name AzureAD
From the Administrator: Windows PowerShell ISE console, run the following to authenticate to your Azure AD tenant:
Connect-AzureAD -TenantId $tenantId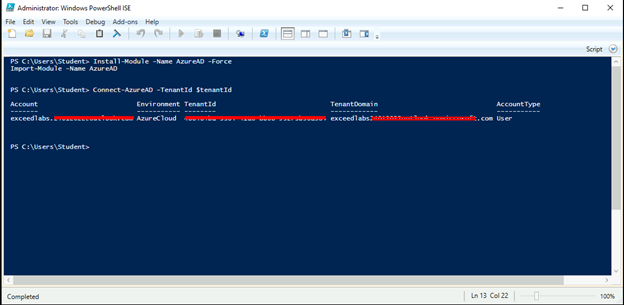
- When prompted, sign in with the same credentials you used earlier in this task.
- From the Administrator: Windows PowerShell ISE console, run the following to retrieve the primary DNS domain name of the Azure AD tenant associated with your Azure subscription:
$aadDomainName = ((Get-AzureAdTenantDetail).VerifiedDomains)[0].NameFrom the Administrator: Windows PowerShell ISE console, run the following to add the primary DNS domain name of the Azure AD tenant associated with your Azure subscription to the list of UPN suffixes of your AD DS forest:
Get-ADForest|Set-ADForest -UPNSuffixes @{add="$aadDomainName"}From the Administrator: Windows PowerShell ISE script pane, run the following to assign the primary DNS domain name of the Azure AD tenant associated with your Azure subscription as the UPN suffix of all users in the AD DS domain:
$domainUsers = Get-ADUser -Filter {UserPrincipalName -like '*adatum.com'} -Properties userPrincipalName -ResultSetSize $null
$domainUsers | foreach {$newUpn = $_.UserPrincipalName.Replace('adatum.com',$aadDomainName); $_ | Set-ADUser -UserPrincipalName $newUpn}
From the Administrator: Windows PowerShell ISE console, run the following to assign the adatum.com UPN suffix to the Student domain user:
$domainAdminUser = Get-ADUser -Filter {sAMAccountName -eq 'Student'} -Properties userPrincipalName
$domainAdminUser | Set-ADUser -UserPrincipalName 'student@adatum.com'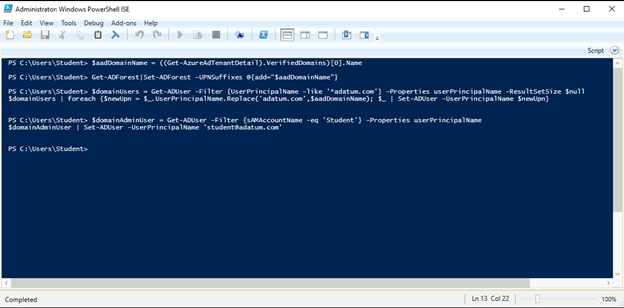
Task 3: Create an Azure AD user that will be used to configure directory synchronization
- Within the Remote Desktop session to exceed-dc-vm11, from the Administrator: Windows PowerShell ISE script pane, run the following to create a new Azure AD user (replace the <password> placeholder with a random, complex password):
Note: Ensure that you remember the password you used. You will need it later in this and subsequent labs.:
$userName = 'aadsyncuser'
$passwordProfile = New-Object -TypeName Microsoft.Open.AzureAD.Model.PasswordProfile
$passwordProfile.Password = 'Changesme@2022'
$passwordProfile.ForceChangePasswordNextLogin = $false
New-AzureADUser -AccountEnabled $true -DisplayName $userName -PasswordProfile $passwordProfile -MailNickName $userName -UserPrincipalName "$userName@$aadDomainName"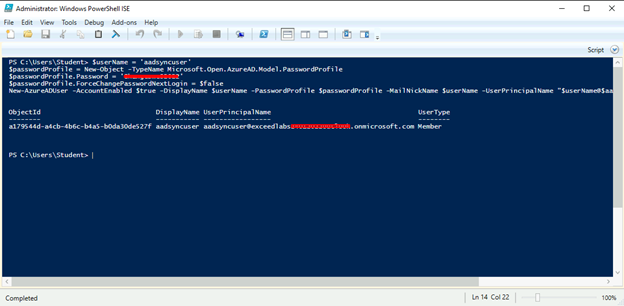
From the Administrator: Windows PowerShell ISE script pane, run the following to assign the Global Administrator role to the newly created Azure AD user:
$aadUser = Get-AzureADUser -ObjectId "$userName@$aadDomainName"
$aadRole = Get-AzureADDirectoryRole | Where-Object {$_.displayName -eq 'Global administrator'}
Add-AzureADDirectoryRoleMember -ObjectId $aadRole.ObjectId -RefObjectId $aadUser.ObjectIdNote: Azure AD PowerShell module refers to the Global Administrator role as Company Administrator.
- From the Administrator: Windows PowerShell ISE script pane, run the following to identify the user principal name of the newly created Azure AD user:
(Get-AzureADUser -Filter "MailNickName eq '$userName'").UserPrincipalName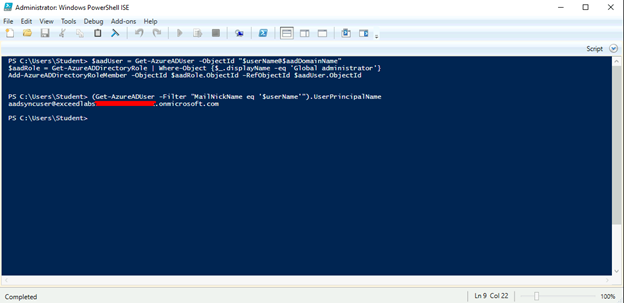
Note: Record the user principal name. You will need it later in this lab.
Task 4: Install Azure AD Connect
- Within the Remote Desktop session to exceed-dc-vm11, from the Administrator: Windows PowerShell ISE script pane, run the following to eanble TLS 1.2:
New-Item 'HKLM:\SOFTWARE\WOW6432Node\Microsoft\.NETFramework\v4.0.30319' -Force | Out-Null

New-ItemProperty -path 'HKLM:\SOFTWARE\WOW6432Node\Microsoft\.NETFramework\v4.0.30319' -name 'SystemDefaultTlsVersions' -value '1' -PropertyType 'DWord' -Force | Out-Null

New-ItemProperty -path 'HKLM:\SOFTWARE\WOW6432Node\Microsoft\.NETFramework\v4.0.30319' -name 'SchUseStrongCrypto' -value '1' -PropertyType 'DWord' -Force | Out-Null

New-Item 'HKLM:\SOFTWARE\Microsoft\.NETFramework\v4.0.30319' -Force | Out-Null

New-ItemProperty -path 'HKLM:\SOFTWARE\Microsoft\.NETFramework\v4.0.30319' -name 'SystemDefaultTlsVersions' -value '1' -PropertyType 'DWord' -Force | Out-Null

New-ItemProperty -path 'HKLM:\SOFTWARE\Microsoft\.NETFramework\v4.0.30319' -name 'SchUseStrongCrypto' -value '1' -PropertyType 'DWord' -Force | Out-Null

New-Item 'HKLM:\SYSTEM\CurrentControlSet\Control\SecurityProviders\SCHANNEL\Protocols\TLS 1.2\Server' -Force | Out-Null

New-ItemProperty -path 'HKLM:\SYSTEM\CurrentControlSet\Control\SecurityProviders\SCHANNEL\Protocols\TLS 1.2\Server' -name 'Enabled' -value '1' -PropertyType 'DWord' -Force | Out-Null

New-ItemProperty -path 'HKLM:\SYSTEM\CurrentControlSet\Control\SecurityProviders\SCHANNEL\Protocols\TLS 1.2\Server' -name 'DisabledByDefault' -value 0 -PropertyType 'DWord' -Force | Out-Null

New-Item 'HKLM:\SYSTEM\CurrentControlSet\Control\SecurityProviders\SCHANNEL\Protocols\TLS 1.2\Client' -Force | Out-Null

New-ItemProperty -path 'HKLM:\SYSTEM\CurrentControlSet\Control\SecurityProviders\SCHANNEL\Protocols\TLS 1.2\Client' -name 'Enabled' -value '1' -PropertyType 'DWord' -Force | Out-Null

New-ItemProperty -path 'HKLM:\SYSTEM\CurrentControlSet\Control\SecurityProviders\SCHANNEL\Protocols\TLS 1.2\Client' -name 'DisabledByDefault' -value 0 -PropertyType 'DWord' -Force | Out-Null
Write-Host 'TLS 1.2 has been enabled.'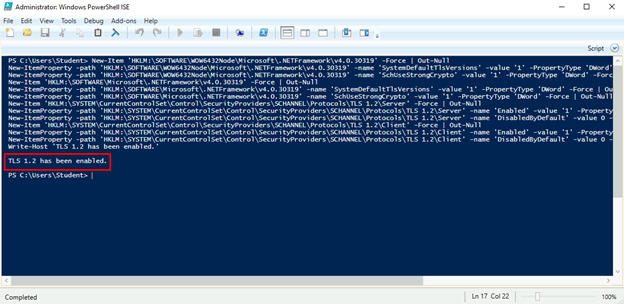
- Within the Remote Desktop session to exceed-dc-vm11, start Internet Explorer and navigate to the Microsoft Edge for Business download page.
- From the Microsoft Edge for Business download page download the latest stable version of Microsoft Edge, install it, launch it, and configure it with the default settings.
- Within the Remote Desktop session to exceed-dc-vm11, use Microsoft Edge to navigate to the Azure portal. If prompted, sign in by using the Azure AD credentials of the user account with the Owner role in the subscription you are using in this lab.
- In the Azure portal, use the Search resources, services, and docs text box at the top of the Azure portal page to search for and navigate to the Azure Active Directory blade and, on your Azure AD tenant blade, in the Manage section of the hub menu, select Azure AD Connect.
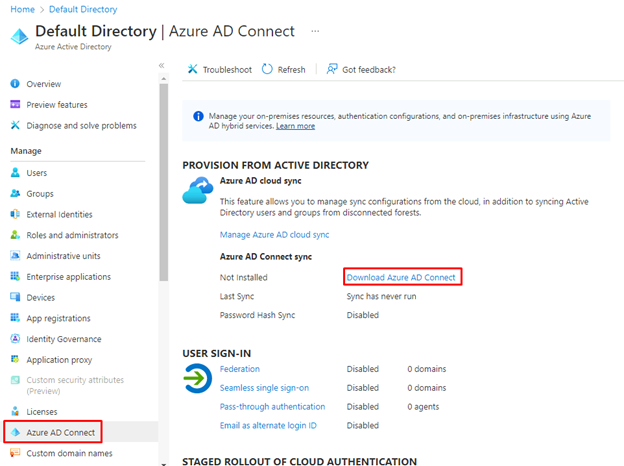
- On the Azure AD Connect blade, select the Download Azure AD Connect link. This will automatically open a new browser tab displaying the Microsoft Azure Active Directory Connect download page.
- On the Microsoft Azure Active Directory Connect download page, select Download.

- When prompted whether to run or save the AzureADConnect.msi installer, select Run to start the Microsoft Azure Active Directory Connect wizard.
- On the Welcome to Azure AD Connect page of the Microsoft Azure Active Directory Connect wizard, select the checkbox I agree to the license terms and privacy notice and select Continue.

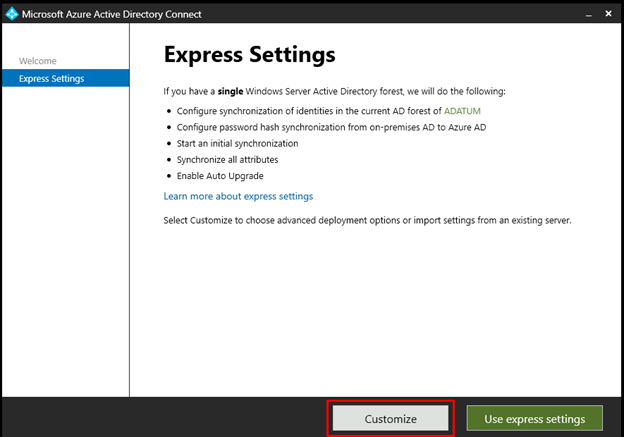
On the Express Settings page of the Microsoft Azure Active Directory Connect wizard, select the Customize option.
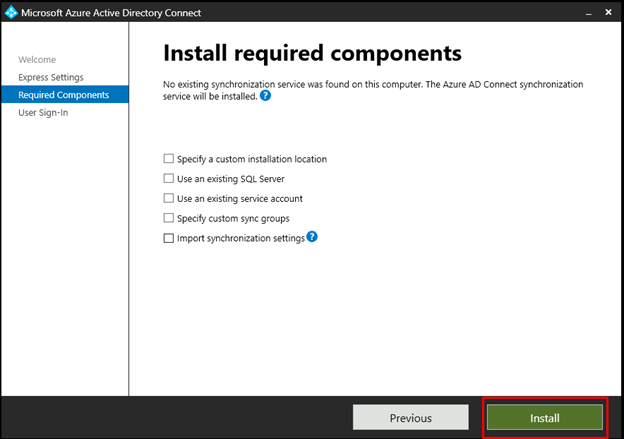
On the Install required components page, leave all optional configuration options deselected and select Install.
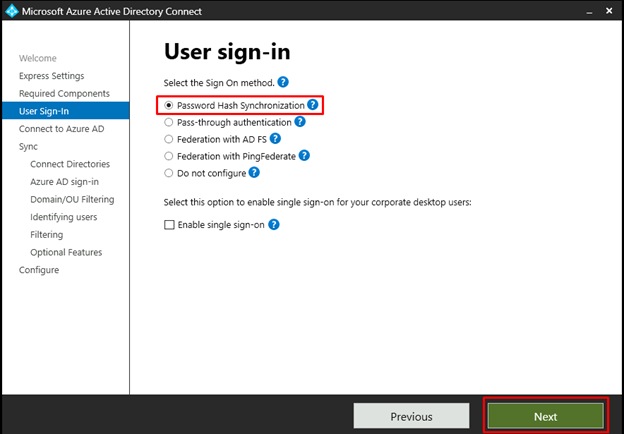
On the User sign-in page, ensure that only the Password Hash Synchronization is enabled and select Next.
On the Connect to Azure AD page, authenticate by using the credentials of the aadsyncuser user account you created in the previous lab and select Next.
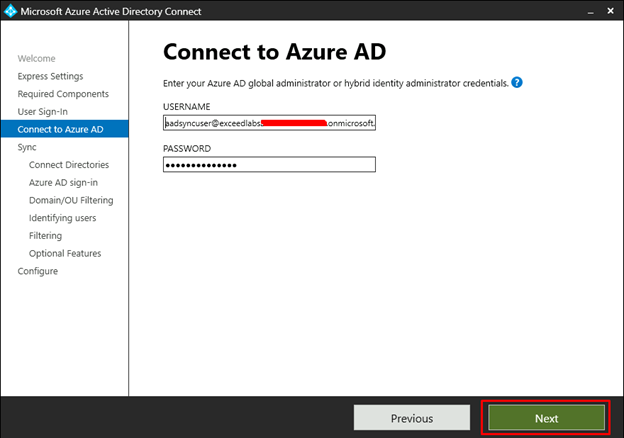
Note: Provide the userPrincipalName attribute of the aadsyncuser account you recorded earlier in this lab and specify the password you set earlier in this lab as its password.
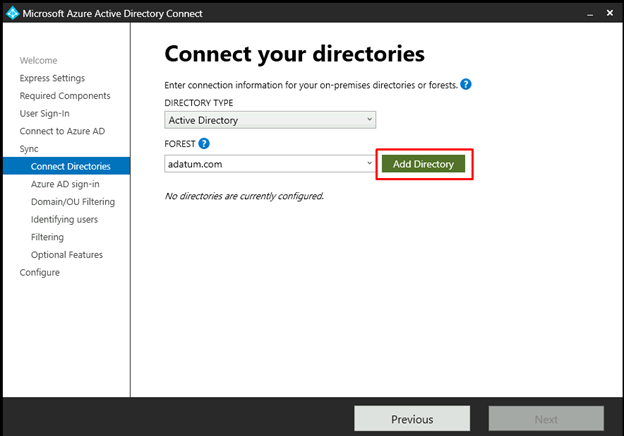
- On the Connect your directories page, select the Add Directory button to the right of the adatum.com forest entry.
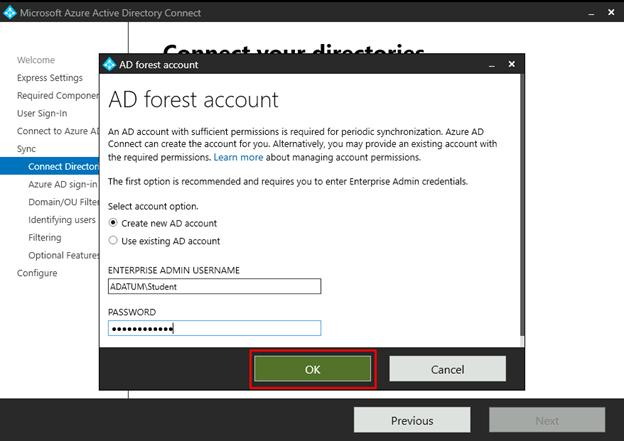
- In the AD forest account window, ensure that the option to Create new AD account is selected, specify the following credentials, and select OK:
| Setting | Value |
| User Name | ADATUM\Student |
| Password | Pa55w.rd1234 |
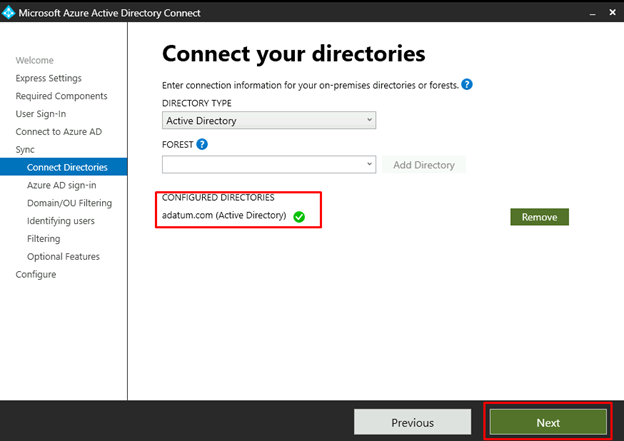
Back on the Connect your directories page, ensure that the adatum.com entry appears as a configured directory and select Next
On the Azure AD sign-in configuration page, note the warning stating Users will not be able to sign-in to Azure AD with on-premises credentials if the UPN suffix does not match a verified domain name, enable the checkbox Continue without matching all UPN suffixes to verified domain, and select Next.
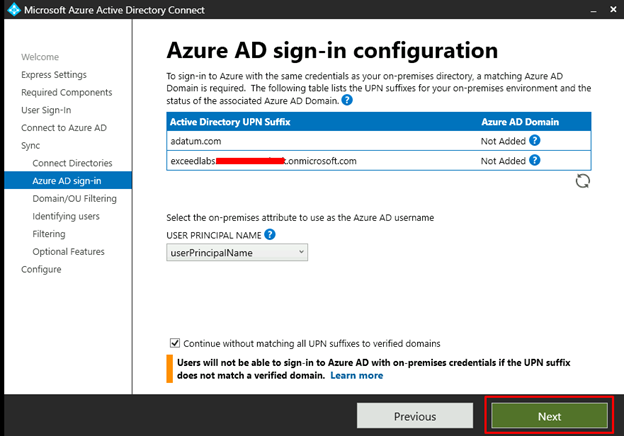
Note: This is expected, since the Azure AD tenant does not have a verified custom DNS domain matching one of the UPN suffixes of the adatum.com AD DS.
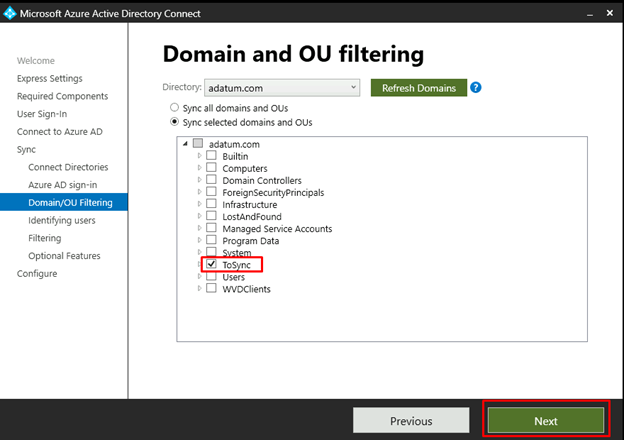
- On the Domain and OU filtering page, select the option Sync selected domains and OUs, expand the adatum.com node, clear all checkboxes, select only the checkbox next to the ToSync OU, and select Next.
On the Uniquely identifying your users page, accept the default settings, and select Next.

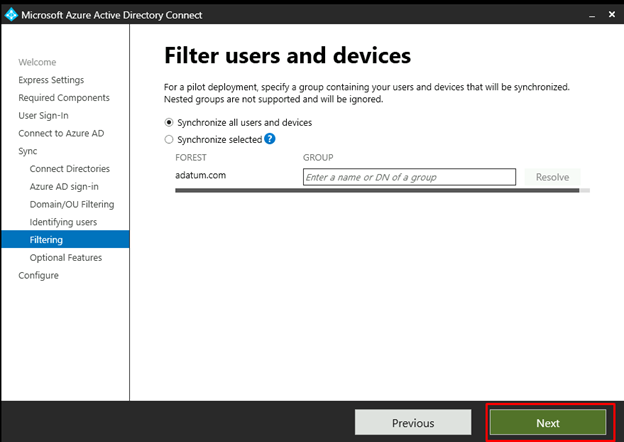
On the Filter users and devices page, accept the default settings, and select Next.
On the Optional features page, accept the default settings, and select Next.

On the Ready to configure page, ensure that the Start the synchronization process when configuration completes checkbox is selected and select Install.

Note: Installation should take about 2 minutes.
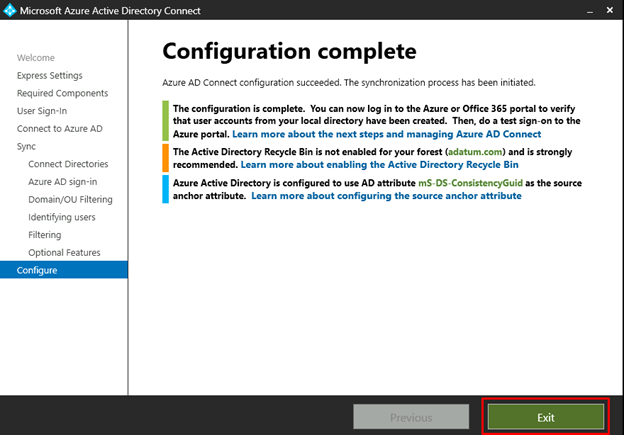
- Review the information on the Configuration complete page and select Exit to close the Microsoft Azure Active Directory Connect window.
- Within the Remote Desktop session to exceed-dc-vm11, in the Microsoft Edge window displaying the Azure portal, navigate to the Users – All users blade of the Adatum Lab Azure AD tenant.
- On the Users | All users blade, note that the list of user objects includes the listing of AD DS user accounts you created earlier in this lab, with the Yes entry appearing in the Directory synced column.
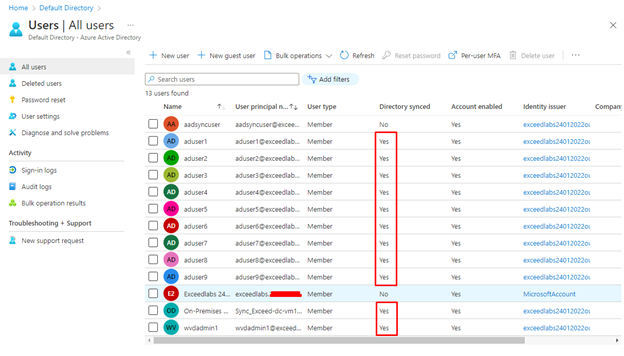
Note: You might have to wait a few minutes and refresh the browser page for the AD DS user accounts to appear.
Congratulations! the deployment of your Active Directory Domain Services (AD DS) environment is now ready for Azure Virtual Desktop.
Reminder: Don’t forget to delete or shutdown all unused Azure resources after your labs for cost saving
Leave a Reply