YAML-based pipelines allow you to fully implement CI/CD as code, in which pipeline definitions reside in the same repository as the code that is part of your Azure DevOps project. YAML-based pipelines support a wide range of features that are part of the classic pipelines, such as pull requests, code reviews, history, branching, and templates.
Regardless of the choice of the pipeline style, to build your code or deploy your solution by using Azure Pipelines, you need an agent. An agent hosts compute resources that runs one job at a time. Jobs can be run directly on the host machine of the agent or in a container. You have an option to run your jobs using Microsoft-hosted agents, which are managed for you, or implementing a self-hosted agent that you set up and manage on your own.
In this lab, you will step through the process of converting a classic pipeline into a YAML-based one and running it first by using a Microsoft-hosted agent and then performing the equivalent task by using a self-hosted agent.
After you complete this lab, you will be able to:
- implement YAML-based pipelines
- implement self-hosted agents
Review the installed applications
Find the taskbar on your Windows 10 desktop. The taskbar contains the icons for the applications that you’ll use in this lab:
- Microsoft Edge
- Visual Studio Code. This will be installed as part of prerequisites for this lab.
Set up an Azure DevOps organization
If you don’t already have an Azure DevOps organization that you can use for this lab, create one by following the instructions available at Create an organization or project collection.
Lab 0: Configure the lab prerequisites
In this Lab, you will set up the prerequisite for the lab, which consists of the preconfigured Parts Unlimited team project based on an Azure DevOps Demo Generator template.
Task 1: Configure the team project
In this task, you will use Azure DevOps Demo Generator to generate a new project based on the PartsUnlimited template.
- On your lab computer, start a web browser and navigate to Azure DevOps Demo Generator. This utility site will automate the process of creating a new Azure DevOps project within your account that is prepopulated with content (work items, repos, etc.) required for the lab.
Note: For more information on the site, see https://docs.microsoft.com/en-us/azure/devops/demo-gen.
- Click Sign in and sign in using the Microsoft account associated with your Azure DevOps subscription.
- If required, on the Azure DevOps Demo Generator page, click Accept to accept the permission requests for accessing your Azure DevOps subscription.
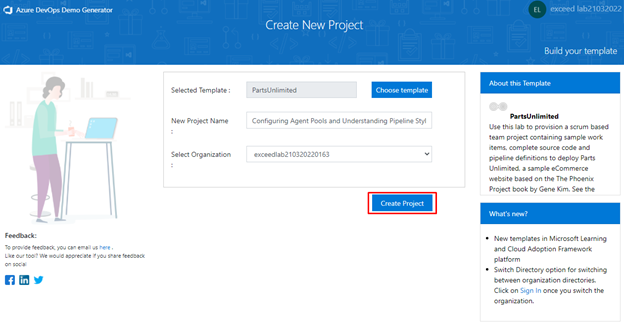
- On the Create New Project page, in the New Project Name textbox, type Configuring Agent Pools and Understanding Pipeline Styles, in the Select organization dropdown list, select your Azure DevOps organization, and then click Choose template.
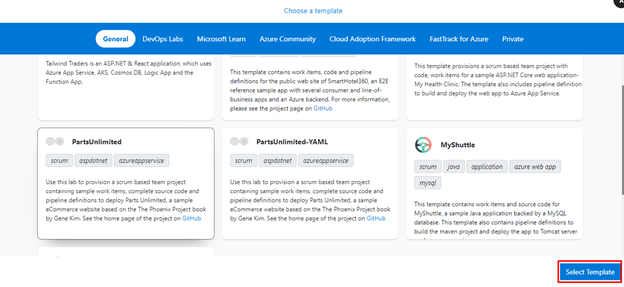
- On the Choose a template page, click the PartsUnlimited template, and then click Select Template.
- Click Create Project
Note: Wait for the process to complete. This should take about 2 minutes. In case the process fails, navigate to your DevOps organization, delete the project, and try again.
- On the Create New Project page, click Navigate to project.

Lab 1: Author YAML-based Azure DevOps pipelines
In this Lab, you will convert a classic Azure DevOps pipeline into a YAML-based one.
Task 1: Create an Azure DevOps YAML pipeline
In this task, you will create a template-based Azure DevOps YAML pipeline.
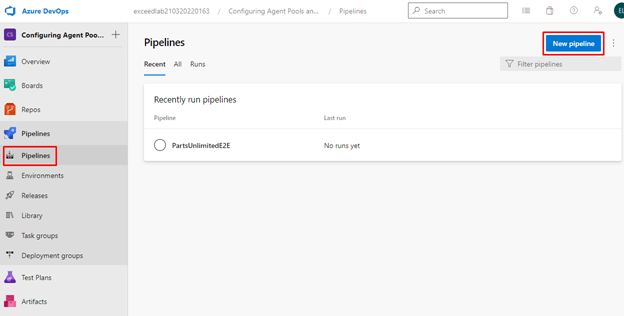
- From the web browser displaying the Azure DevOps portal with the Configuring Agent Pools and Understanding Pipeline Styles project open, in the vertical navigational pane on the left side, click Pipelines.
- On the Recent tab of the Pipelines pane, click New pipeline.
On the Where is your code? pane, click Azure Repos Git.

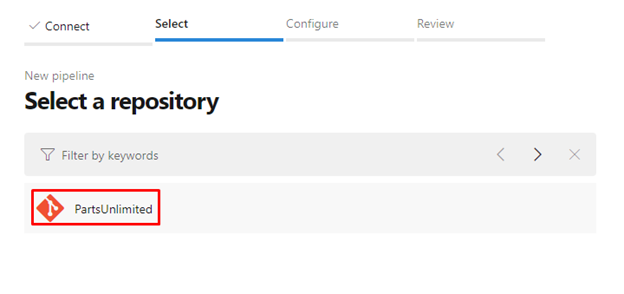
On the Select a repository pane, click PartsUnlimited.
On the Review your pipeline YAML pane, review the sample pipeline, click the down-facing caret symbol next to the Run button, click Save.

Lab 2: Manage Azure DevOps agent pools
In this Lab, you will implement self-hosted Azure DevOps agent.
Task 1: Configure an Azure DevOps self-hosting agent
In this task, you will configure the LOD VM as an Azure DevOps self-hosting agent and use it to run a build pipeline.
- Within the Lab Virtual machine (Lab VM) or your own computer, start a web browser, navigate to the Azure DevOps portal and sign in by using the Microsoft account associated with your Azure DevOps organization.
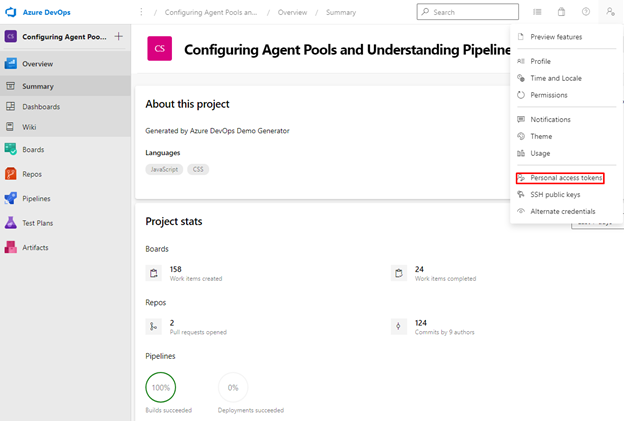
- In the Azure DevOps portal, in the upper right corner of the Azure DevOps page, click the User settings icon, depending on whether or not you have preview features turned on, you should either see a Security or Personal access tokens item in the menu, if you see Security, click on that, then select Personal access tokens. On the Personal Access Tokens pane, and click + New Token.
- On the Create a new personal access token pane, click the Show all scopes link and, specify the following settings and click Create (leave all others with their default values):
| Setting | Value |
| Name | Configuring Agent Pools and Understanding Pipeline Styles lab |
| Scope (custom defined) | Agent Pools (show more scopes option below if needed) |
| Permissions | Read and manage |
- On the Success pane, copy the value of the personal access token to Clipboard.
Note: Make sure you copy the token. You will not be able to retrieve it once you close this pane.
- On the Success pane, click Close.
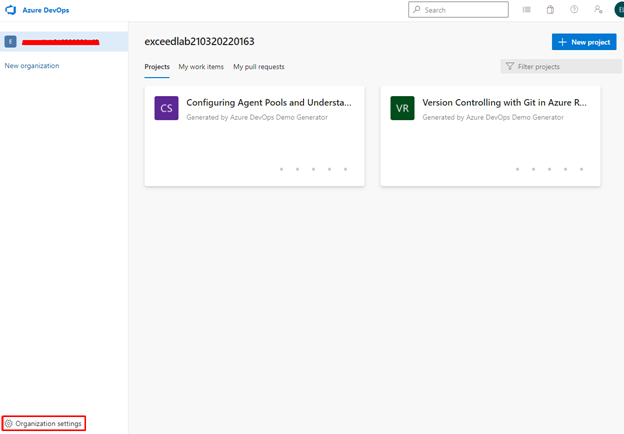
- On the Personal Access Token pane of the Azure DevOps portal, click Azure DevOps symbol in the upper left corner and then click Organization settings label in the lower left corner.
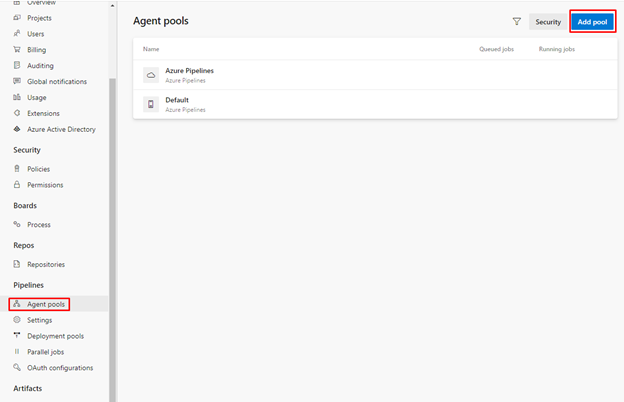
- To the left side of the Overview pane, in the vertical menu, in the Pipelines section, click Agent pools.
- On the Agent pools pane, in the upper right corner, click Add pool.
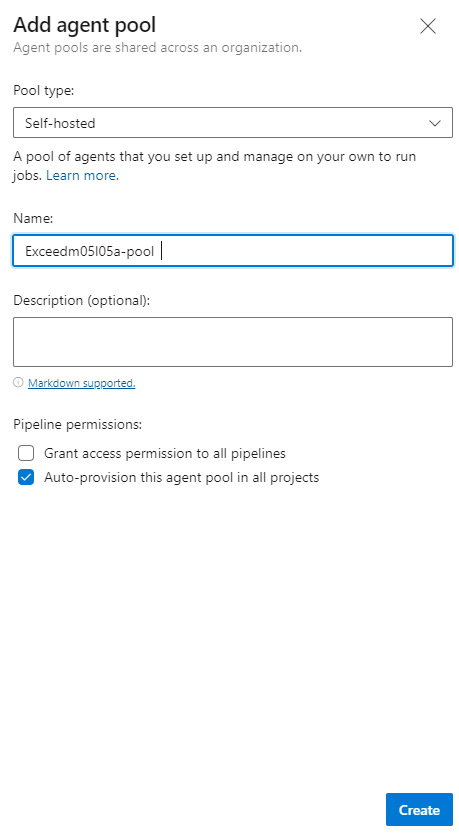
On the Add agent pool pane, in the Pool type dropdown list, select Self-hosted, in the Name text box, type Exceedm05l05a-pool and then click Create.
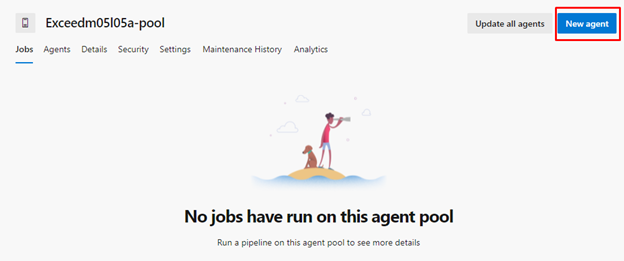
- Back on the Agent pools pane, click the entry representing the newly created Exceedm05l05a-pool .
- On the Jobs tab of the Exceedm05l05a-pool pane, click the New agent button.
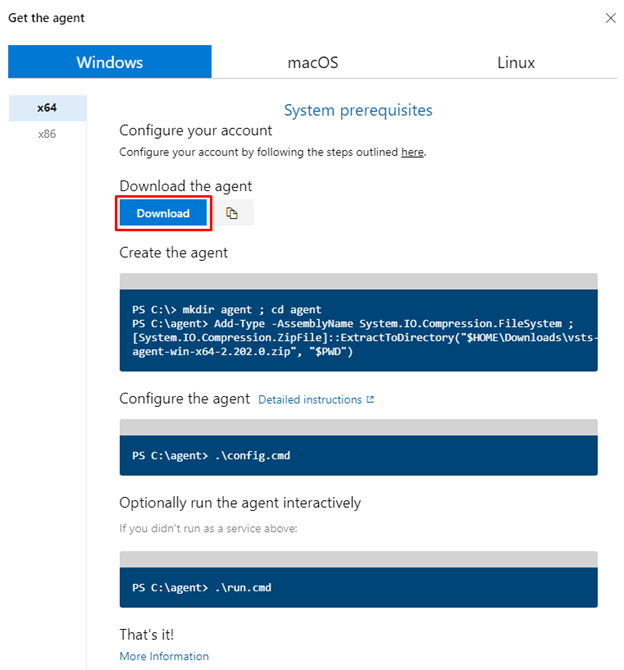
On the Get the agent pane, ensure that the Windows and x64 tabs are selected, and click Download to download the zip archive containing the agent binaries to download it into the local Downloads folder within your user profile.
Note: If you receive an error message at this point indicating that the current system settings prevent you from downloading the file, in the Internet Explorer window, in the upper right corner, click the gearwheel symbol designating the Settings menu header, in the dropdown menu, select Internet Options, in the Internet Options dialog box, click Advanced, on the Advanced tab, click Reset, in the Reset Internet Explorer Settings dialog box, click Reset again, click Close, and try the download again.
- Start Windows PowerShell as administrator and in the Administrator: Windows PowerShell console run the following lines to create the C:\agent directory and extract the content of the downloaded archive into it.
CodeCopy
cd \
mkdir agent ; cd agent
$TARGET = Get-ChildItem "$Home\Downloads\vsts-agent-win-x64-*.zip"
Add-Type -AssemblyName System.IO.Compression.FileSystem
[System.IO.Compression.ZipFile]::ExtractToDirectory($TARGET, "$PWD")

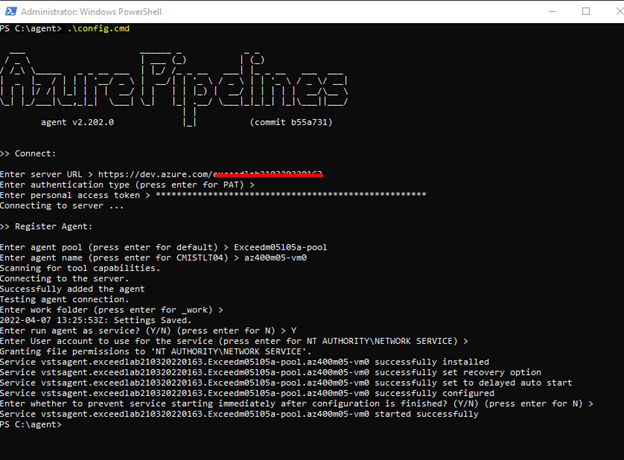
- In the same Administrator: Windows PowerShell console, run the following to configure the agent:
CodeCopy
.\config.cmd- When prompted, specify the values of the following settings:
| Setting | Value |
| Enter server URL | the URL of your Azure DevOps organization, in the format https://dev.azure.com/<organization_name>, where <organization_name> represents the name of your Azure DevOps organization |
| Enter authentication type (press enter for PAT) | Enter |
| Enter personal access token | The access token you recorded earlier in this task |
| Enter agent pool (press enter for default) | Exceedm05l05a-pool |
| Enter agent name | az400m05-vm0 |
| Enter work folder (press enter for _work) | Enter |
| Enter Perform an unzip for tasks for each step. (press enter for N) | Enter |
| Enter run agent as service? (Y/N) (press enter for N) | Y |
| Enter User account to use for the service (press enter for NT AUTHORITY\NETWORK SERVICE) | Enter |
| Enter whether to prevent service starting immediately after configuration is finished? (Y/N) (press enter for N) | Enter |
- Note: You can run self-hosted agent as either a service or an interactive process. You might want to start with the interactive mode, since this simplifies verifying agent functionality. For production use, you should consider either running the agent as a service or as an interactive process with auto-logon enabled, since both persist their running state and ensure that the agent starts automatically if the operating system is restarted.
- Switch to the browser window displaying the Azure DevOps portal and close the Get the agent pane.
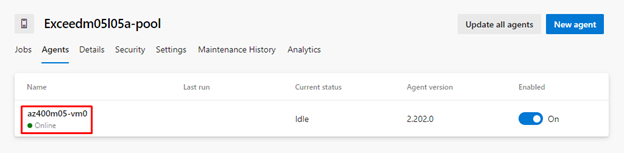
- Back on the Agents tab of the Exceedm05l05a-pool pane, note that the newly configured agent is listed with the Online status.
- In the web browser window displaying the Azure DevOps portal, in the upper left corner, click the Azure DevOps label.
- In the browser window displaying the list of projects, click the tile representing your Configuring Agent Pools and Understanding Pipeline Styles project.
- On the Configuring Agent Pools and Understanding Pipeline Styles pane, in the vertical navigational pane on the left side, in the Pipelines section, click Pipelines.
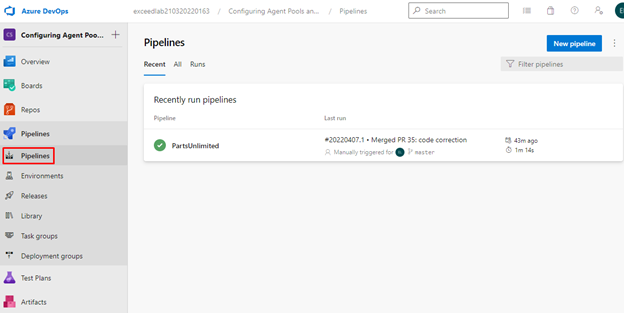
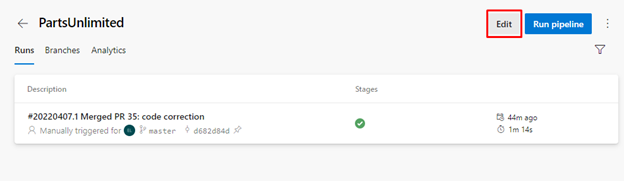
On the Recent tab of the Pipelines pane, select PartsUnlimited and, on the PartsUnlimited pane, select Edit.
- On the PartsUnlimited edit pane, in the existing YAML-based pipeline, replace line vmImage: windows-2019 designating the target agent pool the following content, designating the newly created self-hosted agent pool:
CodeCopy
name: Exceedm05l05a-pool
demands:
- agent.name -equals az400m05-vm0
- For Task: NugetInstaller@0, click on Settings (link that is displaying above the task in grey colour), modify Version of NuGet.exe to install > 4.0.0 and click on Add.
- On the PartsUnlimited edit pane, in the upper right corner of the pane, click Save and, on the Save pane, click Save again. This will automatically trigger the build based on this pipeline.

- In the Azure DevOps portal, in the vertical navigational pane on the left side, in the Pipelines section, click Pipelines.
- On the Recent tab of the Pipelines pane, click the PartsUnlimited entry, on the Runs tab of the PartsUnlimited pane, select the most recent run, on the Summary pane of the run, scroll down to the bottom, in the Jobs section, click Phase 1 and monitor the job until its successful completion.

Review
In this lab, you learned how to convert classic pipelines into YAML-based ones and how to implement and use self-hosted agents.
Leave a Reply