With the introduction of Azure DevOps, Microsoft is offering developers a new continuous integration/continuous delivery (CI/CD) service called Azure Pipelines that enables you to continuously build, test, and deploy to any platform or cloud. It has cloud-hosted agents for Linux, macOS, and Windows; powerful workflows with native container support; and flexible deployments to Kubernetes, VMs, and serverless environments.
Azure Pipelines provides unlimited CI/CD minutes and 10 parallel jobs to every GitHub open source project for free. All open source projects run on the same infrastructure that our paying customers use. That means you’ll have the same fast performance and high quality of service. Many of the top open source projects are already using Azure Pipelines for CI/CD, such as Atom, Python, Pipenv, Tox, Visual Studio Code, and TypeScript-and the list is growing every day.
In this lab, you’ll see how easy it is to set up Azure Pipelines with your GitHub projects and how you can start seeing benefits immediately.
After you complete this lab, you will be able to:
- Install Azure Pipelines from the GitHub Marketplace.
- Integrate a GitHub project with an Azure DevOps pipeline.
- Track pull requests through the pipeline.
Review applications required for this lab
Identify the applications that you’ll use in this lab:
- Microsoft Edge
Set up an Azure DevOps organization
If you don’t already have an Azure DevOps organization that you can use for this lab, create one by following the instructions available at Create an organization or project collection.
Set up a GitHub account
If you don’t already have a GitHub account that you can use for this lab, follow instructions available at Signing up for a new GitHub account.
Lab 1: Getting started with Azure Pipelines
In this Lab, you will integrate a GitHub project with Azure DevOps by using the new Azure Pipelines integration from the Marketplace.
Task 1: Forking a GitHub repo and installing Azure Pipelines
In this task, you will fork a GitHub repo and install Azure Pipelines in your GitHub account.
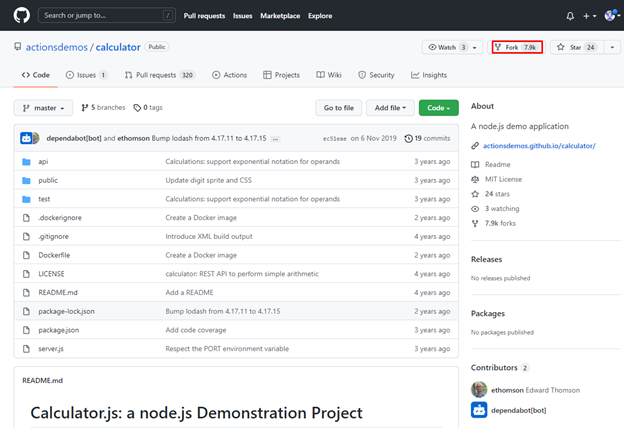
- On your lab computer, start a web browser, navigate to the GitHub actionsdemos/calculator site and, if you’re not already signed in to GitHub, sign in now.
Note: This is the baseline project we will fork and use for this lab.
- On the actionsdemos/calculator site page, click Fork, to fork the repository to your own GitHub account. If prompted, select the account to fork the repository into.
On the page displaying the forked repo, at the top menu, click Marketplace.
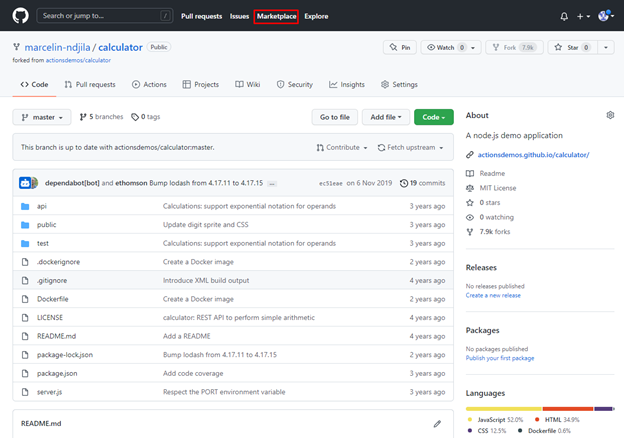
Note: The GitHub Marketplace provides a variety of tools from Microsoft and 3rd parties that help you extend your project workflows.
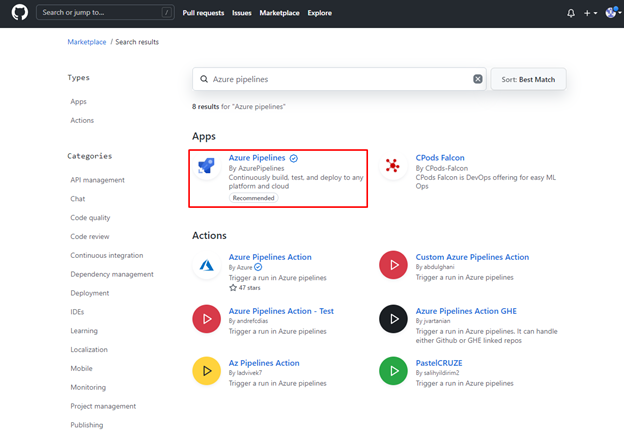
- In the Search for apps and actions, type Azure Pipelines, press the Enter key, and, in the list of results, click Azure Pipelines.
On the Azure Pipelines page, click Read more and read through the benefits of Azure Pipelines.
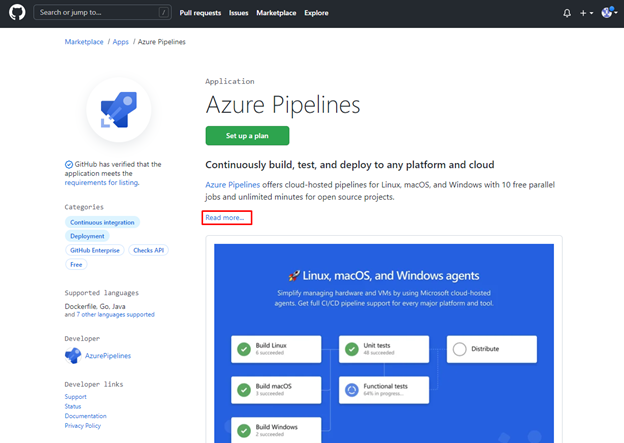
Note: The Azure Pipelines offering is free for anyone to use for public repositories, and free for a single build queue if you’re using a private repository.
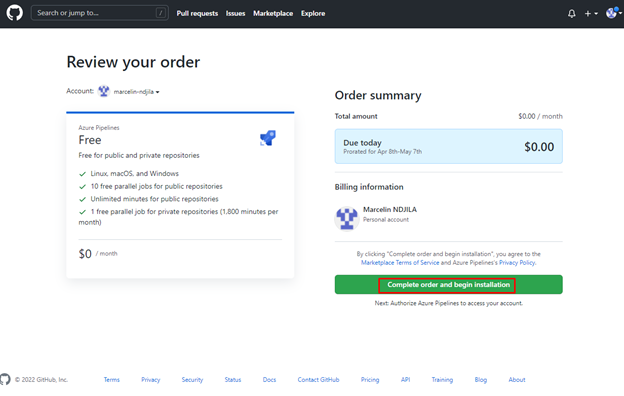
- On the Azure Pipelines page, click Install it for free. If you have multiple GitHub accounts, select the one you forked the calculator to from the Switch billing account dropdown.

On the Review your order page, click Complete order and begin installation.
On the Install Azure Pipelines page, use the default option All repositories and click Install.

Note: You have the option to specify repositories to include, but for the purposes of this lab, just include all of them. Note that Azure DevOps requires the listed set of permissions to fulfill its services.
- If prompted, authenticate with your GitHub password to continue.

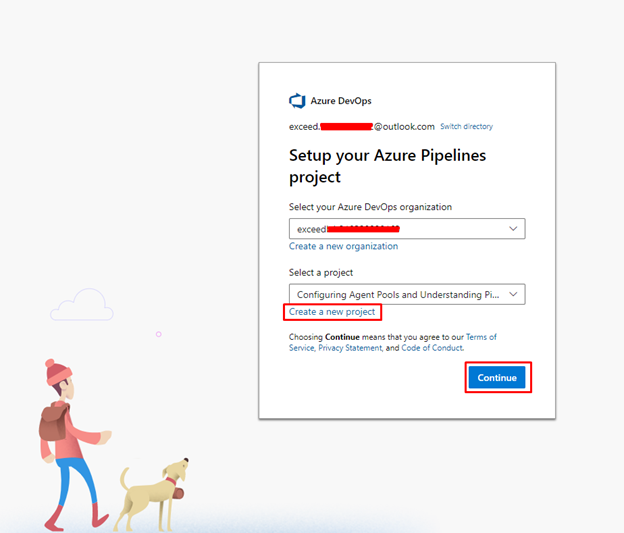
When prompted, on the Setup your Azure Pipelines project page, in the Select your Azure DevOps organization dropdown list, select your Azure DevOps account and click Create a new project.
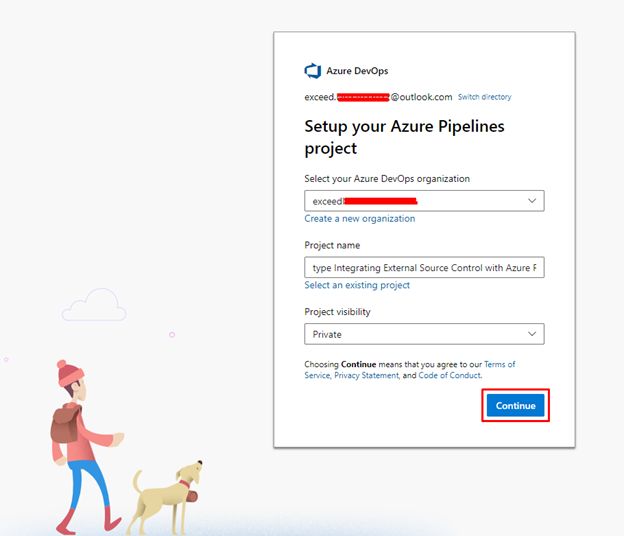
When prompted, on the Setup your Azure Pipelines project page, in the Project name textbox, type Integrating External Source Control with Azure Pipelines, leave the Project visibility set to Private, and click Continue.
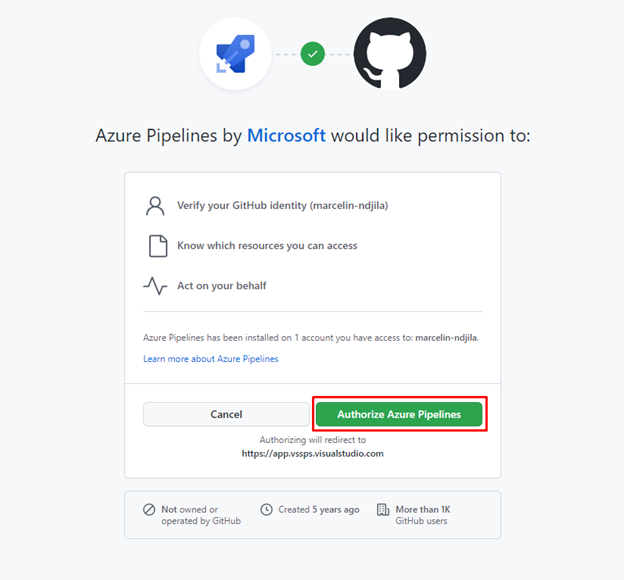
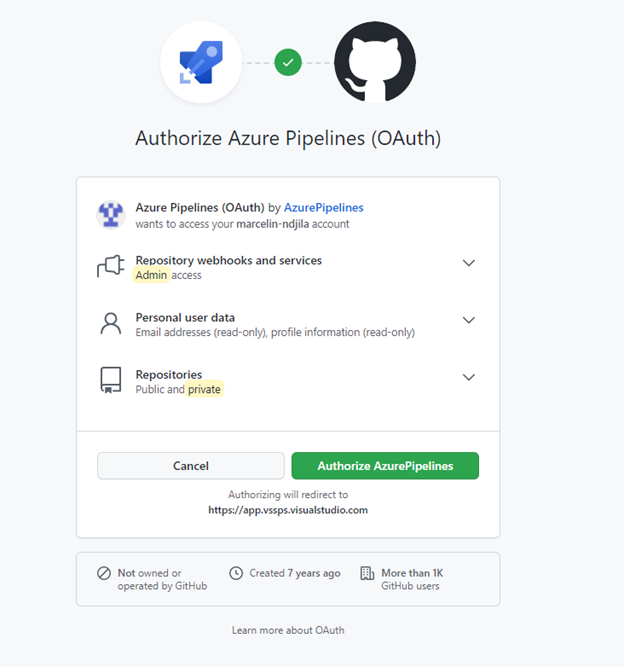
On the Azure Pipelines by Microsoft would like permission to page, click Authorize Azure Pipelines.
Task 2: Configuring your Azure Pipelines project
In this task, you will configure the Azure Pipelines project based on the fork of the GitHub repo you created in the previous task.
Note: You are now on the Azure DevOps site and need to set up your Azure Pipelines project.
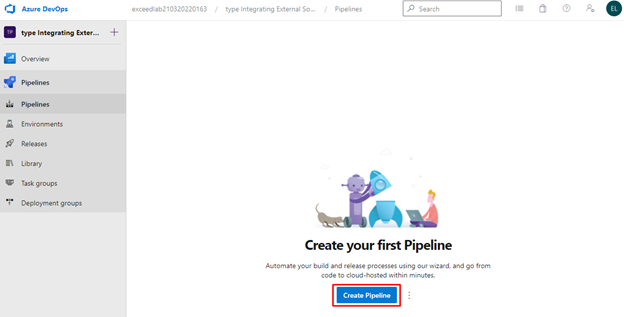
- In the Azure DevOps portal, click on Pipelines in the navigation panel on the left.
- Click on the Create pipeline button at top right.
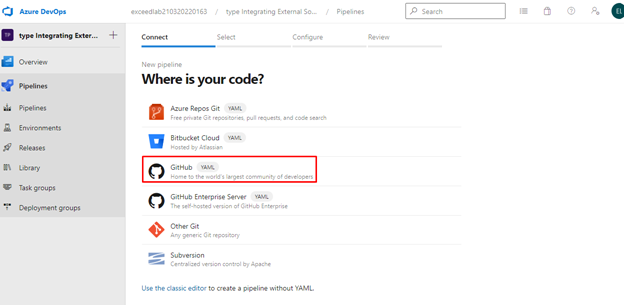
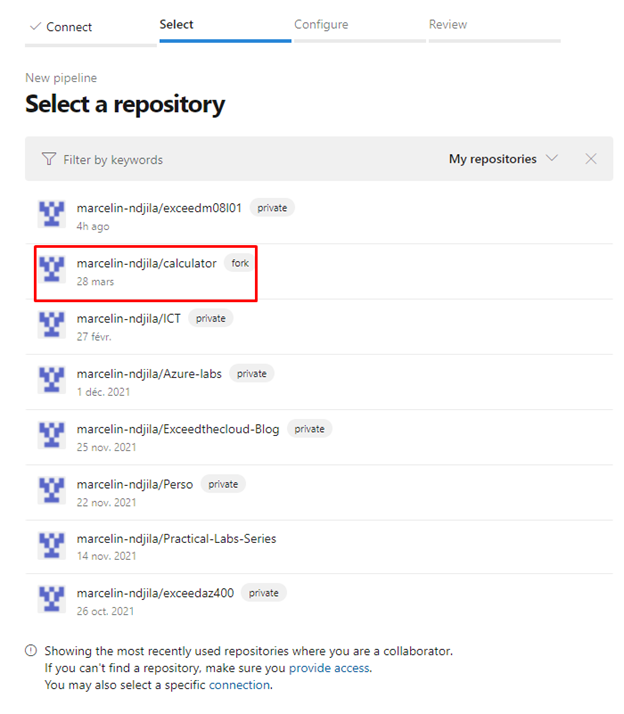
On the Select a repository pane of the Pipelines view in the Azure DevOps portal, select the fork of the GitHub calculator repository you created in the previous task.
Note: Azure Pipelines will analyze your project in an attempt to determine if any existing templates would be a good fit. In this case, the recommended template is for Node.js, which is perfect for our needs. Some alternative templates are also suggested, although the recommended one is the best for this lab.
- On the Configure your pipeline, select Node.js.
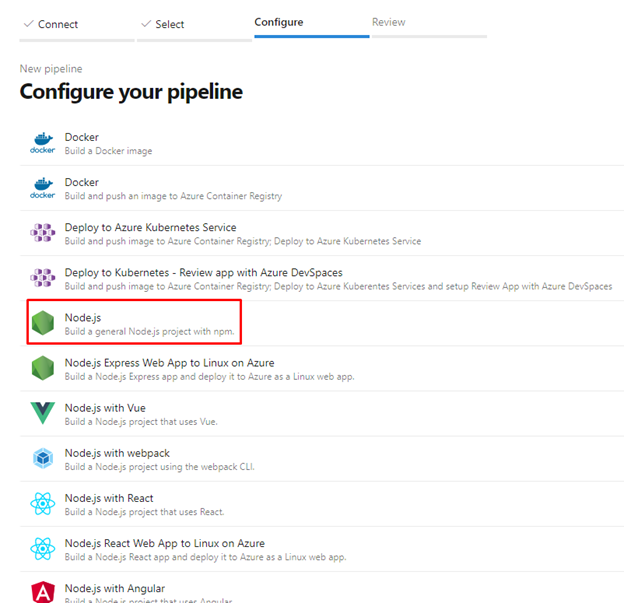
Note: The build pipeline is defined as YAML, a markup syntax well-suited to defining processes like this because it allows you to manage the configuration of the pipeline like any other file in the repo. It’s a pretty simple template that identifies the pool to pull a VM from for building, the process to install Node.js for building, and the actual build itself.
- On the Review your pipeline YAML, click Save and run to save the pipeline and queue a new build.
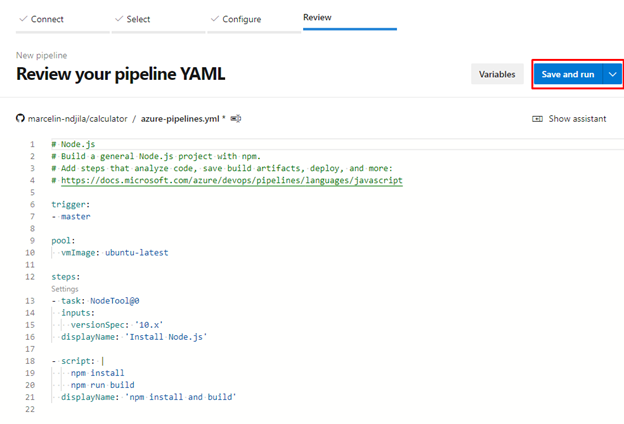
On the Save and run pane, accept the default settings and click Save and run.

Note: For the purposes of this lab, you can commit this new file directly to the master branch.
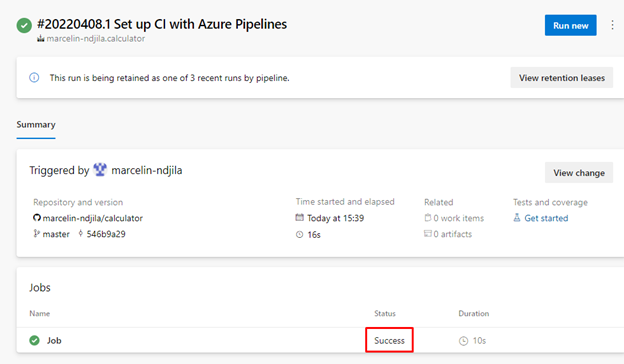
Note: It will take a moment for the pipeline to complete. During this time it will configure the build agent, pull in the source from GitHub, and build it according to the pipeline definition.
- On the Summary tab of the build job’s pane, verify that the build completed successfully.
Task 3: Modifying a YAML build pipeline definition
In this task, you will modify the YAML build definition in the forked GitHub repository and track the build process triggered by your modification.
Note: While the default pipeline is a great start, it doesn’t do everything we would like to have automated. For example, it would be great if it also ran our tests to confirm that the changes don’t create bugs. Let’s return to GitHub where we can edit the YAML by hand.
- On the Summary tab of the build job’s pane, next to the Repository and version label, right-click the entry representing the GitHub project repo hosting the fork you created earlier in this lab and select Open link in new tab. This will open a new browser tab, displaying the GitHub page with the content of the fork.
Note: Since this lab will involve stepping back and forth between GitHub and Azure DevOps, it’ll be easier to keep a browser tab open to each.
- On the GitHub page displaying the content of the fork, locate and click the entry representing the file azure-pipelines.yml. This will automatically open the file and display its content.
- On the master/calculator/azure-pipelines.yml page, in the upper right corner of the pane displaying the file content, click the Edit this file icon in the shape of a pencil.
Note: Our project already contains tests written using Mocha so we just need to execute them in our pipeline.
- To add the test run, add the npm test command directly below the npm run build command, with the same indentation. In addition, update the displayName entry to ‘npm install, build, and test’ to clearly indicate what each task of the build is doing:
CodeCopy
  npm test
displayName: 'npm install, build, and test'
Scroll to the bottom of the page, replace the default commit message with Adding npm test, and click Commit changes.
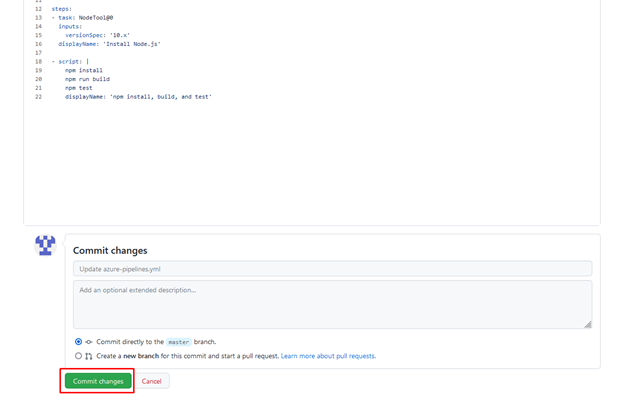
Note: Again, it’s acceptable to commit this change directly to the master branch considering that this is a lab environment.
- Switch back to the browser tab displaying the Azure DevOps portal and use the breadcrumb navigation to navigate to the Pipelines pane of the Pipelines view.
- Verify that the new build triggered by the update already appears on the Recent tab in the Recently run pipelines list. Click the entry corresponding to the pipeline, on the Runs tab, select the most recent run, and, in the Jobs section, click the Job entry.

- On the pane displaying job details, click on individual tasks of the job and follow it through to completion.
Task 4: Proposing a change via GitHub pull request
In this task, you will propose an invalid change and review the results of a build triggered by a pull request.
Note: One of the great benefits of this pipeline setup is that we now have a quality gate that’s automatically run every time someone commits a change. This makes it much easier to manage a project that could have any number of contributions coming in at various levels of quality.
- Switch back to the browser tab displaying the GitHub page displaying the content of the azure-pipelines.yml file, navigate back to the page listing content of the forked repo and click Go to file.
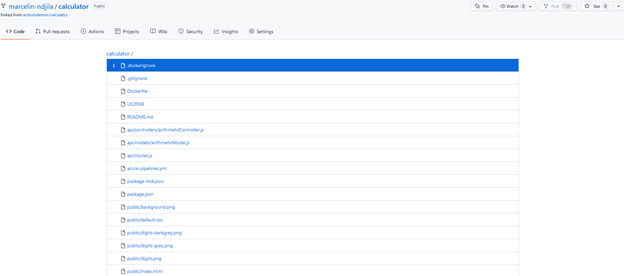
- At the calculator/ prompt, type arithmeticController.js and, in the list of results click api/controllers/arithmeticController.js. This will automatically redirect the browser session to the master/calculator/api/controllers/arithmeticController.js page, displaying the content of that file.
Note: This controller contains the core functionality of the app. However, the code for the add operation isn’t completely clear. Put yourself in the position of someone with good intentions, but a lack of experience with JavaScript. They might identify this as an opportunity to help out by cleaning up the code to make it better.
- On the master/calculator/api/controllers/arithmeticController.js page, in the upper right corner of the pane displaying the file content, click the Edit this file icon in the shape of a pencil.
- Change the line ` ‘add’: function(a,b) { return +a + +b },to ‘add’: function(a,b) { return a + b },`.
Note: This is an incorrect change that would result in invalid outcome.
- Scroll to the bottom of the page, replace the default commit message with Modifying the add function, select Create a new branch, set its name to addition-cleanup, and click Propose file change.

On the Open a pull request page, click Create pull request to initiate the process of getting your untested changes into production code.

Note: Azure DevOps will detect the change and start the build pipeline. This will result in failed checks, triggering an update the GitHub UI.
Note: Return to your original mindset of “project owner”.
- On the Modifying the add function #1 pull request page, in the All checks have failed section, click Details to learn more.

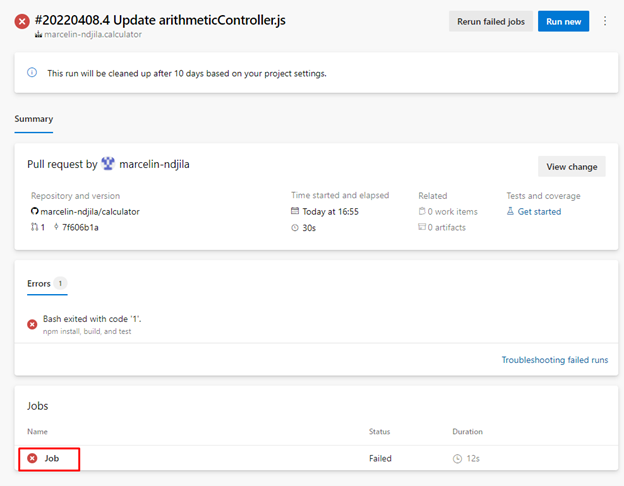
Review the ANNOTATIONS section and click the link View more details on Azure Pipelines directly below it. This will open a new browser tab displaying the failed run of the job in the Azure DevOps portal.

On the failed job pane in the Azure portal, click the Job entry to display its details.
In the list of job tasks, click the npm install, build, and test task to view its output.
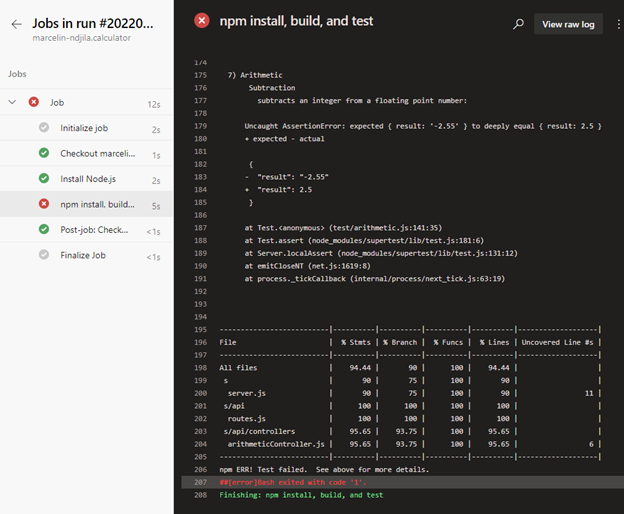
- Locate the section that lists out failing tests.
Note: It might not be immediately clear why the tests failed, but all of the history we’ve accrued in the pipeline makes it easy to identify that something from this new pull request is the cause. The next step will be to figure out why “21 + 21” produced “2121” instead of the expected “42”.
- Close the tab displaying the failed run of the job in the Azure DevOps portal.
Task 5: Using the broken pull request to improve the project
In this task, you will correct the invalid changes introduced in the pull request created in the previous task.
Note: Return to your original mindset of “project owner”.
- Return to the browser tab displaying the Modifying the add function #1 GitHub page and return to the main page listing the content of the forked repo.
- At the top of the pane containing the listing of the repo files, Pull requests and then click the entry representing the most recent pull request.
- On the Modifying the add function #1 GitHub page, click the File changed tab and review its content.
Note: It appears that the changes were made by someone who didn’t realize that the plus signs before each variable were necessary to coerce those variables to their number representations. By removing them, JavaScript interpreted the middle plus sign as the string concatenation operator, which explains why 21 + 21 = 2121 in the failed test.
- On the Modifying the add function #1 GitHub page, click the ellipsis symbol directly under the Review changes button and, in the drop-down menu, click Edit file.

- Revert the original changes by adding the plus signs in front of the a and b variables, resulting in ‘add’: function(a,b) { return +a + +b },. In addition, include a comment on the preceding line stating// Using + operator to type cast variables as integers in order to prevent string concatenation`.
- Scroll to the bottom of the page, replace the default commit message with Fixing the add function, ensure that the option to Commit directly to the addition-cleanup branch is selected, and click Commit changes.

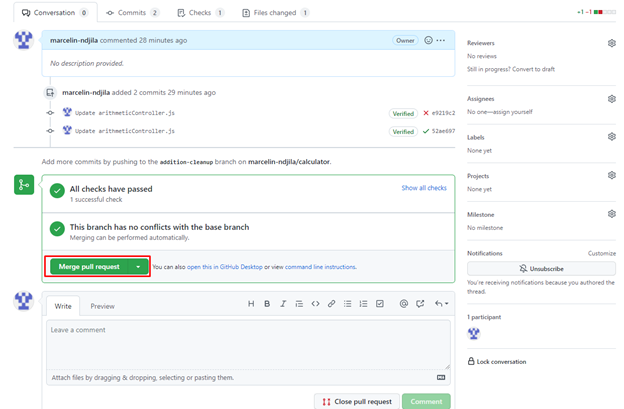
- On the Modifying the add function #1 GitHub page, select the Conversation tab.
Note: Azure DevOps will again detect the change and start the build pipeline. Wait for all checks to pass.
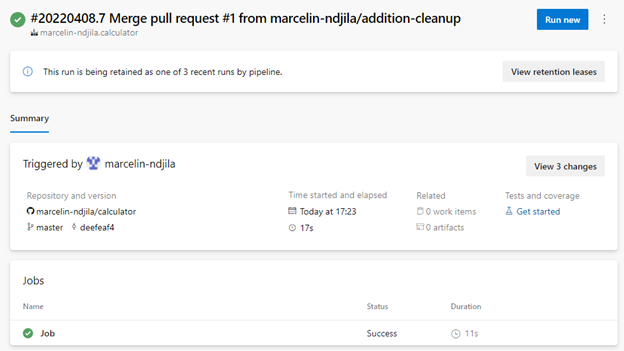
- Once all checks have passed, click Merge pull request and then click Confirm merge.
Task 6: Adding a build status badge
In this task, you will add a build status badge to your GitHub repo.
Note: An important sign for a quality project is its build status badge. When someone finds a project that has a badge indicating that the project is currently in a successful build state, it’s a sign that the project is maintained effectively.
- Switch back to the browser tab displaying the Azure DevOps portal and use the breadcrumb navigation to navigate to the Recent tab of the Pipelines pane of the Pipelines view.
- On the Recent tab in the Recently run pipelines list, click the entry corresponding to the pipeline you used in this lab.
On the pipeline pane, click the ellipsis symbol in the upper right corner and, in the dropdown list, select Status badge.
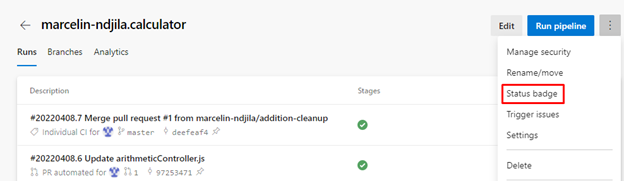
Note: The Status badge UI provides a quick and easy way to reference the build status. Often, you’ll want to use the provided URLs in your own dashboards, or you can use the Markdown snippet to add the status badge to locations such as Wiki pages.
- On the Status badge pane, click the Copy to clipboard button for Sample Markdown.
- Switch back to the browser tab displaying the GitHub page displaying the content of the forked repo and, if needed, click the <> Code tab.
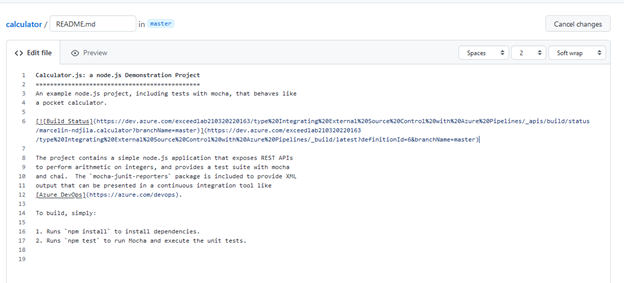
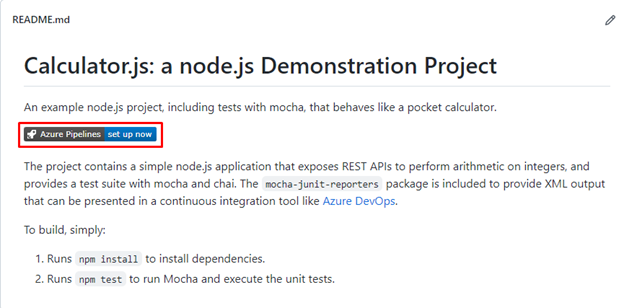
- In the list of repo files, click **README.md** and, on the **master/calculator/README.md** page, in the upper right corner of the pane displaying the file content, click the **Edit this file** icon in the shape of a pencil.
- Add an extra line above line 6 and paste into it the content of Clipboard.
Scroll to the bottom of the page, replace the default commit message with Add an Azure Pipelines status badge, and click Commit changes.
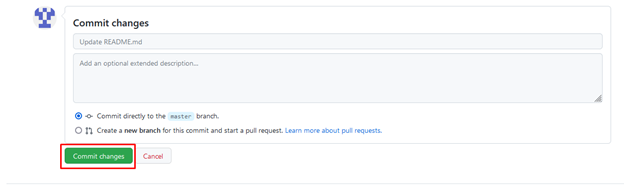
Note: You now have a dynamic build status badge on your project’s front page that allows everyone to know that you’re effectively managing your project.
Review
In this lab, you integrated a GitHub project with Azure DevOps by using the new Azure Pipelines integration from the Marketplace.
Leave a Reply