Many teams prefer to define their build and release pipelines using YAML. This allows them to access the same pipeline features as those using the visual designer, but with a markup file that can be managed like any other source file. YAML build definitions can be added to a project by simply adding the corresponding files to the root of the repository. Azure DevOps also provides default templates for popular project types, as well as a YAML designer to simplify the process of defining build and release tasks.
After you complete this lab, you will be able to:
- configure CI/CD pipelines as code with YAML in Azure DevOps
Review applications required for this lab
Identify the applications that you’ll use in this lab:
- Microsoft Edge
Set up an Azure DevOps organization.
If you don’t already have an Azure DevOps organization that you can use for this lab, create one by following the instructions available at Create an organization or project collection.
Prepare an Azure subscription
- Identify an existing Azure subscription or create a new one.
- Verify that you have a Microsoft account or an Azure AD account with the Owner role in the Azure subscription and the Global Administrator role in the Azure AD tenant associated with the Azure subscription. For details, refer to List Azure role assignments using the Azure portal and View and assign administrator roles in Azure Active Directory.
Lab 0: Configure the lab prerequisites
In this Lab, you will set up the prerequisites for the lab, which consist of the preconfigured Parts Unlimited team project based on an Azure DevOps Demo Generator template and Azure resources, including an Azure web app and an Azure SQL database.
Task 1: Configure the team project
In this task, you will use Azure DevOps Demo Generator to generate a new project based on the PartsUnlimited-YAML template.
- On your lab computer, start a web browser and navigate to Azure DevOps Demo Generator. This utility site will automate the process of creating a new Azure DevOps project within your account that is prepopulated with content (work items, repos, etc.) required for the lab.
Note: For more information on the site, see What is the Azure DevOps Services Demo Generator?.
- Click Sign in and sign in using the Microsoft account associated with your Azure DevOps subscription.
- If required, on the Azure DevOps Demo Generator page, click Accept to accept the permission requests for accessing your Azure DevOps subscription.
- On the Create New Project page, in the New Project Name textbox, type Configuring Pipelines as Code with YAML, in the Select organization dropdown list, select your Azure DevOps organization, and then click Choose template.
- In the list of templates, in the toolbar, click General, select the PartsUnlimited-YAML template and click Select Template.
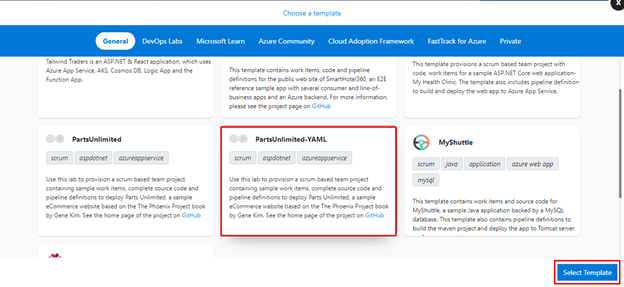
Back on the Create New Project page, click Create Project
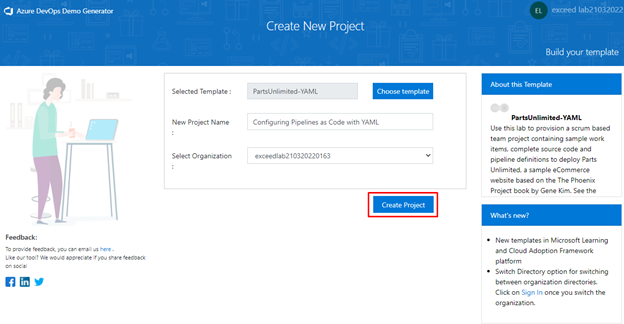
Note: Wait for the process to complete. This should take about 2 minutes. In case the process fails, navigate to your DevOps organization, delete the project, and try again.
- On the Create New Project page, click Navigate to project.
Task 2: Create Azure resources
In this task, you will create an Azure web app and an Azure SQL database by using the Azure portal.
- From the lab computer, start a web browser, navigate to the Azure Portal, and sign in with the user account that has the Owner role in the Azure subscription you will be using in this lab and has the role of the Global Administrator in the Azure AD tenant associated with this subscription.
- In the Azure portal, in the toolbar, click the Cloud Shell icon located directly to the right of the search text box.
- If prompted to select either Bash or PowerShell, select Bash.
Note: If this is the first time you are starting Cloud Shell and you are presented with the You have no storage mounted message, select the subscription you are using in this lab, and select Create storage.
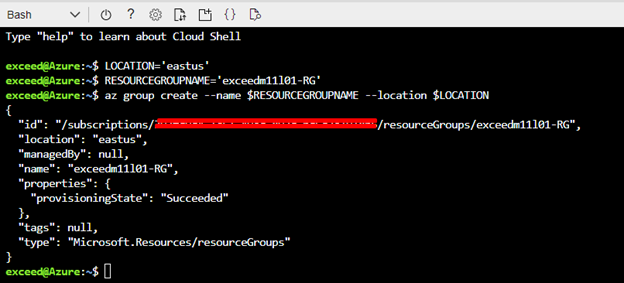
- From the Bash prompt, in the Cloud Shell pane, run the following command to create a resource group (replace the <region> placeholder with the name of the Azure region closest to you such as ‘eastus’).
CodeCopy
LOCATION='eastus'CodeCopy
RESOURCEGROUPNAME='exceedm11l01-RG'
az group create --name $RESOURCEGROUPNAME --location $LOCATION
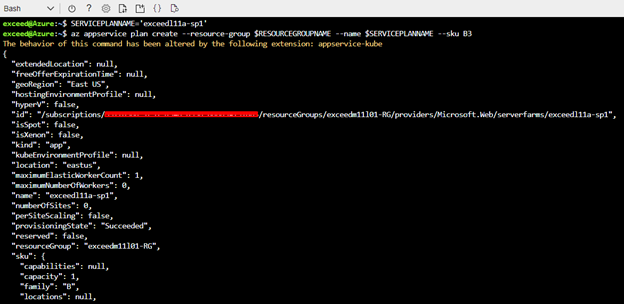
- To create a Windows App service plan by running the following command:
CodeCopy
SERVICEPLANNAME='exceedl11a-sp1'
az appservice plan create --resource-group $RESOURCEGROUPNAME --name $SERVICEPLANNAME --sku B3
Note: If the az appservice plan create command fails with an error message starting with ModuleNotFoundError: No module named ‘vsts_cd_manager’, then run the following commands and then re-run the failed command.
CodeCopy
az extension remove -n appservice-kube
az extension add --yes --source "https://aka.ms/appsvc/appservice_kube-latest-py2.py3-none-any.whl"

- Create a web app with a unique name.
CodeCopy
WEBAPPNAME=partsunlimited$RANDOM$RANDOM
az webapp create --resource-group $RESOURCEGROUPNAME --plan $SERVICEPLANNAME --name $WEBAPPNAME
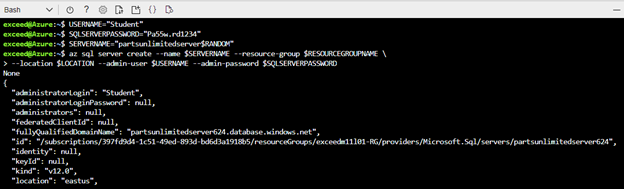
- Next, create an Azure SQL Server.
CodeCopy
USERNAME="Student"
SQLSERVERPASSWORD="Pa55w.rd1234"
SERVERNAME="partsunlimitedserver$RANDOM"

az sql server create --name $SERVERNAME --resource-group $RESOURCEGROUPNAME \
--location $LOCATION --admin-user $USERNAME --admin-password $SQLSERVERPASSWORD
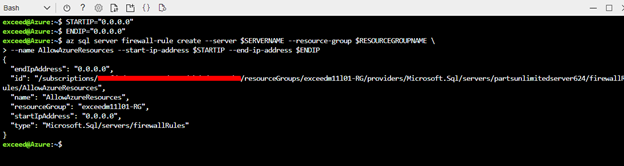
- The web app needs to be able to access the SQL server, so we need to allow access to Azure resources in the SQL Server firewall rules.
CodeCopy
STARTIP="0.0.0.0"
ENDIP="0.0.0.0"
az sql server firewall-rule create --server $SERVERNAME --resource-group $RESOURCEGROUPNAME \
--name AllowAzureResources --start-ip-address $STARTIP --end-ip-address $ENDIP
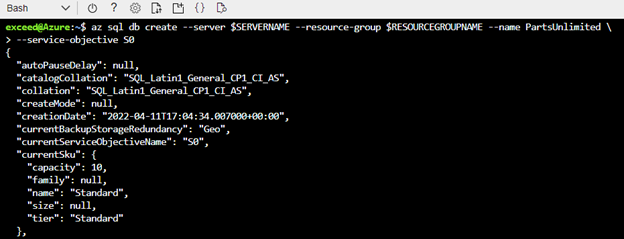
- Now create a database within that server.
CodeCopy
az sql db create --server $SERVERNAME --resource-group $RESOURCEGROUPNAME --name PartsUnlimited --service-objective S0
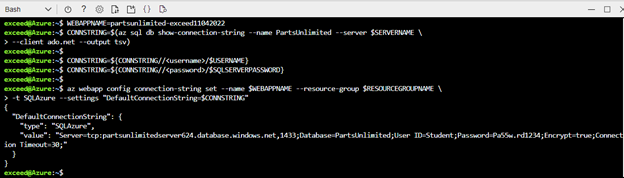
- The web app you created needs the database connection string in its configuration, so run the following commands to prepare and add it to the app settings of the web app.
CodeCopy
CONNSTRING=$(az sql db show-connection-string --name PartsUnlimited --server $SERVERNAME \
--client ado.net --output tsv)

CONNSTRING=${CONNSTRING//<username>/$USERNAME}
CONNSTRING=${CONNSTRING//<password>/$SQLSERVERPASSWORD}

az webapp config connection-string set --name $WEBAPPNAME --resource-group $RESOURCEGROUPNAME \
-t SQLAzure --settings "DefaultConnectionString=$CONNSTRING"
Lab 1: Configure CI/CD Pipelines as Code with YAML in Azure DevOps
In this Lab, you will configure CI/CD Pipelines as code with YAML in Azure DevOps.
Task 1: Delete the existing pipeline
In this task, you will delete the existing pipeline.
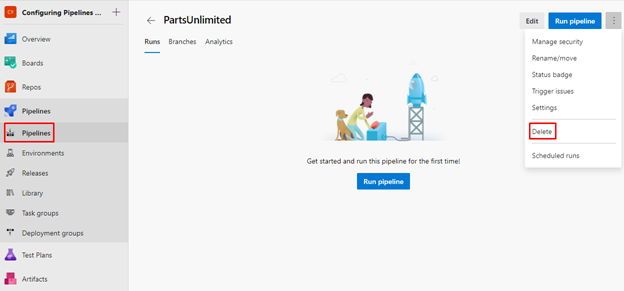
- On the lab computer, switch to the browser window displaying the Configuring Pipelines as Code with YAML project in the Azure DevOps portal and, in the vertical navigational pane, select the Pipelines.
Note: Before configuring YAML pipelines, you will disable the existing build pipeline.
- On the Pipelines pane, select the PartsUnlimited entry.
- In the upper right corner of the PartsUnlimited blade, click the vertical ellipsis symbol and, in the drop-down menu, select Delete.
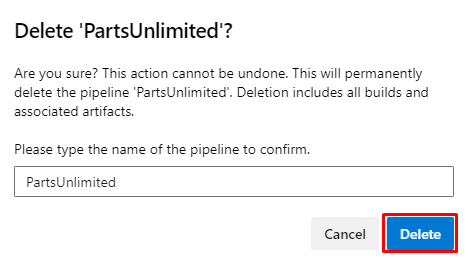
Write PartsUnlimited and click Delete.
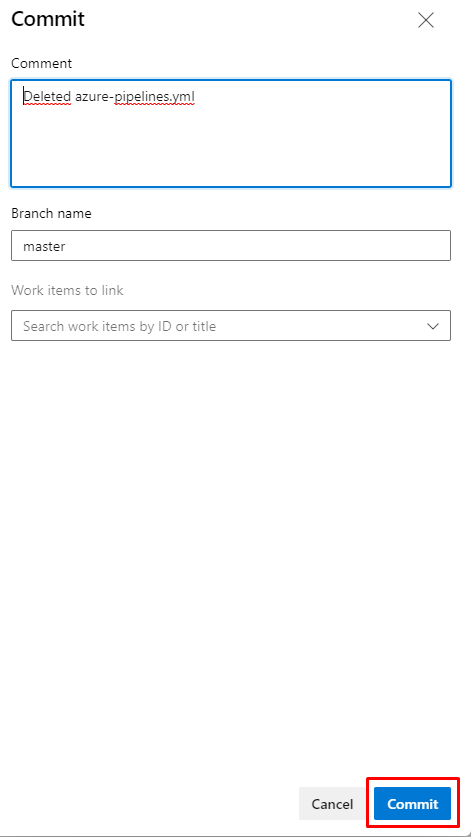
In the vertical navigational pane, select the Repos > Files. Make sure you are in the master branch (dropdown on top of Files window), on the azure-pipelines.yml file, click the vertical ellipsis symbol and, in the drop-down menu, select Delete. Commit the change on the master branch by clicking on Commit (leaving default options).

Task 2: Add a YAML build definition
In this task, you will add a YAML build definition to the existing project.
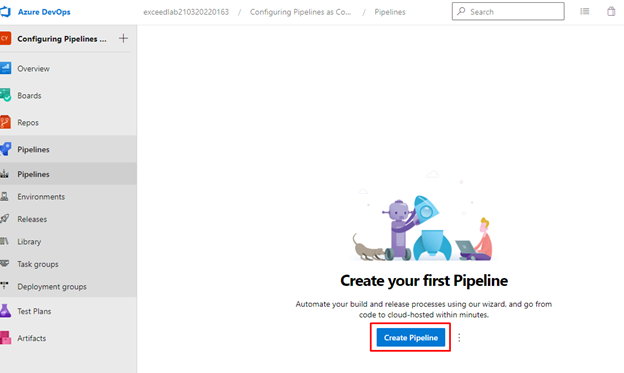
- Navigate back to the Pipelines pane in of the Pipelines hub.
- In the Create your first Pipeline window, click Create pipeline.
Note: We will use the wizard to automatically create the YAML definition based on our project.
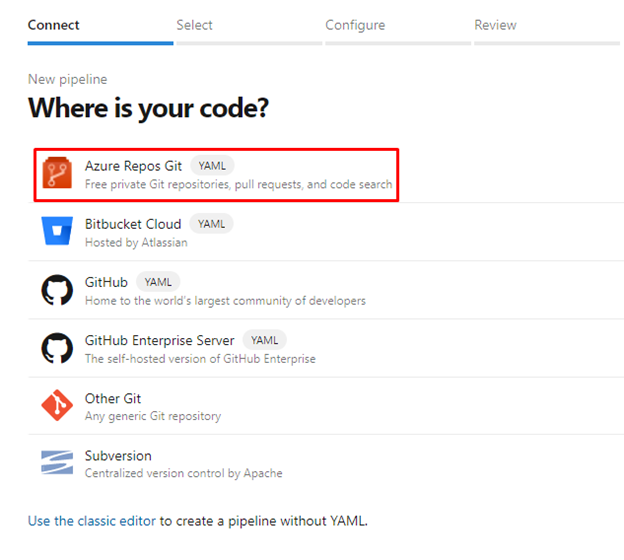
- On the Where is your code? pane, click Azure Repos Git (YAML) option.
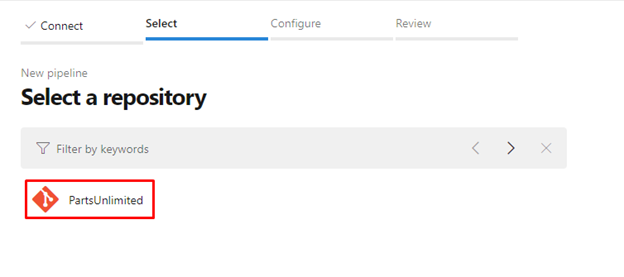
On the Select a repository pane, click PartsUnlimited.
On the Configure your pipeline pane, click **ASP.NET** to use this template as the starting point for your pipeline. This will open the **Review your pipeline YAML** pane.
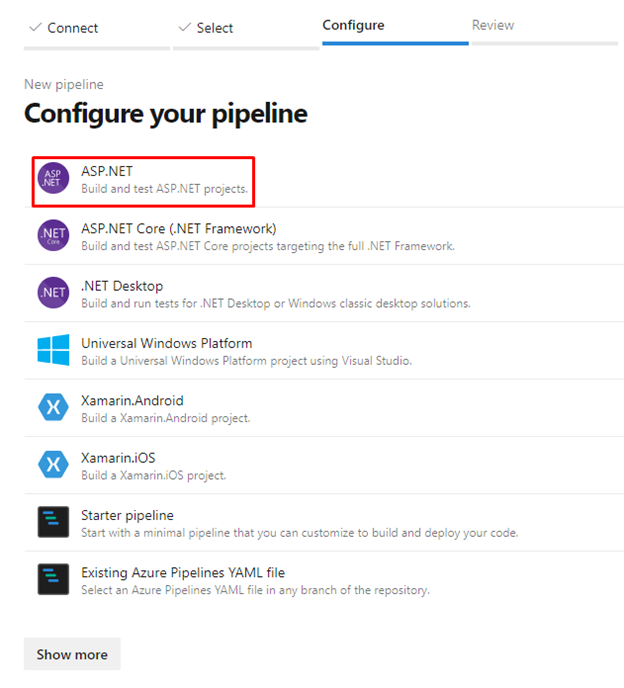
Note: The pipeline definition will be saved as a file named azure-pipelines.yml in the root of the repository. The file will contain the steps required to build and test a typical ASP.NET solution. You can also customize the build as needed. In this scenario, you will update the **pool** to enforce the use of a VM running Windows 2019.
- Make sure trigger is master.
Note: Review in Repos if your repository has master or main branch, organizations could choose default branch name for new repos: Change the default branch.
- On the Review your pipeline YAML pane, in line 10, replace vmImage: ‘windows-latest’ with vmImage: ‘windows-2019’.
- Remove the VSTest@2 task: “`yaml
- task: VSTest@2 inputs: platform: ‘$(buildPlatform)’ configuration: ‘$(buildConfiguration)’ “`
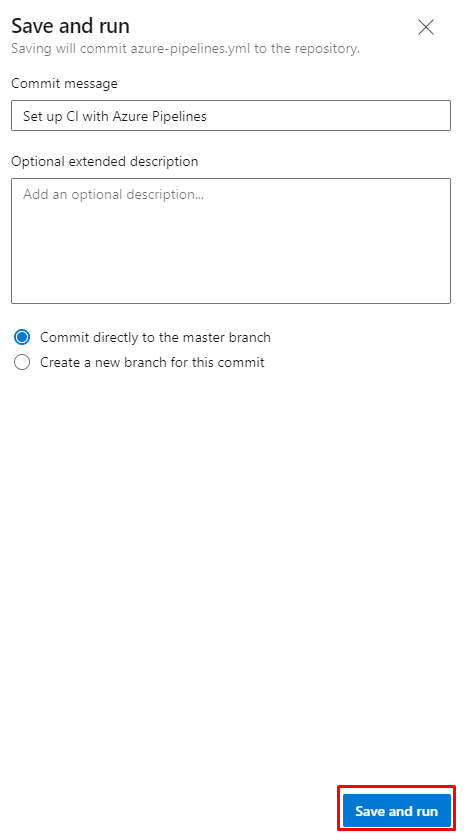
- On the Review your pipeline YAML pane, click Save and run.
- On the Save and run pane, accept the default settings and click Save and run.
On the pipeline run pane, in the Jobs section, click Job and monitor its progress and verify that it completes successfully.
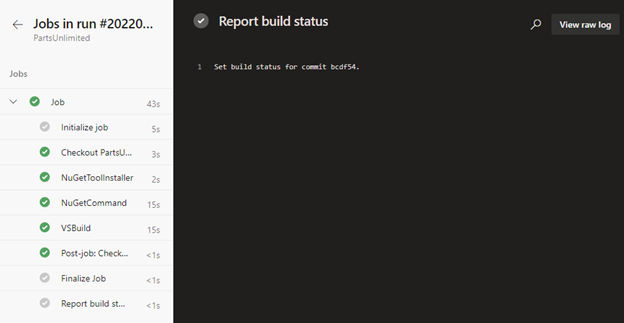
Note: Each task from the YAML file is available for review, including any warnings and errors.
Task 3: Add continuous delivery to the YAML definition
In this task, you will add continuous delivery to the YAML-based definition of the pipeline you created in the previous task.
Note: Now that the build and test processes are successful, we can now add delivery to the YAML definition.
- On the pipeline run pane, click the ellipsis symbol in the upper right corner and, in the dropdown menu, click Edit pipeline.
- On the pane displaying the content of the azure-pipelines.yaml file, in line 8, following the trigger section, add the following content to define the Build stage in the YAML pipeline.
Note: You can define whatever stages you need to better organize and track pipeline progress.
CodeCopy
stages:
- stage: Build
  jobs:
  - job: Build
- Select the remaining content of the YAML file and press the Tab key twice to indent it four spaces (it should be placed with same identation as job: Build).
Note: This way, everything starting with the pool section becomes part of the job: Build.
- At the bottom of the file, add the configuration below to define the second stage.
CodeCopy
- stage: Deploy
  jobs:
  - job: Deploy
    pool:
      vmImage: 'windows-2019'
    steps:
- Set the cursor on a new line at the end of the YAML definition.
Note: This will be the location where new tasks are added.
- In the list of tasks on the right side of the code pane, search for and select the Azure App Service Deploy task.
- In the Azure App Service deploy pane, specify the following settings and click Add:
- in the Azure subscription drop-down list, select the Azure subscription into which you deployed the Azure resources earlier in the lab, click Authorize, and, when prompted, authenticate by using the same user account you used during the Azure resource deployment.
- in the App Service name dropdown list, select the name of the web app you deployed earlier in the lab.
- in the Package or folder text box, type $(System.ArtifactsDirectory)/drop/*.zip.
Note: This will automatically add the deployment task to the YAML pipeline definition.
- With the added task still selected in the editor, press the Tab key twice to indent it four spaces, so that it listed as a child of the steps task.
Note: The packageForLinux parameter is misleading in the context of this lab, but it is valid for Windows or Linux.
Note: By default, these two stages run independently. As a result, the build output from the first stage might not be available to the second stage without additional changes. To implement these changes, we will use one task to publish the build output at the end of the build stage and another to download it in the beginning of the deploy stage.
- Place the cursor on a blank line at the end of the build stage to add another task. (right below task: VSBuild@1 )
- On the Tasks pane, search for and select the Publish build artifacts task.
- On the Publish build artifacts pane, accept the default settings and click Add.
Note: This will publish the build artifacts to a location that will be downloadable under the alias drop.
- With the added task still selected in the editor, press the Tab key twice to indent it four spaces (or press the Tab until task is indented as the ones above).
Note: You may also want to add an empty line before and after to make it easier to read.
- Place the cursor on the first line under the steps node of the deploy stage.
- On the Tasks pane, search for and select the Download build artifacts task.
- Click Add.
- With the added task still selected in the editor, press the Tab key twice to indent it four spaces.
Note: Here as well you may also want to add an empty line before and after to make it easier to read.
- Add a property to the download task specifying the artifactName of drop (make sure to match the spacing):
CodeCopy
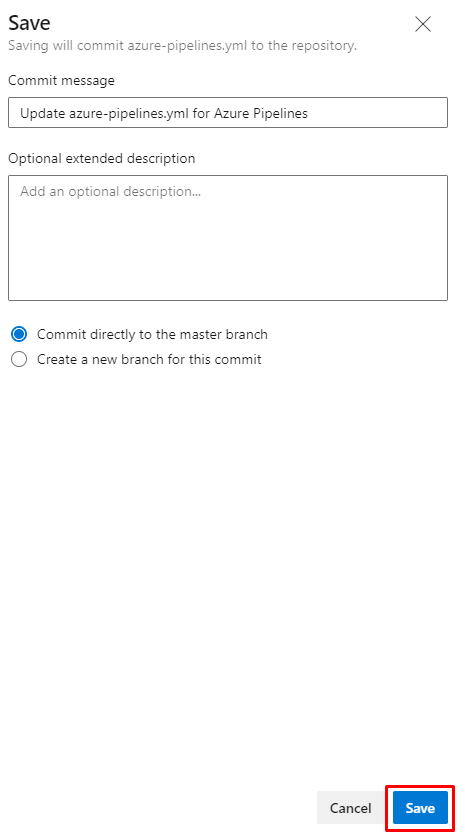
artifactName: 'drop'Click Save, on the Save pane, click Save again to commit the change directly into the master branch.
Note: This will automatically trigger a new build.
- The pipeline will look similar to this example (Reference your own subscription and webapp on last task):
Note: The indentation needs to be correct to make it work, copy and pasting may modify it.
CodeCopy
trigger:
- master

stages:
- stage: Build
  jobs:
  - job: Build
    pool:
        vmImage: 'windows-2019'

    variables:
        solution: '**/*.sln'
        buildPlatform: 'Any CPU'
        buildConfiguration: 'Release'

    steps:
    - task: NuGetToolInstaller@1

    - task: NuGetCommand@2
      inputs:
        restoreSolution: '$(solution)'

    - task: VSBuild@1
      inputs:
        solution: '$(solution)'
        msbuildArgs: '/p:DeployOnBuild=true /p:WebPublishMethod=Package /p:PackageAsSingleFile=true /p:SkipInvalidConfigurations=true /p:PackageLocation="$(build.artifactStagingDirectory)"'
        platform: '$(buildPlatform)'
        configuration: '$(buildConfiguration)'

    - task: PublishBuildArtifacts@1
      inputs:
        PathtoPublish: '$(Build.ArtifactStagingDirectory)'
        ArtifactName: 'drop'
        publishLocation: 'Container'

- stage: Deploy
  jobs:
  - job: Deploy
    pool:
        vmImage: 'windows-2019'
    steps:
    - task: DownloadBuildArtifacts@0
      inputs:
        buildType: 'current'
        downloadType: 'single'
        downloadPath: '$(System.ArtifactsDirectory)'
        artifactName: 'drop'
    - task: AzureRmWebAppDeployment@4
      inputs:
        ConnectionType: 'AzureRM'
        azureSubscription: 'YOUR-AZURE-SUBSCRIPTION'
        appType: 'webApp'
        WebAppName: 'YOUR-WEBAPP-NAME'
        packageForLinux: '$(System.ArtifactsDirectory)/drop/*.zip'
- In the web browser window displaying the Azure DevOps portal, in the vertical navigational pane, select the Pipelines.
- On the Pipelines pane, click the entry representing the newly configured pipeline.
- Click on the most recent run (automatically started).
- On the Summary pane, monitor the progress of the pipeline run.
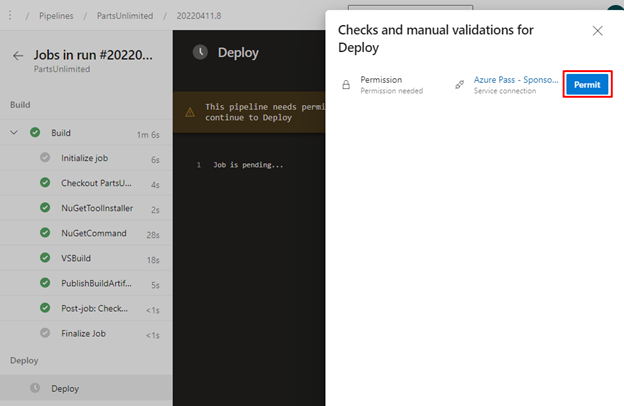
- If you notice a message stating that This pipeline needs permissions to access a resource before this run can continue to Deploy, click View, in the Waiting for review dialog box, click Permit, and, in the Permit access? pane, click Permit again.
- At the bottom of the Summary pane, click the Deploy stage to view details of the deployment.
Note: Once the task completes, your app will be deployed to an Azure web app.
Task 4: Review the deployed site
- Switch back to web browser window displaying the Azure portal and navigate to the blade displaying the properties of the Azure web app.
- On the Azure web app blade, click Overview and, on the overview blade, click Browse to open your site in a new web browser tab.
- Verify that the deployed site loads as expected in the new browser tab.
Review
In this lab, you configured CI/CD pipelines as code with YAML in Azure DevOps.
Reminder: Don’t forget to delete or shutdown all unused Azure resources after your labs for cost saving
Leave a Reply