Azure Key Vault provides secure storage and management of sensitive data, such as keys, passwords, and certificates. Azure Key Vault includes supports for hardware security modules, as well as a range of encryption algorithms and key lengths. By using Azure Key Vault, you can minimize the possibility of disclosing sensitive data through source code, which is a common mistake made by developers. Access to Azure Key Vault requires proper authentication and authorization, supporting fine grained permissions to its content.
In this lab, you will see how you can integrate Azure Key Vault with an Azure DevOps pipeline by using the following steps:
- create an Azure Key vault to store a MySQL server password as a secret.
- create an Azure service principal to provide access to secrets in the Azure Key vault.
- configure permissions to allow the service principal to read the secret.
- configure pipeline to retrieve the password from the Azure Key vault and pass it on to subsequent tasks.
After you complete this lab, you will be able to:
- Create an Azure Active Directory (Azure AD) service principal.
- Create an Azure key vault.
- Track pull requests through the Azure DevOps pipeline.
Review applications required for this lab
Identify the applications that you’ll use in this lab:
- Microsoft Edge
Prepare an Azure subscription
- Identify an existing Azure subscription or create a new one.
- Verify that you have a Microsoft account or an Azure AD account with the Owner role in the Azure subscription and the Global Administrator role in the Azure AD tenant associated with the Azure subscription. For details, refer to List Azure role assignments using the Azure portal and View and assign administrator roles in Azure Active Directory.
Set up an Azure DevOps organization
If you don’t already have an Azure DevOps organization that you can use for this lab, create one by following the instructions available at Create an organization or project collection.
Lab0: Configure the lab prerequisites
In this Lab, you will set up the prerequisite for the lab, which consists of the preconfigured Parts Unlimited team project based on an Azure DevOps Demo Generator template.
Task 1: Configure the team project
In this task, you will use Azure DevOps Demo Generator to generate a new project based on the Azure Key Vault template.
- On your lab computer, start a web browser and navigate to Azure DevOps Demo Generator. This utility site will automate the process of creating a new Azure DevOps project within your account that is prepopulated with content (work items, repos, etc.) required for the lab.
Note: For more information on the site, see https://docs.microsoft.com/en-us/azure/devops/demo-gen.
- Click Sign in and sign in using the Microsoft account associated with your Azure DevOps subscription.
- If required, on the Azure DevOps Demo Generator page, click Accept to accept the permission requests for accessing your Azure DevOps subscription.
- On the Create New Project page, in the New Project Name textbox, type Integrating Azure Key Vault with Azure DevOps, in the Select organization dropdown list, select your Azure DevOps organization, and then click Choose template.
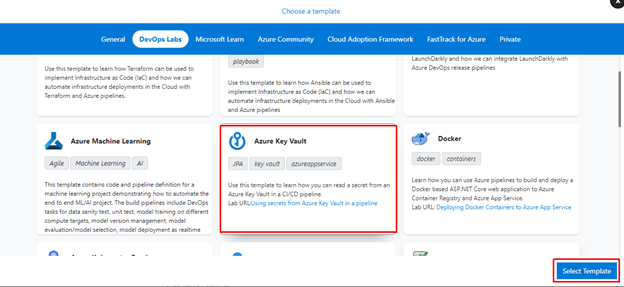
- On the Choose a template page, in the header menu, click DevOps Labs, in the list of templates, click the Azure Key Vault template, and then click Select Template.
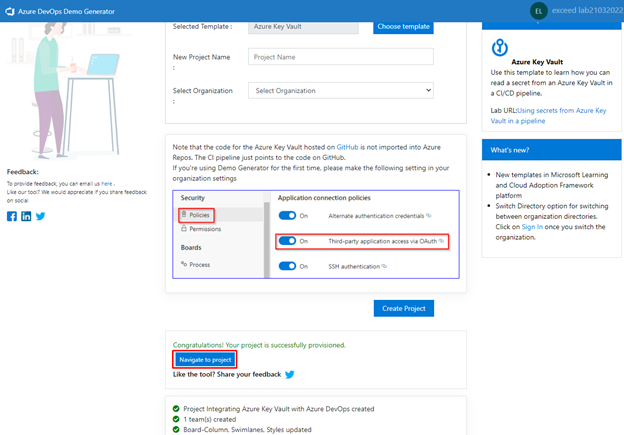
- Back on the Create New Project page, select the checkbox below the ARM Outputs label, and click Create Project
Note: Wait for the process to complete. This should take about 2 minutes. In case the process fails, navigate to your DevOps organization, delete the project, and try again.
- On the Create New Project page, click Navigate to project.
Lab1: Integrate Azure Key Vault with Azure DevOps
- create an Azure service principal that will provide access to secrets in an Azure Key vault.
- create the Azure Key vault to store a MySQL server password as a secret.
- configure permissions to allow the service principal to read the secret.
- configure pipeline to retrieve the password from the Azure Key vault and pass it on to subsequent tasks.
Task 1: Create a service principal
In this task, you will create a service principal by using the Azure CLI.
Note: If you do already have a service principal, you can proceed directly to the next task.
You will need a service principal to deploy an app to an Azure resource from Azure Pipelines. Since we are going to retrieve secrets in a pipeline, we will need to grant permission to the service when we create the Azure Key vault.
A service principal is automatically created by Azure Pipeline when you connect to an Azure subscription from inside a pipeline definition or when you create a new service connection from the project settings page. You can also manually create the service principal from the portal or using Azure CLI and re-use it across projects. It is recommended that you use an existing service principal when you want to have a pre-defined set of permissions.
- From the lab computer, start a web browser, navigate to the Azure Portal, and sign in with the user account that has the Owner role in the Azure subscription you will be using in this lab and has the role of the Global Administrator in the Azure AD tenant associated with this subscription.
- In the Azure portal, click the Cloud Shell icon, located directly to the right of the search textbox at the top of the page.
- If prompted to select either Bash or PowerShell, select Bash.
Note: If this is the first time you are starting Cloud Shell and you are presented with the You have no storage mounted message, select the subscription you are using in this lab, and select Create storage.
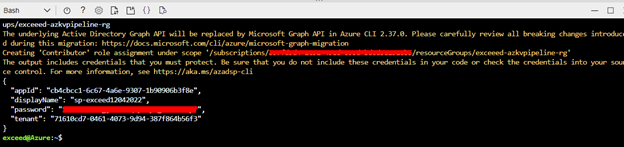
- From the Bash prompt, in the Cloud Shell pane, run the following command to create a service principal (replace the <service-principal-name> with any unique string of characters consisting of letters and digits):
CodeCopy
az ad sp create-for-rbac --name <service-principal-name> --role Contributor --ScopesNote: The command will generate a JSON output. Copy the output to text file. You will need it later in this lab.
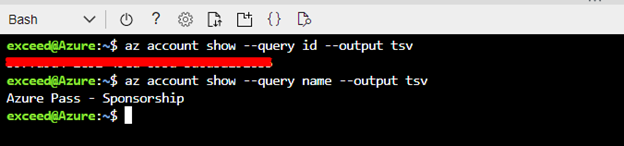
- From the Bash prompt, in the Cloud Shell pane, run the following commands to retrieve the values of the Azure subscription ID and subscription name attributes:
CodeCopy
az account show --query id --output tsv
az account show --query name --output tsv
Note: Copy both values to a text file. You will need them later in this lab.
Task 2: Create an Azure Key vault
In this task, you will create an Azure Key vault by using the Azure portal.
For this lab scenario, we have an app that connects to a MySQL database. We intend to store the password for the MySQL database as a secret in the key vault.
- In the Azure portal, in the Search resources, services, and docs text box, type Key vaults and press the Enter key.
- On the Key vaults blade, click + Create.
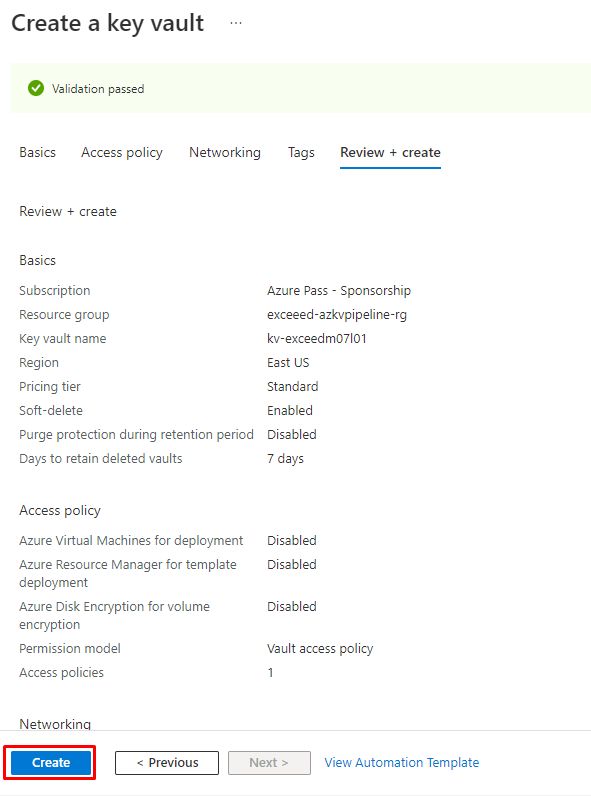
- On the Basics tab of the Create key vault blade, specify the following settings and click Next: Access policy:
| Setting | Value |
| Subscription | the name of the Azure subscription you are using in this lab |
| Resource group | the name of a new resource group exceeed-azkvpipeline-rg |
| Key vault name | any unique valid name |
| Region | an Azure region close to the location of your lab environment |
| Pricing tier | Standard |
| Days to retain deleted vaults | 7 |
| Purge protection | Disable purge protection |
On the Access policy tab of the Create key vault blade, click + Add Access Policy to setup a new policy.
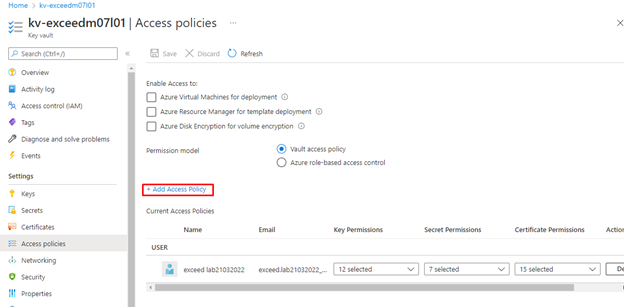
Note: You need to secure access to your key vaults by allowing only authorized applications and users. To access the data from the vault, you will need to provide read (Get) permissions to the service principal that you will be using for authentication in the pipeline.
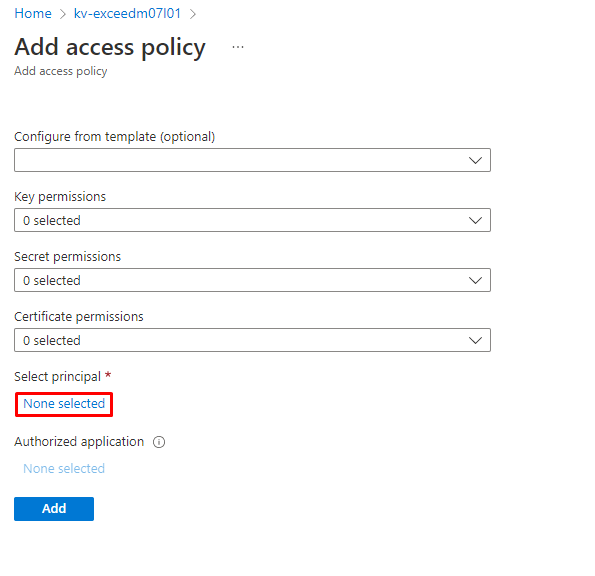
- On the Add access policy blade, click the None selected link directly under the Select principal label.
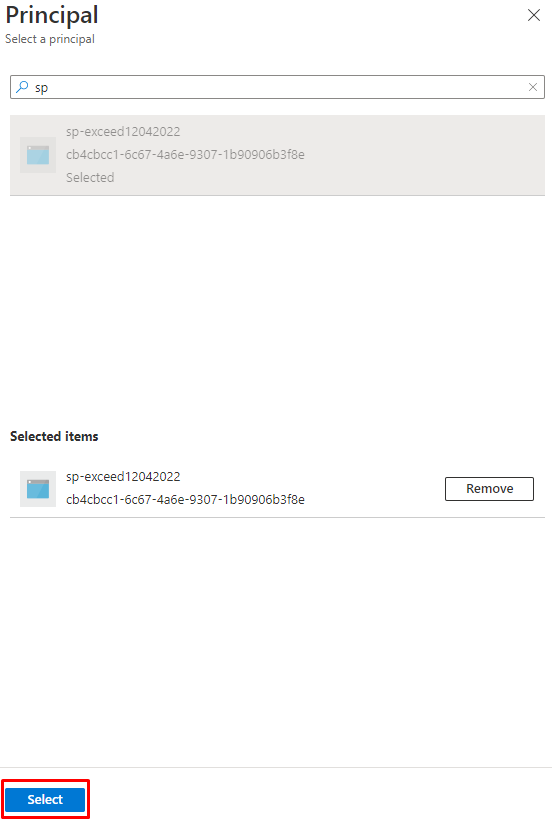
On the Principal blade, search for the security principal that you created in the previous Lab, select it, and then click Select.
Back on the Add access policy blade, in the Secret permissions drop down list, select checkboxes next to the Get and List permissions and then click Add.
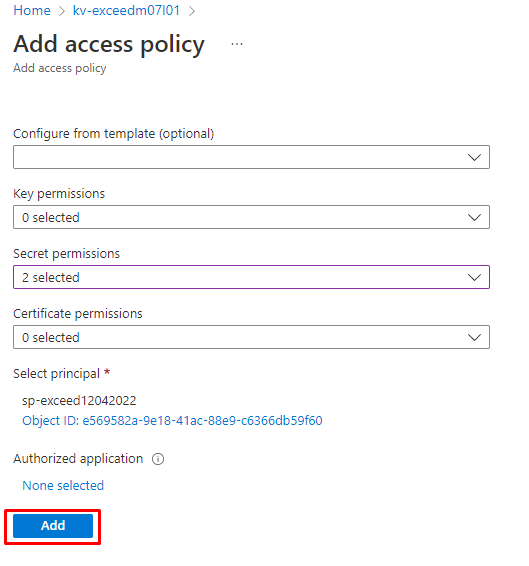
- Back on the Access policy tab of the Create key vault blade, click Review + create and, on the Review + create blade, click Create.
Note: Wait for the Azure Key vault to be provisioned. This should take less than 1 minute.
- On the Your deployment is complete blade, click Go to resource.
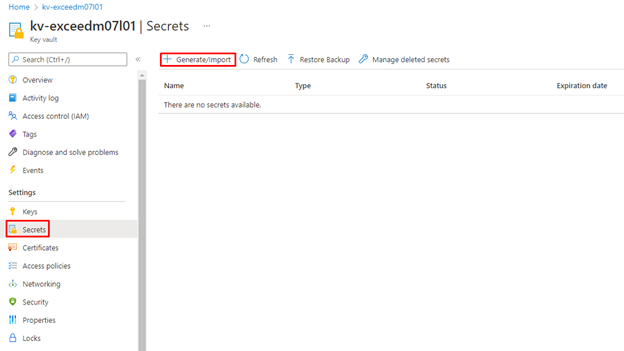
- On the Azure Key vault blade, in the vertical menu on the left side of the blade, in the Settings section, click Secrets.
- On the Secrets blade, click Generate/Import.
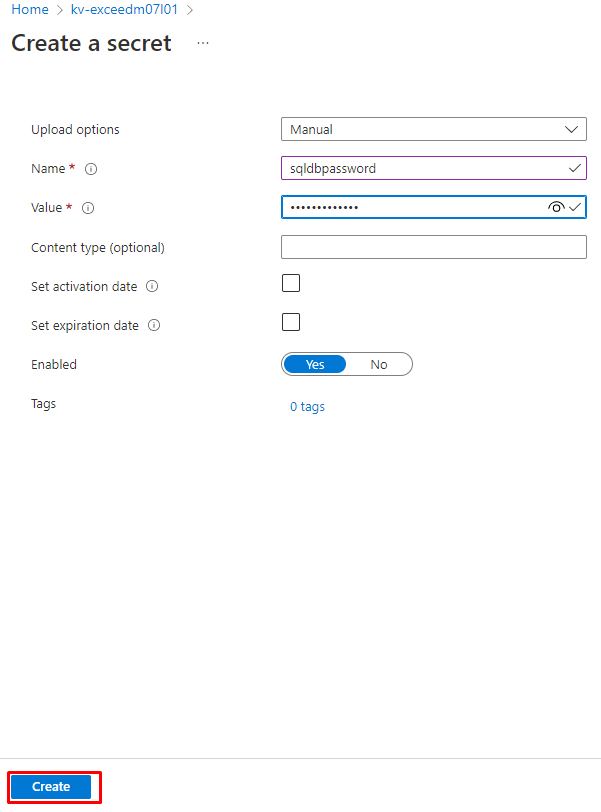
- On the Create a secret blade, specify the following settings and click Create (leave others with their default values):
| Setting | Value |
| Upload options | Manual |
| Name | sqldbpassword |
| Value | any valid MySQL password value |
Task 3: Check the Azure Pipeline
In this task, you will configure the Azure Pipeline to retrieve the secret from the Azure Key vault.
- On your lab computer, start a web browser and navigate to the Azure DevOps project Integrating Azure Key Vault with Azure DevOps you created in the previous Lab.
- In the vertical navigational pane of the of the Azure DevOps portal, select Pipelines and verify that the Pipelines pane is displayed.
- On the Pipelines pane, click the entry representing the SmartHotel-CouponManagement-CI pipeline. Click on Edit.
- On the pipeline definition, make sure the Pipeline > Agent Specification is ubuntu 18.04. Click Save and Queue > Queue > Run to trigger a build.

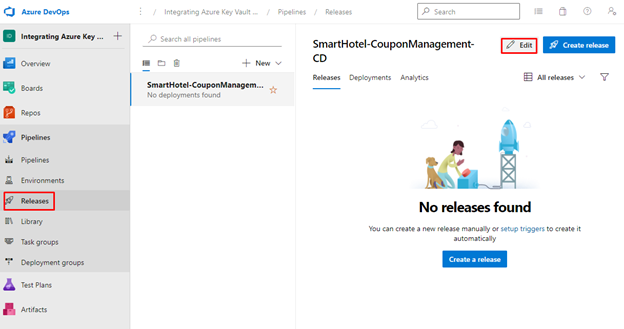
- In the vertical navigational pane of the of the Azure DevOps portal, in the Pipelines section, select Releases.
- On the SmartHotel-CouponManagement-CD pane, click Edit in the upper right corner.
On the All pipelines > SmartHotel-CouponManagement-CD pane, select the Task tab and, in the dropdown menu, select Dev.
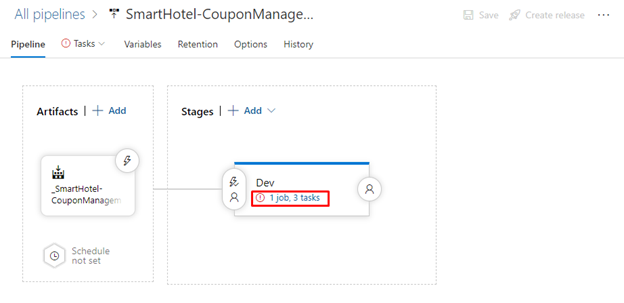
Note: The release definition for Dev stage has an Azure Key Vault task. This task downloads Secrets from an Azure Key Vault. You will need to point to the subscription and the Azure Key Vault resource created earlier in the lab.
Note: You need to authorize the pipeline to deploy to Azure. Azure pipelines can automatically create a service connection with a new service principal, but we want to use the one we created earlier, as it has been authorized to read the secret.
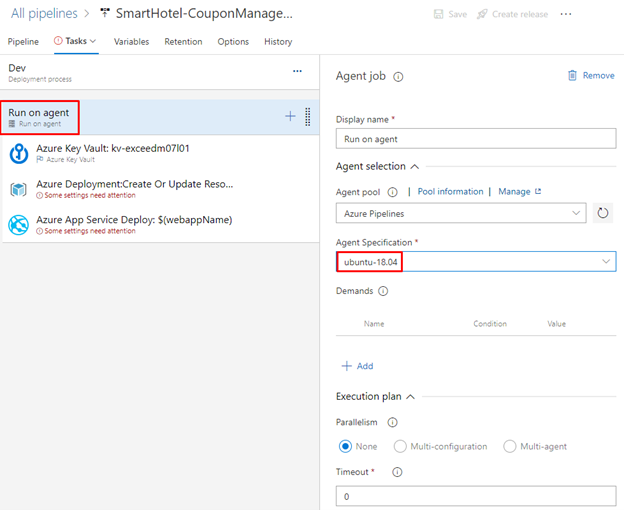
- Select Run on agent and modify Agent pool field to Azure Pipelines and agent specification ubuntu 18.04.
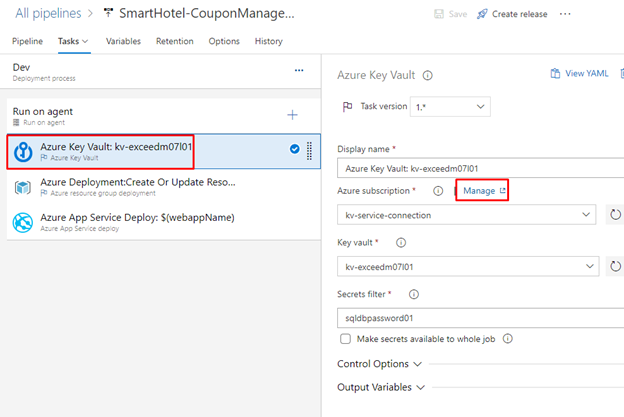
Select the Azure Key Vault task and, on the right side, in the Azure Key Vault task properties, next to the Azure subscription label, click Manage. This will open another browser tab displaying the Service connections pane in the Azure DevOps portal.
On the Service connections pane, click New Service connection.
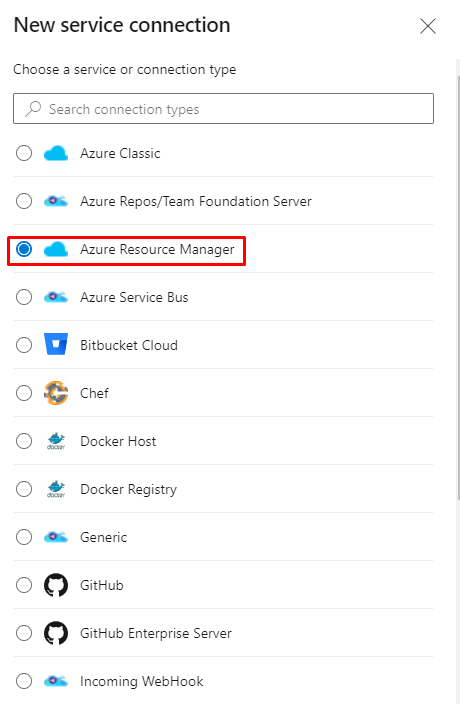
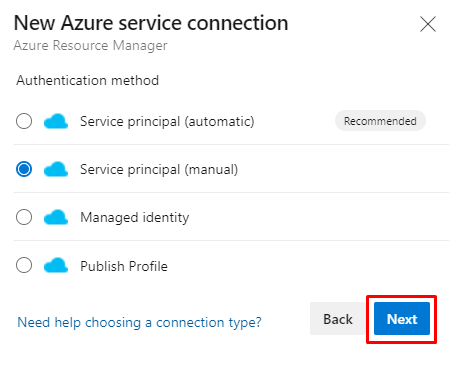
On the New service connection pane, select the Azure Resource Manager option, click Next, select Service Principal (manual), and click Next again.
- On the New service connection pane, specify the following settings, using the information you copied to a text file in the first task of this Labfollowing creation of the service principal by using Azure CLI:
- Subscription Id: the value you obtained by running az account show –query id –output tsv
- Subscription Name: the value you obtained by running az account show –query name –output tsv
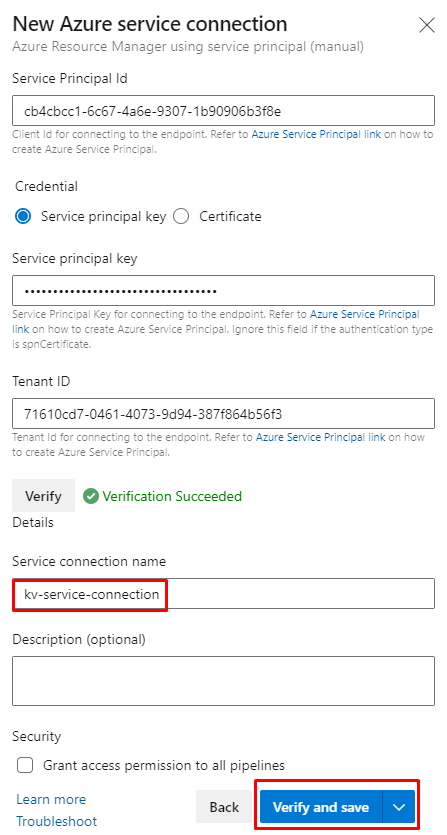
- Service Principal Id: the value labeled appId in the output generated by running az ad sp create-for-rbac
- Service Principal key: the value labeled password in the output generated by running az ad sp create-for-rbac
- TenantId: the value labeled tenant in the output generated by running az ad sp create-for-rbac
- On the New service connection pane, click Verify to determine whether the information you provided is valid.

Once you receive the Verification Succeeded response, in the Service connection name textbox, type kv-service-connection and click Verify and Save.
- Switch back to the web browser tab displaying the pipeline definition and the Azure Key Vault task.
- With the Azure Key Vault task selected, on the Azure Key Vault pane, click the Refresh button, in the Azure subscription dropdown list, select the kv-service-connection entry, in the Key vault dropdown list, select the entry representing the Azure Key vault you created in the first task, and, in the Secrets filter textbox, type sqldbpassword. Finally, expand the Output Variables section and, in the Reference name textbox, type sqldbpassword.
Note: At runtime, Azure Pipelines will fetch the latest value of the secret and set it as the task variable $(sqldbpassword). The tasks can consumed by the subsequent tasks by referencing that variable.
- To verify this, select the next task, Azure Deployment, which deploys an ARM template and review the content of the Override template parameters textbox.
CodeCopy
-webAppName $(webappName) -mySQLAdminLoginName "azureuser" -mySQLAdminLoginPassword $(sqldbpassword)Note: The Override template parameters content references the sqldbpassword variable to set the mySQL admin password. This will provision the MySQL database defined in the ARM template using the password that you have specified in the key vault.
- You may complete the pipeline definition by specifying the subscription (if new subscription is used in the project, click on Authorize )and location for the task. Repeat the same for the last task in the pipeline Azure App Service Deploy (choose the subscription from the Available Azure service connection section in the dropdown).
Note: In the Azure subscription dropdown list, you will see Available Azure service connections for those susbcriptions that have already been authorized to be connected to Azure. If you select the authorized subscription again (from Available Azure subscriptions list) and try to Authorize, the process will fail.
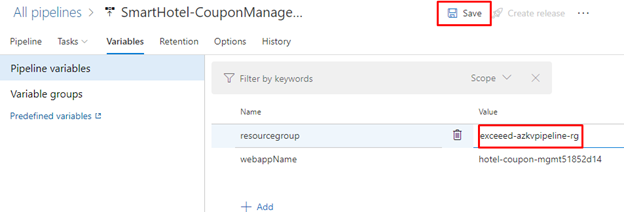
- On the Variables tab, change the resourcegroup variable to plain text (click on lock) and write exceeed-azkvpipeline-rg in the value field.
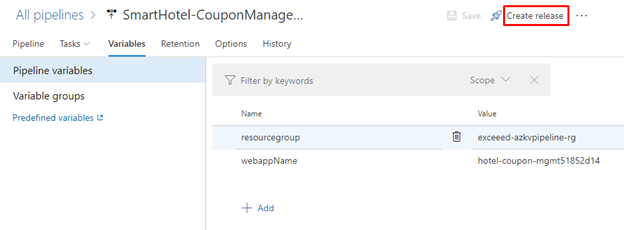
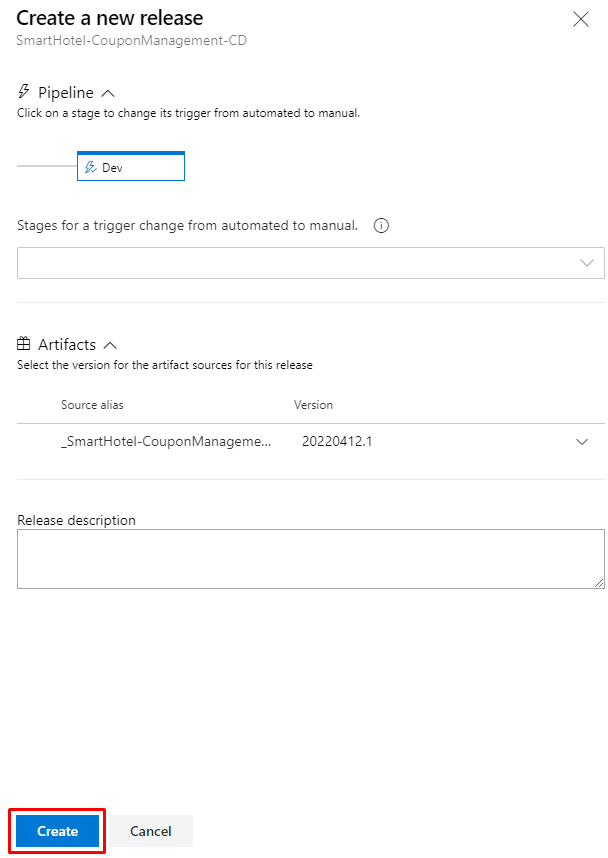
Finally, Save and click on Create a new release > Create (leave defaults) to start the deployment.
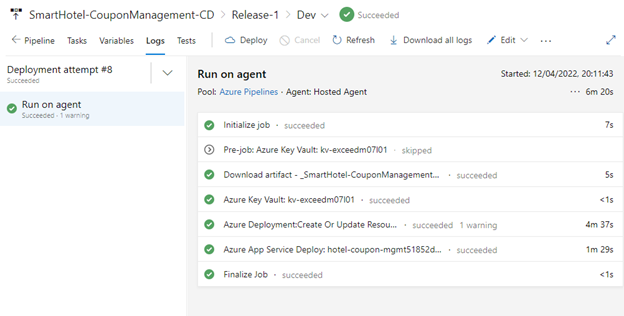
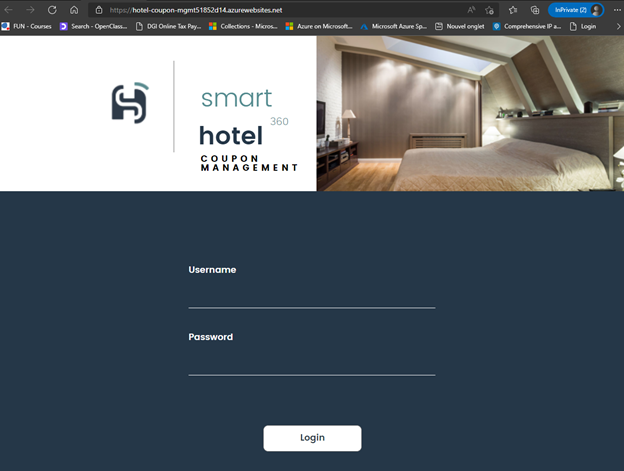
Make sure your pipeline runs successfully and once finished, review the created resources by opening the resource group exceeed-azkvpipeline-rg in the Azure Portal . Open the App Service and browse it (Overview -> Browse), to see the published website.
Review
In this lab, you integrated Azure Key Vault with an Azure DevOps pipeline by using the following steps:
- created an Azure Key vault to store a MySQL server password as a secret.
- created an Azure service principal to provide access to secrets in the Azure Key vault.
- configured permissions to allow the service principal to read the secret.
- configured pipeline to retrieve the password from the Azure Key vault and pass it on to subsequent tasks.
Reminder: Don’t forget to delete or shutdown all unused Azure resources after your labs for cost saving
Leave a Reply