In this lab we will deploy, configure, and manage Azure resources by using Ansible.
Ansible is declarative configuration management software. It relies on a description of the intended configuration applicable to managed computers in the form of playbooks. Ansible automatically applies that configuration and maintains it going forward, addressing any potential discrepancies. Playbooks are formatted by using YAML.
Unlike the majority of other configuration management tools, such as Puppet or Chef, Ansible is agentless, which means that it does not require the installation of any software in the managed machines. Ansible uses SSH to manage Linux servers and Powershell Remoting to manage Windows servers and clients.
In order to interact with resources other than operating systems (such as, for example, Azure resources accessible via Azure Resource Manager), Ansible supports extensions called modules. Ansible is written in Python so, effectively, the modules are implemented as Python libraries. In order to manage Azure resources, Ansible relies on GitHub-hosted modules.
Ansible requires that the managed resources are specified in a designated host inventory. Ansible supports dynamic inventories for some systems, including Azure, so that the host inventory is dynamically generated at runtime.
The lab will consist of the following high-level steps:
- Installing and configuring Ansible on the Azure VM
- Downloading Ansible configuration and sample playbook files
- Creating and configuring a managed identity in Azure AD
- Configuring Azure AD credentials and SSH for use with Ansible
- Deploying an Azure VM by using an Ansible playbook
- Configuring an Azure VM by using an Ansible playbook
After you complete this lab, you will be able to:
- Install and configure Ansible on Azure VM
- Download Ansible configuration and sample playbook files
- Create and configure Azure Active Directory managed identity
- Configure Azure AD credentials and SSH for use with Ansible
- Deploy an Azure VM by using an Ansible playbook
- Configure an Azure VM by using an Ansible playbook
Review applications required for this lab
Identify the applications that you’ll use in this lab:
- Microsoft Edge
Prepare an Azure subscription
- Identify an existing Azure subscription or create a new one.
- Verify that you have a Microsoft account or an Azure AD account with the Owner role in the Azure subscription and the Global Administrator role in the Azure AD tenant associated with the Azure subscription. For details, refer to List Azure role assignments using the Azure portal and View and assign administrator roles in Azure Active Directory.
Lab1: Deploy, configure, and manage Azure VMs by using Ansible
In this Lab, you will deploy, configure, and manage Azure VMs by using Ansible.
Task 1: Provision an Azure VM serving as the Ansible control node
In this task, you will deploy an Azure VM by using Azure CLI and configure it as an Ansible control node that manages your Ansible environment.
Note: You will use the Azure VM configured as an Ansible control node to perform Ansible management tasks, including those you performed in the previous tasks of this lab.
- In the Azure portal, in the toolbar, click the Cloud Shell icon located directly to the right of the search text box.
Note: Alternatively, you can access Cloud Shell directly by navigating to https://shell.azure.com.
- If prompted to select either Bash or PowerShell, select Bash.
Note: If this is the first time you are starting Cloud Shell and you are presented with the You have no storage mounted message, select the subscription you are using in this lab, and select Create storage.
- From the Bash session in the Cloud Shell pane, run the following to specify the name of the Azure region that will host the resources you deploy in this lab (replace the <Azure_region> placeholder with the name of the Azure region where you intend to deploy resources. Make sure that the name does not contain any spaces, e.g. westeurope):
CodeCopy
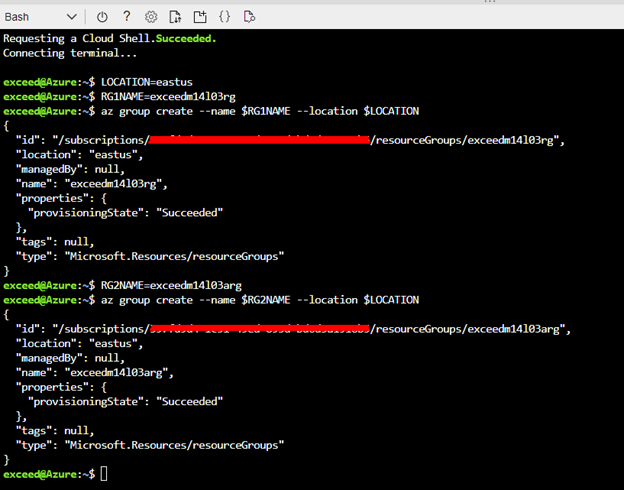
LOCATION=eastus- From the Bash session in the Cloud Shell pane, run the following to create resource groups that will host the Azure VMs you deploy in this lab:
CodeCopy
RG1NAME=exceedm14l03rg
az group create --name $RG1NAME --location $LOCATION
RG2NAME=exceedm14l03arg
az group create --name $RG2NAME --location $LOCATION
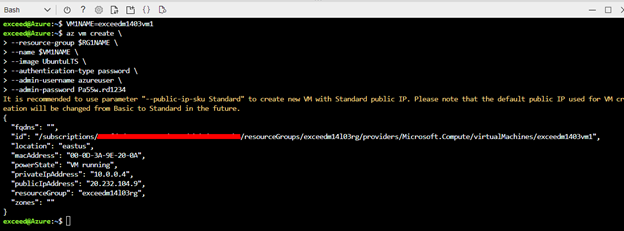
- Run the following to deploy an Azure VM running Ubuntu into the resource group you created in the previous step:
CodeCopy
VM1NAME=exceedm1403vm1
az vm create \
--resource-group $RG1NAME \
--name $VM1NAME \
--image UbuntuLTS \
--authentication-type password \
--admin-username azureuser \
--admin-password Pa55w.rd1234
Note: Wait for the deployment to complete before you proceed to the next step. This might take about 2 minutes.
Note: Once the provisioning completes, in the JSON-based output, identify the value of the “publicIpAddress” property included in the output.
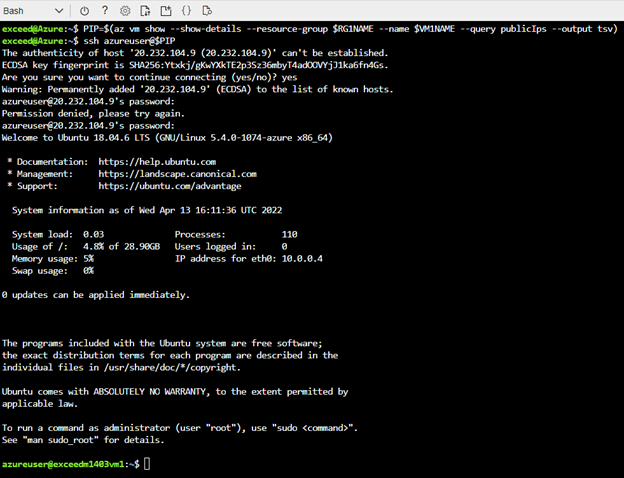
- Run the following to connect to the newly deployed Azure VM by using SSH:
CodeCopy
PIP=$(az vm show --show-details --resource-group $RG1NAME --name $VM1NAME --query publicIps --output tsv)
ssh azureuser@$PIP
When prompted for confirmation to proceed, type yes and press the Enter key and, when prompted to provide the password, type Pa55w.rd1234.
Task 2: Install and configure Ansible on an Azure VM
In this task, you will install and configure Ansible on the Azure VM you deployed in the previous task.
- In the Bash session in the Cloud Shell pane, within the SSH session to the newly deployed Azure VM, run the following to update the Advanced Packaging Tool (apt) package list to include the latest version and package details:
CodeCopy
sudo apt-get update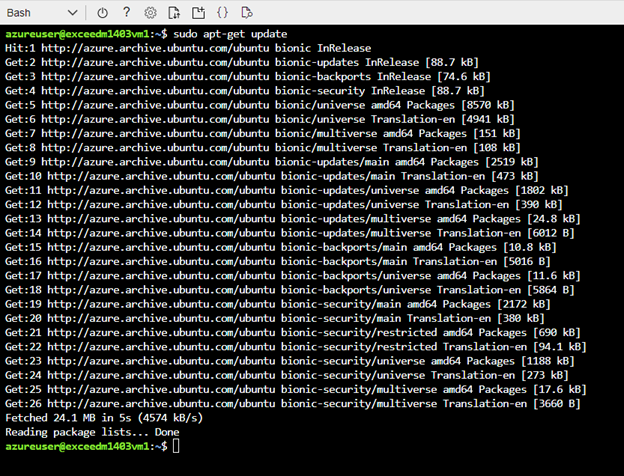
- Run the following commands to add and install VSCode (whenever you are prompted for confirmation, type y and press the Enter key):
CodeCopy
sudo apt-get install wget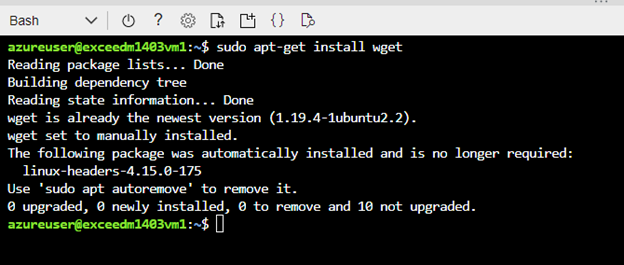
CodeCopy
wget -qO- https://packages.microsoft.com/keys/microsoft.asc | gpg --dearmor > packages.microsoft.gpgCodeCopy
sudo install -o root -g root -m 644 packages.microsoft.gpg /etc/apt/trusted.gpg.d/
sudo sh -c 'echo "deb [arch=amd64,arm64,armhf signed-by=/etc/apt/trusted.gpg.d/packages.microsoft.gpg] https://packages.microsoft.com/repos/code stable main" > /etc/apt/sources.list.d/vscode.list'

CodeCopy
rm -f packages.microsoft.gpgCodeCopy
sudo apt update
sudo apt install apt-transport-https
sudo apt install code

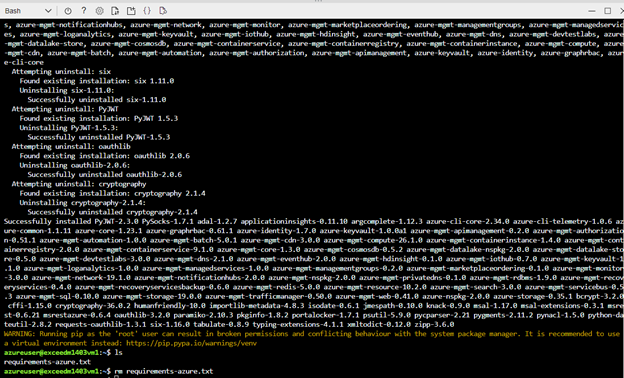
- Run the following to install Ansible and the required Azure modules (make sure that you run the commands individually, line by line, and, whenever you are prompted for confirmation, type y and press the Enter key):
CodeCopy
sudo apt install python3-pip
sudo -H pip3 install --upgrade pip
sudo -H pip3 install ansible[azure]
sudo apt-add-repository --yes --update ppa:ansible/ansible
sudo apt install ansible
sudo ansible-galaxy collection install azure.azcollection
curl -O https://raw.githubusercontent.com/ansible-collections/azure/dev/requirements-azure.txt
sudo pip3 install -r requirements-azure.txt
rm requirements-azure.txt
Note: Disregard any warnings. If you encounter any errors, rerun the commands.
- Run the following to install the dnspython package to allow the Ansible playbooks to verify DNS names before deployment:
CodeCopy
sudo -H pip3 install dnspython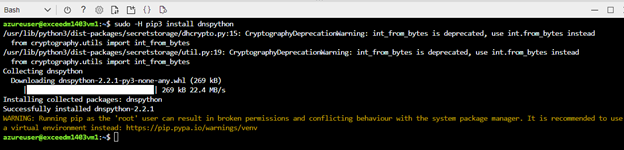
- In the Bash session in the Cloud Shell pane, within the SSH session to the newly deployed Azure VM, run the following to install the jq JSON parsing tool (when prompted, type y and press the Enter key):
CodeCopy
sudo apt install jq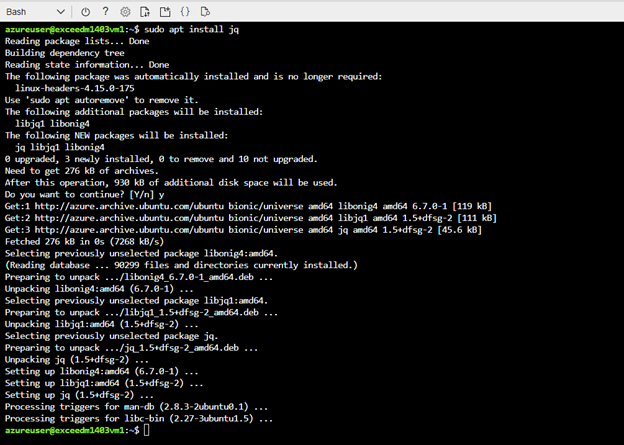
- Run the following to install Azure CLI:
CodeCopy
curl -sL https://aka.ms/InstallAzureCLIDeb | sudo bash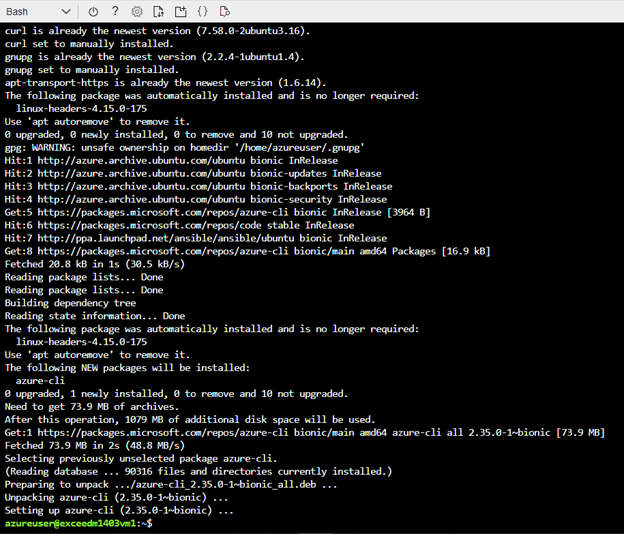
Task 3: Download Ansible configuration and sample playbook files
In this task, you will download from GitHub the Ansible configuration repository along with the sample lab files.
- In the Bash session in the Cloud Shell pane, within the SSH session to the newly deployed Azure VM, run the following to ensure that git is installed:
CodeCopy
sudo apt install git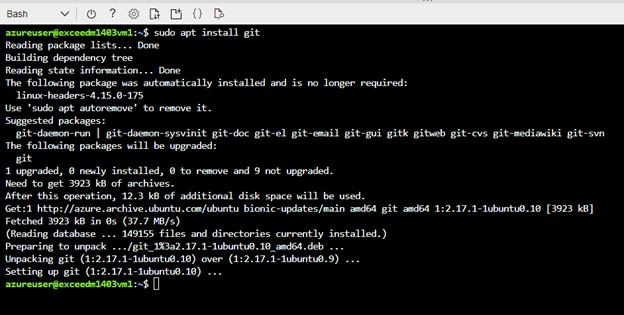
- Run the following to clone the PartsUnlimitedMRP repo from GitHub:
CodeCopy
git clone https://github.com/Microsoft/PartsUnlimitedMRP.gitNote: This repository contains playbooks for creating a wide range of resources, some of which we will use in the lab.

Task 4: Create and configure Azure Active Directory managed identity
In this task, you will generate an Azure AD managed identity in order to facilitate non-interactive authentication of Ansible, which is necessary to access Azure resources. You will also assign to the managed identity the Contributor role on the resource group you created in the previous task.
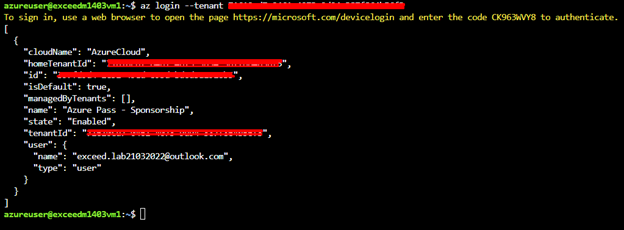
- In the Bash session in the Cloud Shell pane, within the SSH session to the newly deployed Azure VM, run the following to sign in to the Azure AD tenant associated with your Azure subscription:
CodeCopy
az loginNote: If the command fails, rerun the installation of Azure CLI.
- Note the code displayed in the output of the previous command and switch to your lab computer. From your lab computer, open another tab in the browser window displaying the Azure portal, navigate to the Microsoft Device Login page and, when prompted, enter the code and select Next.
- When prompted, sign in with credentials you are using in this lab and close the browser tab.
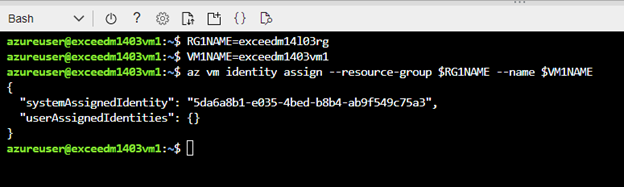
- Switch back to the Bash session in the Cloud Shell pane. Within the SSH session to the Azure VM configured as the Ansible control node, run the following to generate a system assigned managed identity:
CodeCopy
RG1NAME=exceedm14l03rg
VM1NAME=exceedm1403vm1
az vm identity assign --resource-group $RG1NAME --name $VM1NAME
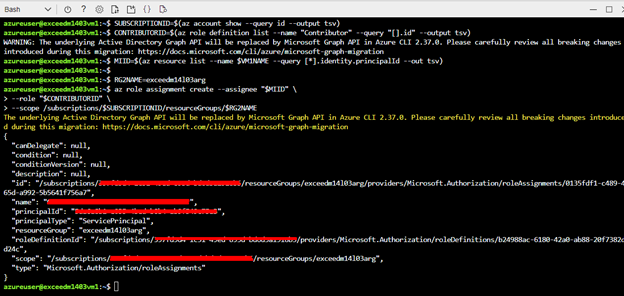
- Run the following to identify the value of your subscription by running:
CodeCopy
SUBSCRIPTIONID=$(az account show --query id --output tsv)- Run the following to retrieve the value of the ID property of the built-in Azure Role Based Access Control Contributor role:
CodeCopy
CONTRIBUTORID=$(az role definition list --name "Contributor" --query "[].id" --output tsv)- Run the following to assign the Contributor role on the resource group you created earlier in this lab:
CodeCopy
MIID=$(az resource list --name $VM1NAME --query [*].identity.principalId --out tsv)

RG2NAME=exceedm14l03arg
az role assignment create --assignee "$MIID" \
--role "$CONTRIBUTORID" \
--scope /subscriptions/$SUBSCRIPTIONID/resourceGroups/$RG2NAME
Task 5: Configure SSH for use with Ansible
In this task, you will configure SSH for use with Ansible.
- In the Bash session in the Cloud Shell pane, within the SSH session to the newly deployed Azure VM, run the following to generate the key pair (when prompted, press the Enter key three times to accept the default values of the locations of the files and not to set the passphrase):
CodeCopy
ssh-keygen -t rsa
- Run the following to grant read, write, and execute permissions on the .ssh folder hosting the private key:
CodeCopy
chmod 755 ~/.ssh- Run the following to create as well as set read and write permissions on the authorized_keys file.
CodeCopy
touch ~/.ssh/authorized_keys
chmod 644 ~/.ssh/authorized_keys
Note: By providing keys included in this file, you are allowed access without having to provide a password.
- Run the following to add the password to the authorized_keys file:
CodeCopy
ssh-copy-id azureuser@127.0.0.1When prompted, type yes and enter the password Pa55w.rd1234 for the azureuser user account you specified when deploying the third Azure VM earlier in this lab.

- Run the following to verify that you are not prompted for password:
CodeCopy
ssh 127.0.0.1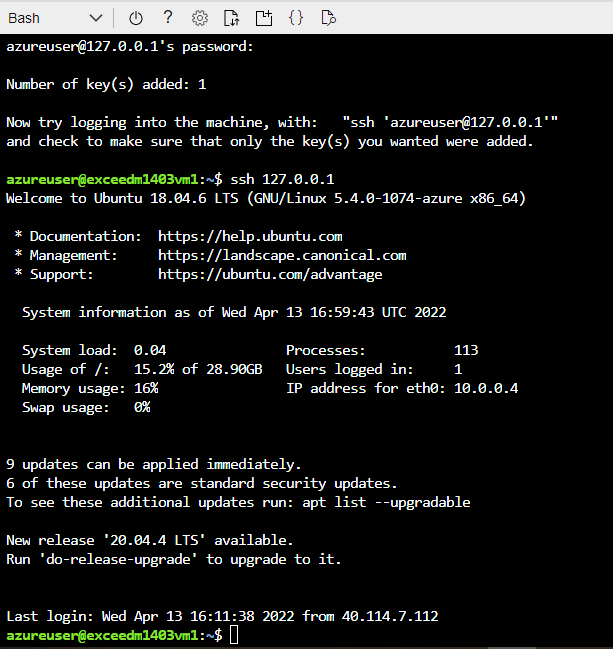
- Type exit and press the Enter key to terminate the loopback connection you just established.
Note: Establishing passwordless SSH authentication is a critical step for setting up your Ansible environment.
Task 6: Create a web server Azure VM by using an Ansible playbook
In this task, you will create an Azure VM hosting a web server by using an Ansible playbook.
Note: Now that we have Ansible up and running in the control Azure VM, we can deploy our first playbook in order to create and configure a managed Azure VM. Before deploying the sample playbook, you need to replace the public SSH key included in its content with the key you generated in the previous task.
- In the Bash session in the Cloud Shell pane, within the SSH session to the Azure VM configured as the Ansible control node, run the following to identify the locally stored public key which you generated in the previous task:
CodeCopy
cat ~/.ssh/id_rsa.pubRecord the output, including the username at the end of the output string.

- Run the following to open the new_vm_web.yml file in the Code text editor:
CodeCopy
code ~/PartsUnlimitedMRP/Labfiles/AZ-400T05-ImplemntgAppInfra/Labfiles/ansible/new_vm_web.yml- In the Code editor, if needed, change the name of the region in the dnsname: ‘.westeurope.cloudapp.azure.com’ entry to the name of the Azure region you are targeting for deployment.
Note: Make sure that this region matches the Azure region where you created the exceedm14l03rg resource group.
- In the Code editor, change the value of vm_size entry from Standard_A0 to Standard_DS1_v2.
- In the Code editor, locate the SSH string towards the end of the file, in the key_data entry, delete the existing key value and replace it with the key value that you recorded earlier in this task.
Note: Make sure that the value of admin_username entry that is included in the file matches the user name you used to sign in to the Azure VM hosting the Ansible control system (azureuser). The same user name must be used in the path entry of ssh_public_keys section.
- Within the Code editor interface, click the … on the top right, and select Save.
Note: Next, you will deploy an Azure VM into the resource group created at the beginning of the lab. Use the following values for the deployment:
| Setting | Value |
| Resource group | exceedm14l03arg |
| Virtual network | exceedm1403aVNET |
| Subnet | exceedm1403aSubnet |
Note: The variables can be defined inside of playbooks or can be entered at runtime when invoking the ansible-playbook command by including the –extra-vars option. As the VM name, use only up to 15 lower case letters and numbers (no hyphens, underscore signs or upper case letters) and ensure it is globally unique, since the same name is used to generate the storage account and the DNS name for the public IP address associated with the corresponding Azure VM.
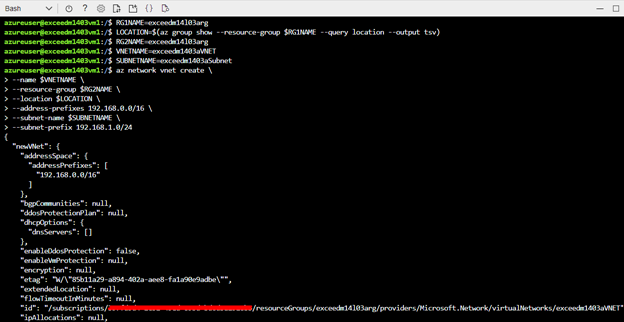
- Run the following to create the virtual network and its subnet into which you will deploy an Azure VM by using an ansible playbook:
CodeCopy
RG1NAME=exceedm14l03arg
LOCATION=$(az group show --resource-group $RG1NAME --query location --output tsv)
RG2NAME=exceedm14l03arg
VNETNAME=exceedm1403aVNET
SUBNETNAME=exceedm1403aSubnet
az network vnet create \
--name $VNETNAME \
--resource-group $RG2NAME \
--location $LOCATION \
--address-prefixes 192.168.0.0/16 \
--subnet-name $SUBNETNAME \
--subnet-prefix 192.168.1.0/24
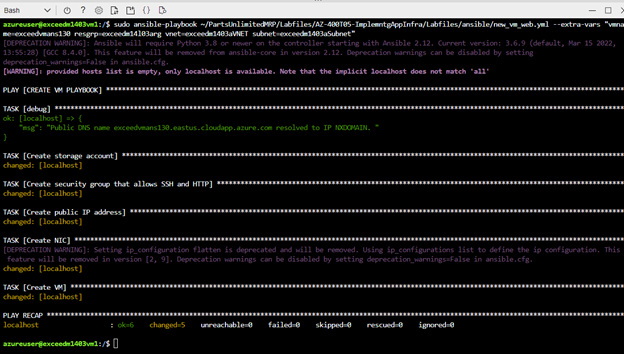
- Run the following to deploy the sample ansible playbook that provisions an Azure VM (make sure to replace the <VM_name> with the unique VM name you chose):
CodeCopy
sudo ansible-playbook ~/PartsUnlimitedMRP/Labfiles/AZ-400T05-ImplemntgAppInfra/Labfiles/ansible/new_vm_web.yml --extra-vars "vmname=exceedvmans130 resgrp=exceedm14l03arg vnet=exceedm1403aVNET subnet=exceedm1403aSubnet"Note: Disregard deprecation warning regarding the setting ip_configuration.
Note: You might receive the following errors if you enter an existing or an invalid VM name:
- fatal: [localhost]: FAILED! => {“changed”: false, “failed”: true, “msg”: “The storage account named storageaccountname is already taken. – Reason.already_exists”}. To resolve this, use another name for the Azure VM, since the one you used is not globally unique.
- fatal: [localhost]: FAILED! => {“changed”: false, “failed”: true, “msg”: “Error creating or updating your-vm-name – Azure Error: InvalidDomainNameLabel\nMessage: The domain name label for your VM is invalid. It must conform to the following regular expression: ^[a-z][a-z0-9-]{1,61}[a-z0-9]$.”}. To resolve this issue, use another name for the Azure VM following the required naming convention.
Note: Wait for the deployment to complete. This might take about 3 minutes.
- Run the following to create a new file named myazure_rm.yml and open it in the Code text editor:
CodeCopy
code ./myazure_rm.yml- Within the Code editor interface, paste the following content:
CodeCopy
plugin: azure_rm
include_vm_resource_groups:
- exceedm14l03arg
auth_source: msi

keyed_groups:
- prefix: tag
  key: tags
- Within the Code editor interface, click the … on the top right, and select Save.
- Back in the Bash session in the Cloud Shell pane, within the SSH session to the Azure VM configured as the Ansible control node, run the following to perform a ping test, verifying that the dynamic inventory file includes the newly deployed Azure VM:
CodeCopy
sudo ansible --user azureuser --private-key=/home/azureuser/.ssh/id_rsa all -m ping -i ./myazure_rm.yml- When prompted whether you want to continue connecting, type yes and press the Enter key.
Note: The output should resemble the following:
CodeCopy
exceedm1403vm2_5444 | SUCCESS => {
    "ansible_facts": {
        "discovered_interpreter_python": "/usr/bin/python"
    },
    "changed": false,
    "ping": "pong"
}
Note: The first time you run the command you will have to acknowledge the authenticity of the target VMs, by typing yes and pressing the Enter key.

Task 7: Configure an Azure VM by using an Ansible playbook
In this task, you will run another Ansible playbook, this time to configure the newly deployed Azure VM. You will use a playbook that installs a software package httpd and downloads an HTML page from a GitHub repository. Once this is completed, you will have a fully functional Web server.
Note: We will use the sample playbook ~/PartsUnlimitedMRP/Labfiles/AZ-400T05-ImplemntgAppInfra/Labfiles/ansible/httpd.yml. We will use the variable vmname in order to modify the hosts parameter of the playbook that defines which host (out of the ones returned by the dynamic inventory script) the playbook will target.
- In the Bash session in the Cloud Shell pane, within the SSH session to the Azure VM configured as the Ansible control node, run the following to identify the public IP address of the newly deployed Azure VM (make sure to replace the <VM_name> placeholder with the name you assigned to the newly provisioned Azure VM):
CodeCopy
RGNAME='exceedm14l03arg'
VMNAME='exceedvmans130'
PIP=$(az vm show --show-details --resource-group $RGNAME --name $VMNAME --query publicIps --output tsv)

- Run the following to verify that the newly deployed Azure VM is currently not running any web service (where the <IP_address> placeholder represents the public IP address assigned to the network adapter of the Azure VM you provisioned in the previous task):
CodeCopy
curl http://$PIPNote: Verify that the response is in the format curl: (7) Failed to connect to 52.186.157.26 port 80: Connection refused.

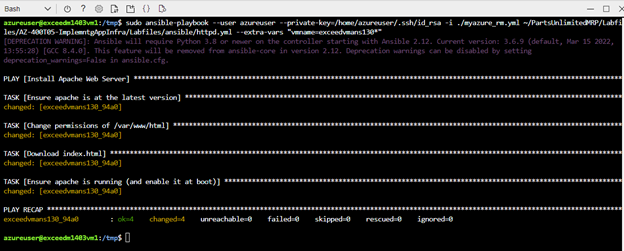
- Run the following to install the HTTP service by using the Ansible playbook (where the <VM_name> placeholder represents the name of the VM you provisioned in the previous task):
CodeCopy
sudo ansible-playbook --user azureuser --private-key=/home/azureuser/.ssh/id_rsa -i ./myazure_rm.yml ~/PartsUnlimitedMRP/Labfiles/AZ-400T05-ImplemntgAppInfra/Labfiles/ansible/httpd.yml --extra-vars "vmname=exceedvmans130*"Note: Make sure to include the trailing asterisk (*) following the Azure VM name.
Note: Wait for the installation to complete. This should take less than a minute.
- Once the installation completes, run the following to verify that the newly deployed Azure VM is now running a web service (where the <IP_address> placeholder represents the public IP address assigned to the network adapter of the Azure VM you provisioned in the previous task):
CodeCopy
curl http://$PIPNote: The output should have the following content:
CodeCopy
<!DOCTYPE html>
 <html lang="en">
     <head>
         <meta charset="utf-8">
         <title>Hello World</title>
     </head>
     <body>
         <h1>Hello World</h1>
         <p>
             <br>This is a test page
             <br>This is a test page
             <br>This is a test page
         </p>
     </body>
 </html>

Review
In this lab, you learned how to deploy, configure, and manage Azure resources by using Ansible.
Reminder: Don’t forget to delete or shutdown all unused Azure resources after your labs for cost saving
Leave a Reply