In this lab you will learn how to create your first security group, allow SSH connection from your public IP address, create your first EC2 instance and connect to your EC2 instance with your SSH client PuTTY
Prerequisite: Having a valid AWS Account (Follow the step in this link to create an AWS Account) How to Sign Up for a new Amazon Web Services Account
Open the page: https://aws.amazon.com/account/
Create a security group and open port 22
Type and select VPC in the search box
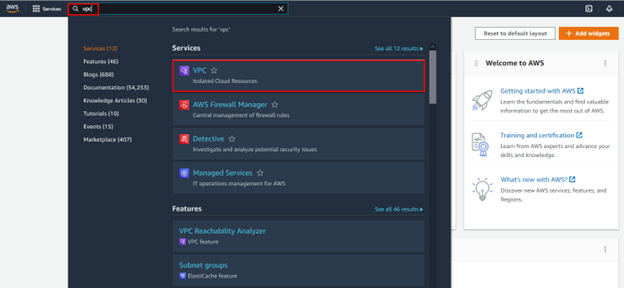
On the menu select Security groups under Security

Click Create Security group
Give your security group a name and description
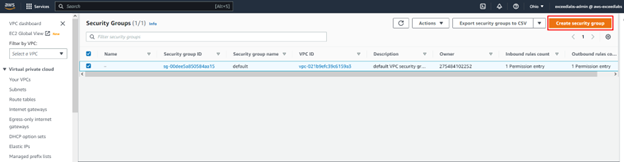
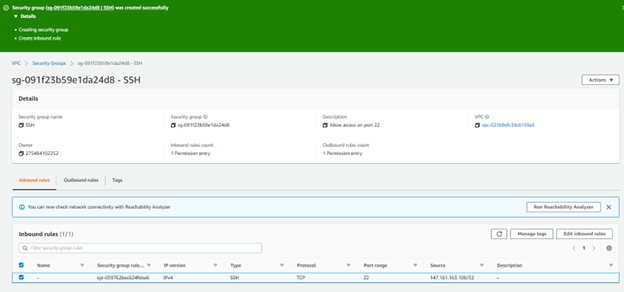
Select the default VPC / Click Add rule / Select SSH / Source My IP / Click Create Security Group

Confirm your new Security Group is create
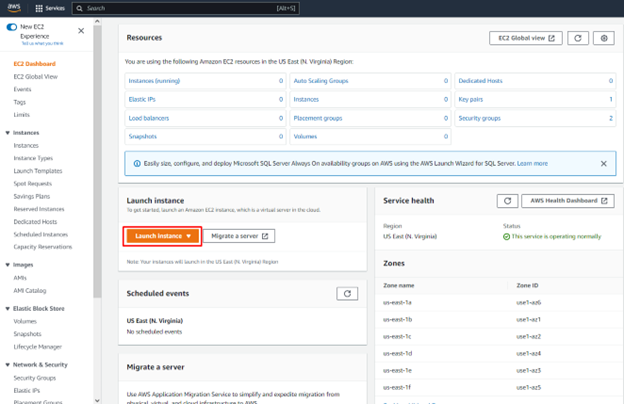
Launch an EC2 instance
Type and select EC2 in your search box
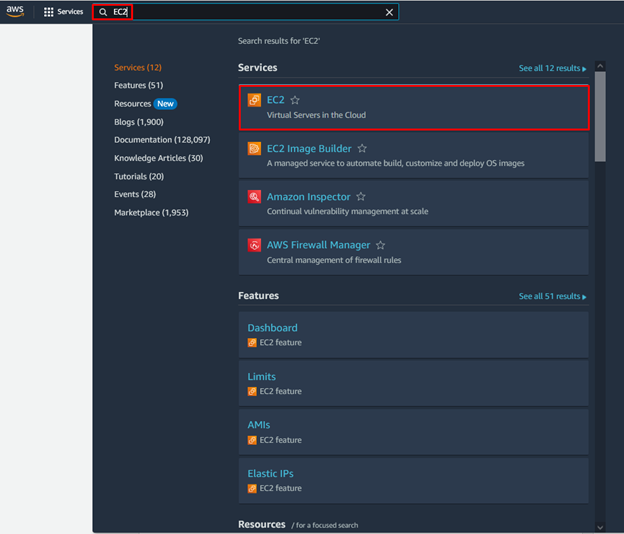
In the dashboard select Launch instance
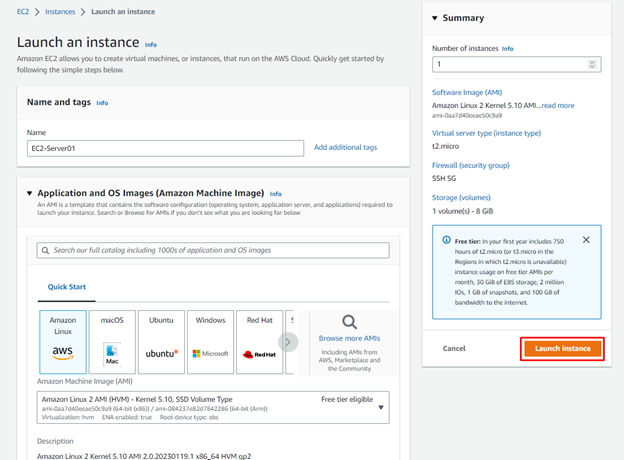
Enter the name of your EC2 instance / Select the Key pair create on the previous labs / Select the new Security group / Click Launch instance
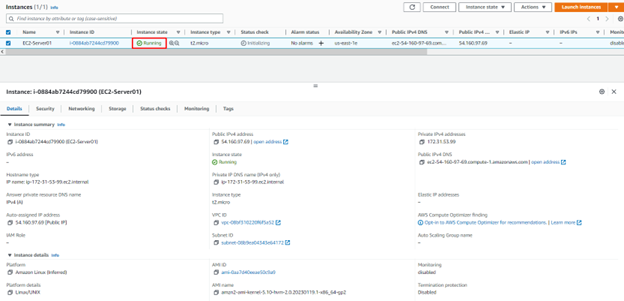
Confirm you new EC2 instance is up and running
Download and install SSH Client PuTTY in your computer
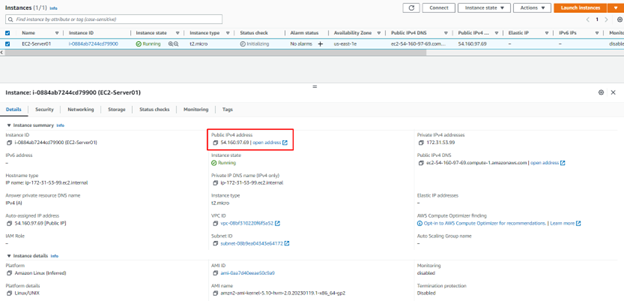
Copy the public IP address of the EC2 instance
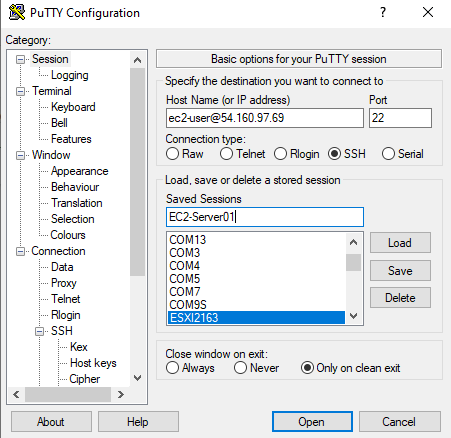
Launch SSH Client PuTTY
On Host Name enter ec2-user@your_public_IP address
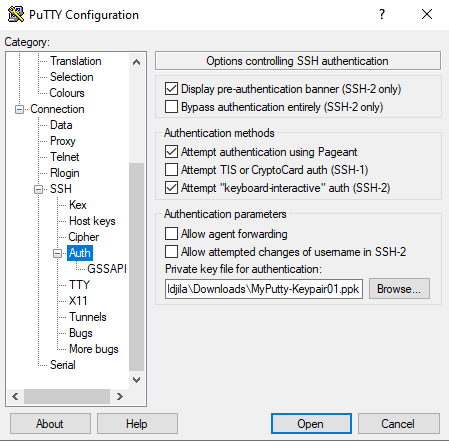
In the PuTTY Client select SSH / Auth / Browse and Load the Key pair created in the previous labs
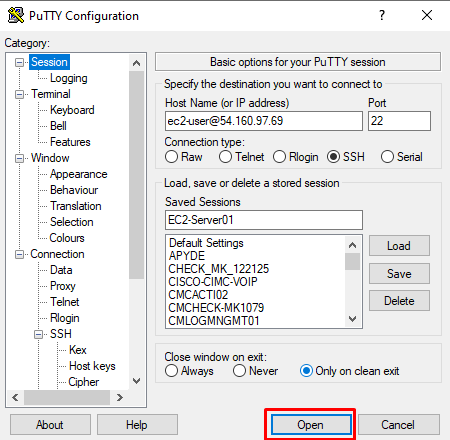
Click on Open
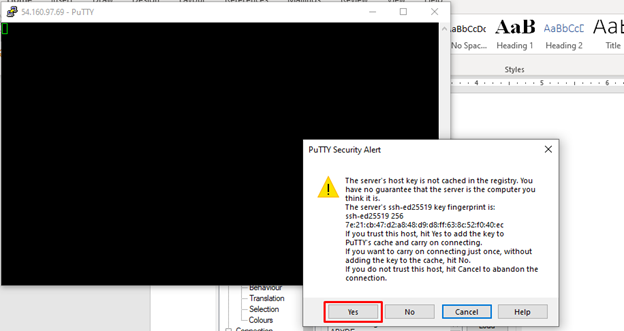
Click on Yes to Accept and trust the host
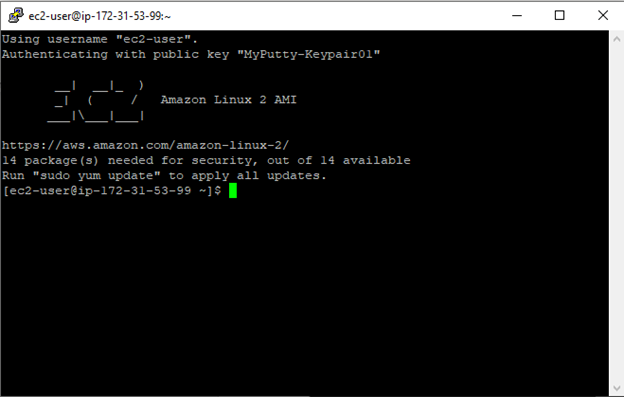
Confirm you successfully access your EC2 instance
Cleanup your lab by terminating the EC2 instance
Select your EC2 instance / Under Instance state / Click on Terminate instance

Confirm you wan to terminate your instance / Click Terminate

Confirm the instance is terminated in the instance state

Credit: Azeez
Leave a Reply