Data Center migrations are typically accomplished via one of the following approach. Interconnection playing a key essential and enabling factor in each of them.
- Lift and Shift
- Hybrid Cloud Architecture
- Large Data import
- Cloud-to-Cloud Migration
In this post we will explore the Lift and Shift approach to migrate a workload from Hyper-V to Microsoft Azure Cloud Solution. This labs are a replay of exercises done during my AZ-304-Microsoft-Azure-Architect-Design official course and are intended to guide you step by step to accomplish successfully this migration.
Prerequisites for this labs : Azure Account / Download Labs Files here
After completing this lab, you will be able to:
- Prepare Hyper-V for assessment and migration by using Azure Migrate
- Assess Hyper-V for migration by using Azure Migrate
- Migrate Hyper-V VMs by using Azure Migrate
Lab 0: Prepare the lab environment
The main tasks for this exercise are as follows:
- Deploy an Azure VM by using an Azure Resource Manager QuickStart template
- Configure nested virtualization in the Azure VM
Task 1: Deploy an Azure VM by using an Azure Resource Manager QuickStart template
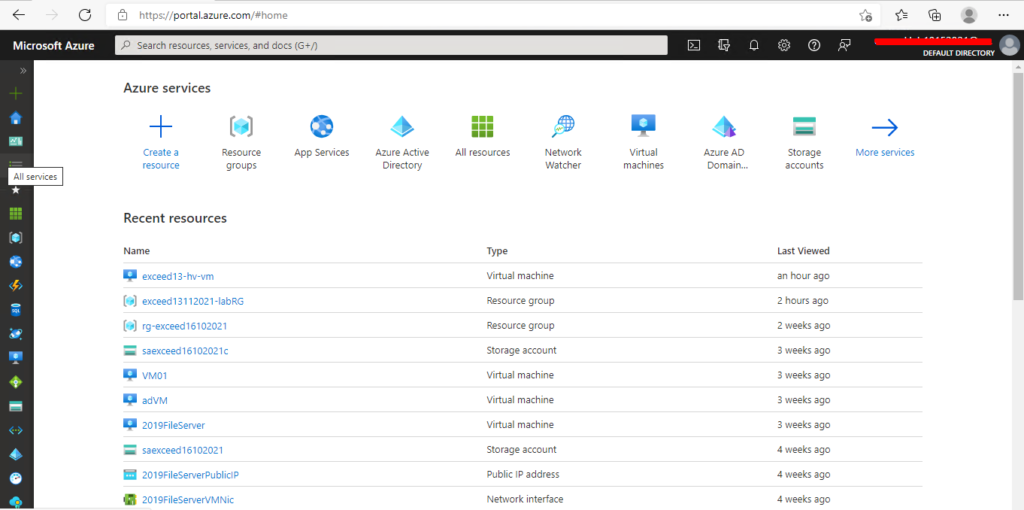
- From your lab computer, start a web browser, navigate to the Azure portal – portal.azure.com, and sign in by providing credentials of a user account with the Owner role in the subscription you will be using in this lab.
- In the Azure portal, open Cloud Shell pane by selecting on the toolbar icon directly to the right of the search textbox.
- If prompted to select either Bash or PowerShell, select PowerShell.
Note: If this is the first time you are starting Cloud Shell and you are presented with the You have no storage mounted message, select the subscription you are using in this lab, and select Create storage.
- In the toolbar of the Cloud Shell pane, select the Upload/Download files icon, in the drop-down menu select Upload, and upload the file \\Azurelabs04\azuredeploy30308suba.json into the Cloud Shell home directory.
- From the Cloud Shell, run the following command to set a variable named location with an Azure Region near you (replace the ‘<Azure region>’ placeholder with the name of the Azure region that is available for deployment of Azure VMs in your subscription and which is closest to the location of your lab computer, for example ‘eastus’):
$location = 'eastus'Note: To identify Azure regions where you can provision Azure VMs, refer to https://azure.microsoft.com/en-us/regions/offers/
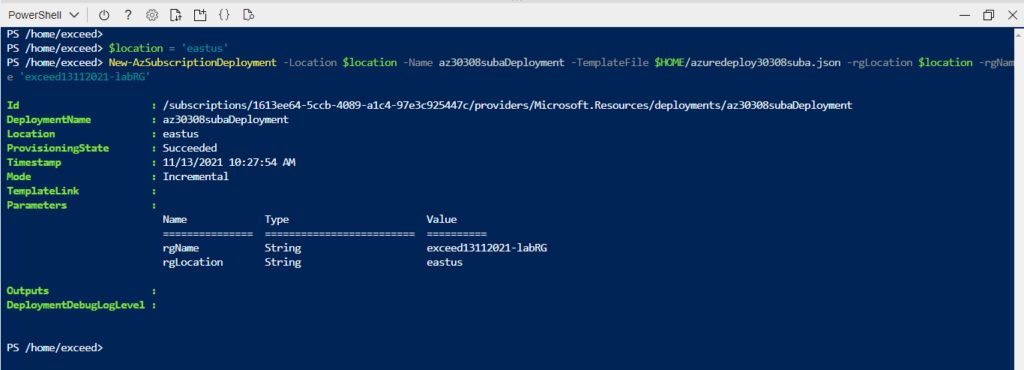
· From the Cloud Shell pane, run the following to create a resource group:
code
New-AzSubscriptionDeployment -Location $location -Name az30308subaDeployment -TemplateFile $HOME/azuredeploy30308suba.json -rgLocation $location -rgName 'exceed13112021-labRG'
· In the Azure portal, close the Cloud Shell pane.
· From your lab computer, open another browser tab, navigate to the 301-nested-vms-in-virtual-network Azure QuickStart template and select Deploy to Azure (you find the button Deploy to Azure in the README.md file after the list of the resources created by the template) . This will automatically redirect the browser to the Hyper-V Host Virtual Machine with nested VMs blade in the Azure portal.
code
https://github.com/Azure/azure-quickstart-templates/tree/master/demos/nested-vms-in-virtual-network- On the Hyper-V Host Virtual Machine with nested VMs blade in the Azure portal, specify the following settings (leave others with their default values):
| Setting | Value |
| Subscription | the name of the Azure subscription you are using in this lab |
| Resource group | exceed13112021-labRG |
| Host Public IP Address Name | exceed13112021-hv-vm-pip |
| Virtual Network Name | exceed13112021-hv-vnet |
| Host Network Interface1Name | exceed13112021-hv-vm-nic1 |
| Host Network Interface2Name | exceed13112021-hv-vm-nic2 |
| Host Virtual Machine Name | exceed13-hv-vm |
| Host Admin Username | exceedStudent |
| Host Admin Password | Pa55w.rd1234 |
- On the Hyper-V Host Virtual Machine with nested VMs blade, select Review + create and then select Create.

Note: Wait for the deployment to complete. The deployment might take about 10 minutes.
Task 2: Configure nested virtualization in the Azure VM
- In the Azure portal, search for and select Virtual machines and, on the Virtual machines blade, select exceed13-hv-vm.
- On the exceed13-hv-vm blade, select Networking.
| On the **exceed13112021-hv-vm | Networking** blade, ensure that the exceed13112021-hv-vm-nic1 tab is selected and then select Add inbound port rule. |
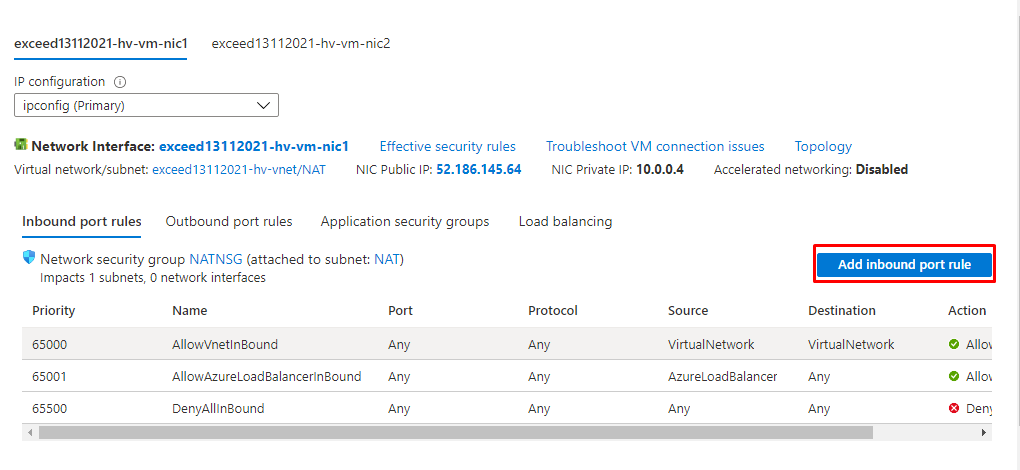
Note: Make sure that you modify the settings of exceed13112021-hv-vm-nic1, which has the public IP address assigned to it.
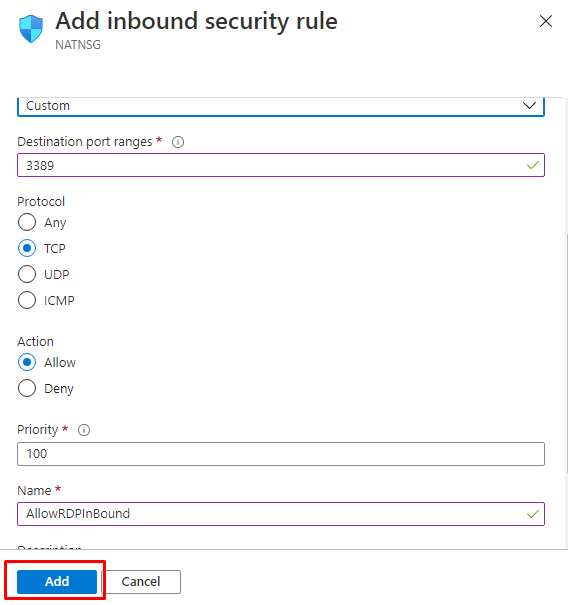
- On the Add inbound security rule blade, specify the following settings (leave others with their default values) and select Add:
| Setting | Value |
| Destination port ranges | 3389 |
| Protocol | Any |
| Name | AllowRDPInBound |
- On the exceed13-hv-vm blade, select Overview.
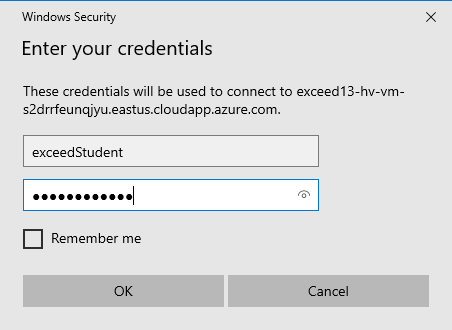
- On the exceed13-hv-vm blade, select Connect, in the drop-down menu, select RDP, and then click Download RDP File.

- When prompted, click Connect and sign in with the following credentials:
| Setting | Value |
| User Name | exceedStudent |
| Password | Pa55w.rd1234 |
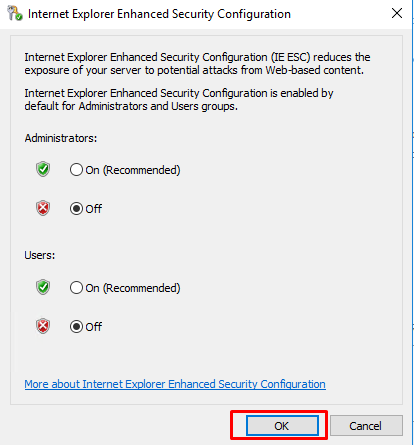
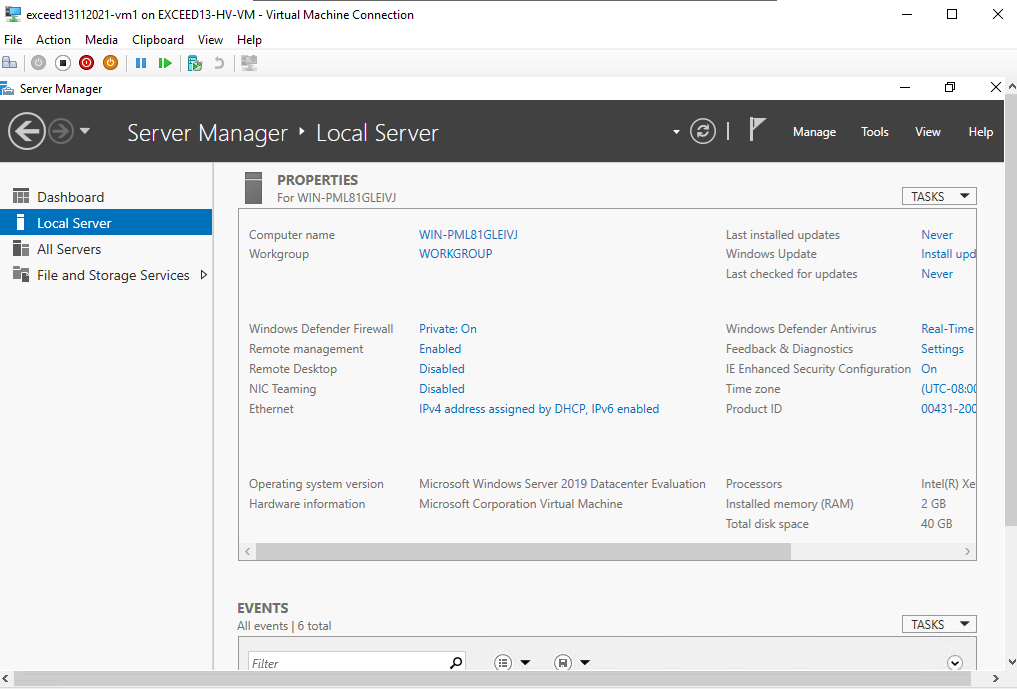
Within the Remote Desktop session to exceed13-hv-vm, in the Server Manager window, click Local Server, click the On link next to the IE Enhanced Security Configuration label, and, in the IE Enhanced Security Configuration dialog box, select both Off options and then click OK.
- From the Remote Desktop session, open File Explorer and navigate to the F:. Create a folder named VHDs.
- Within the Remote Desktop session to exceed13-hv-vm, start Internet Explorer, navigate to the download page of Microsoft Edge, download Microsoft Edge installer and perform the installation.
- Within the Remote Desktop session to exceed13-hv-vm, in Microsoft Edge, browse to Windows Server Evaluations, and download the Windows Server 2019 VHD file to the F:\VHDs folder.
code
https://www.microsoft.com/en-us/evalcenter/evaluate-windows-server-2019Note: The evaluations page will ask for personal information to complete the download. Choose ‘United Kingdom’ or another country to be able to opt-out of notifications.
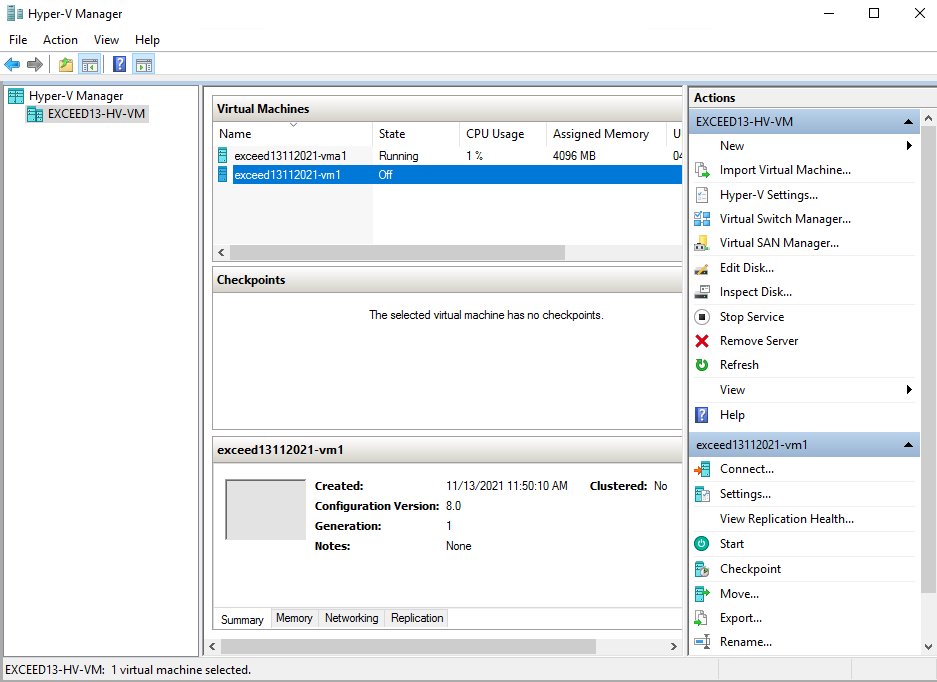
· Within the Remote Desktop session to exceed13-hv-vm, click Start, and then click Windows Administrative Tools, then launch Hyper-V Manager.
· In the Hyper-V Manager console, select the exceed13112021-hv-vm node.
· Click New and, in the cascading menu, select Virtual Machine. This will start the New Virtual Machine Wizard.
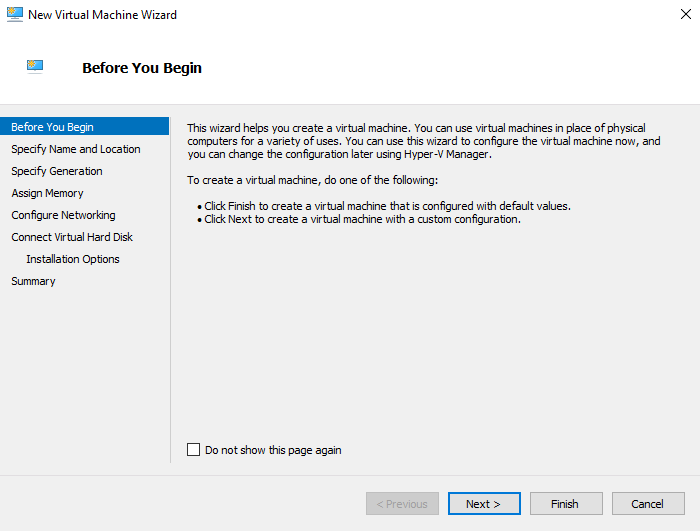
On the Before You Begin page of the New Virtual Machine Wizard, select Next >.
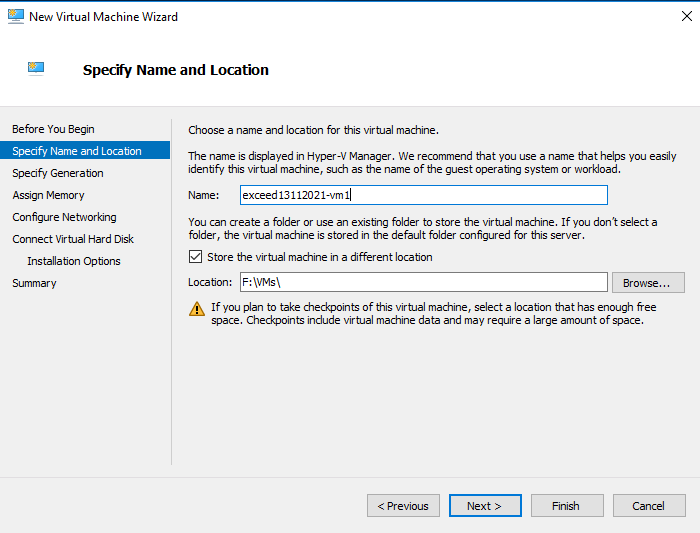
· On the Specify Name and Location page of the New Virtual Machine Wizard, specify the following settings and select Next >:
| Setting | Value |
| Name | exceed13112021-vm1 |
| Store the virtual machine in a different location | selected |
| Location | F:\VMs |
Note: Make sure to create the F:\VMs folder.
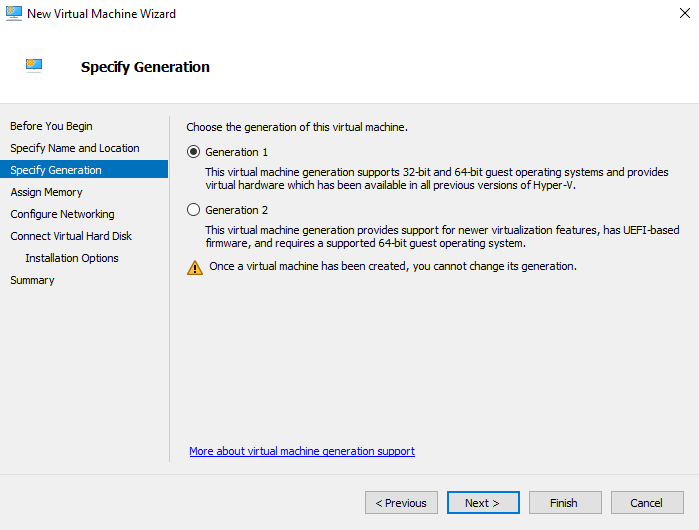
On the Specify Generation page of the New Virtual Machine Wizard, ensure that the Generation 1 option is selected and select Next >:
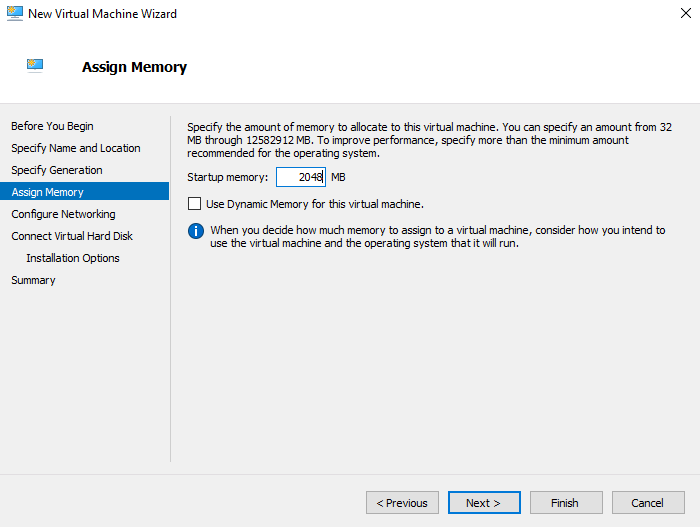
On the Assign Memory page of the New Virtual Machine Wizard, set Startup memory to 2048 and select Next >.
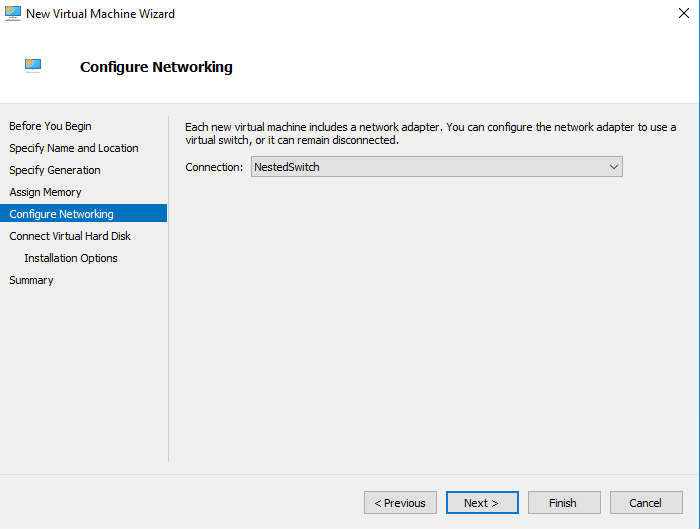
On the Configure Networking page of the New Virtual Machine Wizard, in the Connection drop-down list select NestedSwitch and select Next >.
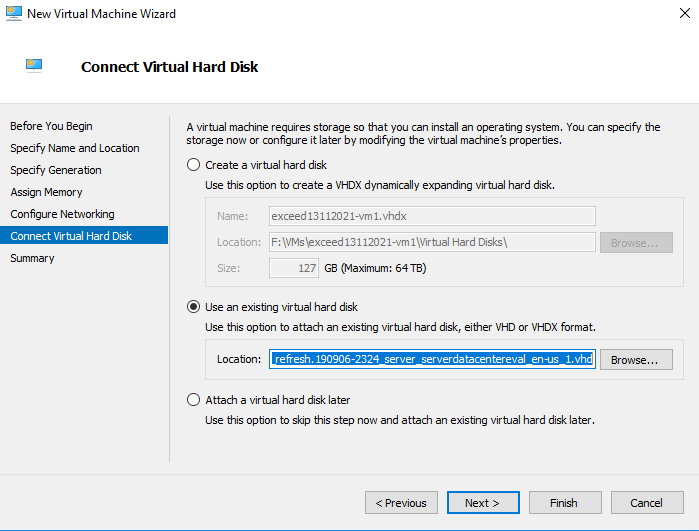
On the Connect Virtual Hard Disk page of the New Virtual Machine Wizard, select the option Use an existing virtual hard disk, set location to the VHD file you downloaded to the F:\VHDs folder, and select Next >.
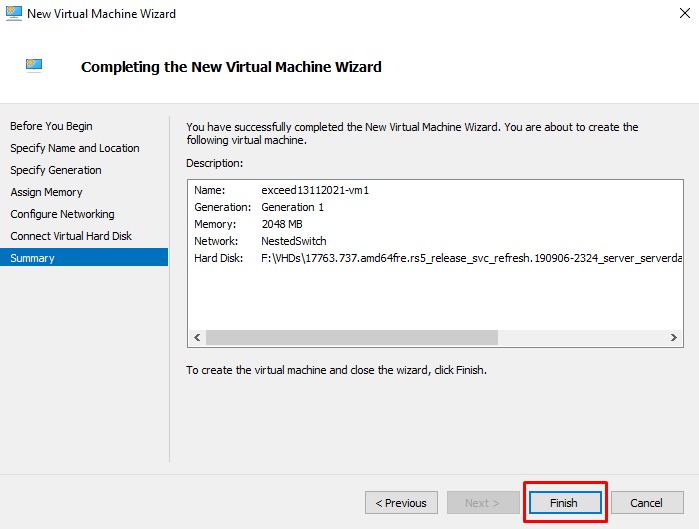
· On the Summary page of the New Virtual Machine Wizard, select Finish.
· In the Hyper-V Manager console, select the newly created virtual machine and select Start.
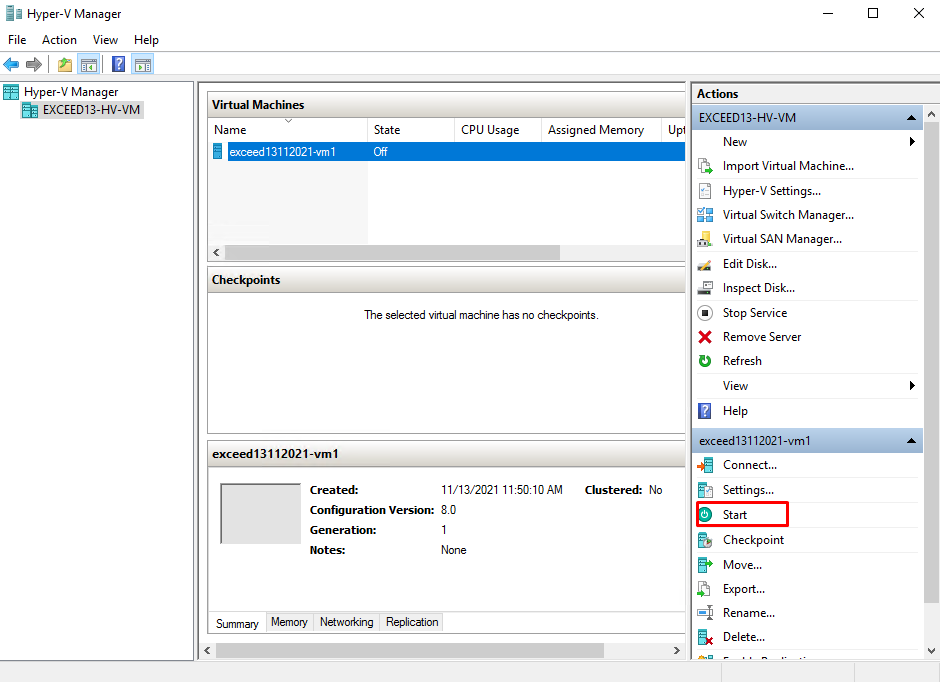
· In the Hyper-V Manager console, verify that the virtual machine is running and select Connect.

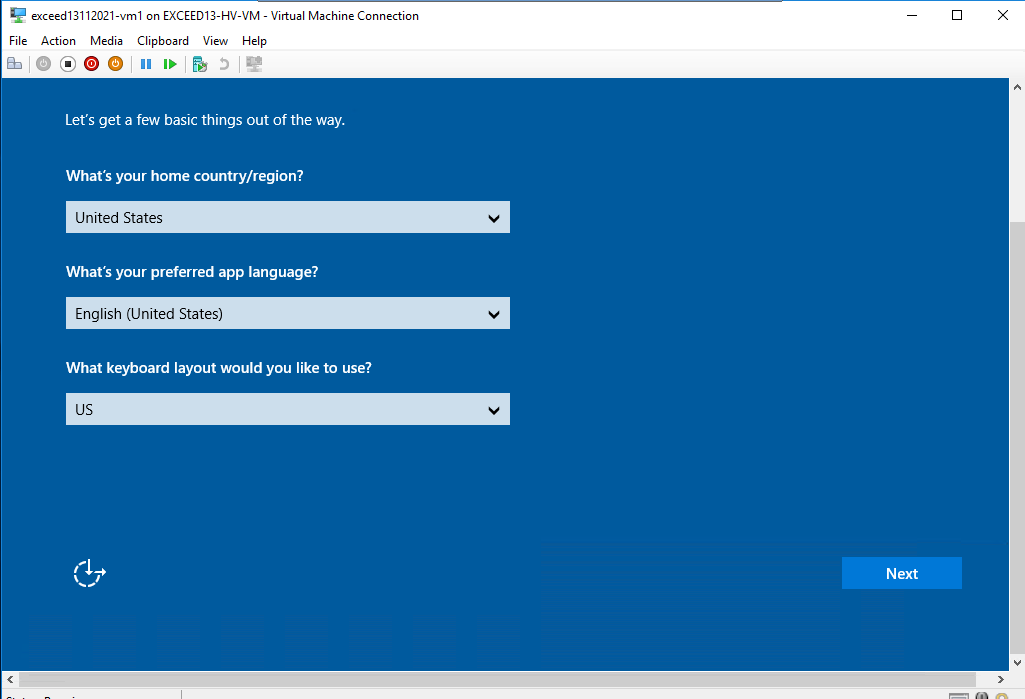
· In the Virtual Machine Connection window to exceed13112021-vm1, on the Hi there page, select Next.
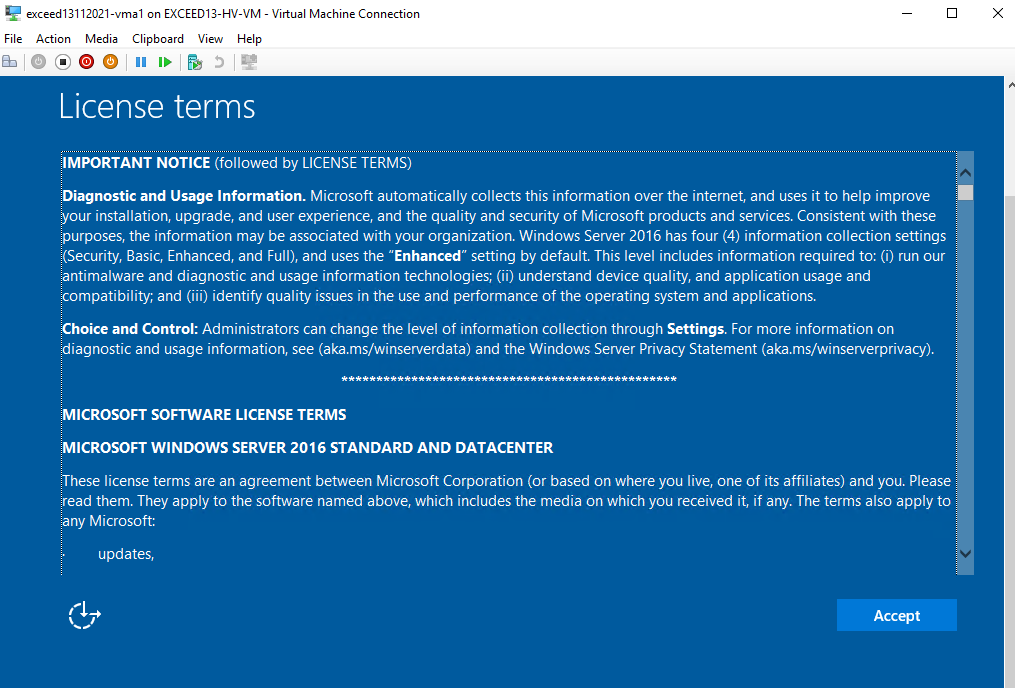
· In the Virtual Machine Connection window to exceed13112021-vm1, on the License terms page, select Accept.
· In the Virtual Machine Connection window to exceed13112021-vm1, on the Customize settings page, set the password of the built-in Administrator account to Pa55w.rd1234 and select Finish.

· In the Virtual Machine Connection window to exceed13112021-vm1, sign in by using the newly set password.
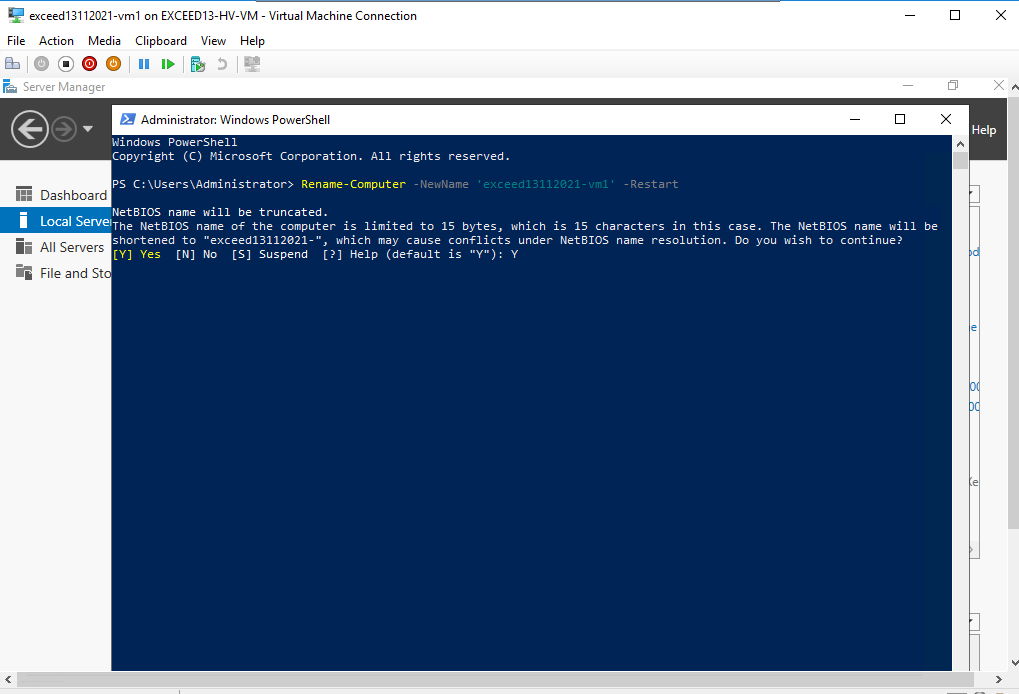
In the Virtual Machine Connection window to exceed13112021-vm1, start Windows PowerShell and, in the Administrator: Windows PowerShell window run the following to set the computer name.
code
Rename-Computer -NewName 'exceed13112021-vm1' -Restart
Select Y to continue
Lab 1: Prepare for assessment and migration by using Azure Migrate
The main tasks for this exercise are as follows:
- Configure Hyper-V environment
- Create an Azure Migrate project
- Implement the target Azure environment
Task 1: Configure Hyper-V environment
- Within the Remote Desktop session to exceed13112021-hv-vm, start Microsoft Edge, navigate to the Microsoft Download Center, and download the configuration PowerShell script to the F:.
code
https://aka.ms/migrate/script/hypervNote: The script performs the following tasks:
- Checks that you’re running the script on a supported PowerShell version.
- Verifies that you have administrative privileges on the Hyper-V host.
- Allows you to create a local user account that the Azure Migrate service uses to communicate with the Hyper-V host. This user account is added to Remote Management Users, Hyper-V Administrators and Performance Monitor Users groups on the Hyper-V host.
- Checks that the host is running a supported version of Hyper-V, and the Hyper-V role.
- Enables the WinRM service, and opens ports 5985 (HTTP) and 5986 (HTTPS) on the host. This is required for metadata collection.
- Enables PowerShell remoting on the host.
- Checks that the Hyper-V Integration Services is enabled on all VMs managed by the host.
- Enables CredSSP on the host if needed.
· Within the Remote Desktop session to exceed13112021-hv-vm, start Windows PowerShell ISE.
· In the Administrator: Windows PowerShell ISE window, in the console pane, run the following to remove the Zone.Identifier alternate data stream, which, in this case, indicates that the file was downloaded from the Internet.
code
Unblock-File -Path F:\MicrosoftAzureMigrate-Hyper-V.ps1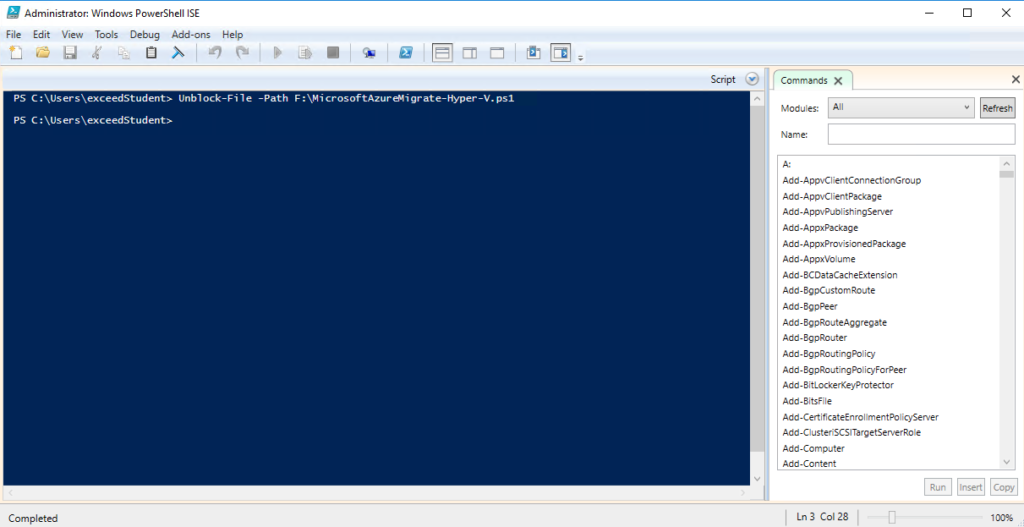
- In the Administrator: Windows PowerShell ISE window, open the MicrosoftAzureMigrate-Hyper-V.ps1 script residing in the F: folder and run it. When prompted for confirmation, press the Y key followed by the Enter key, with exception of the following prompts, in which case, type N followed by the Enter key:
- Do you use SMB share(s) to store the VHDs?
- Do you want to create non-administrator local user for Azure Migrate and Hyper-V Host communication?

Task 2: Create an Azure Migrate project
- Within the Remote Desktop session to exceed13-hv-vm, start Microsoft Edge, navigate to the Azure portal, and sign in by providing credentials of a user account with the Owner role in the subscription you will be using in this lab.
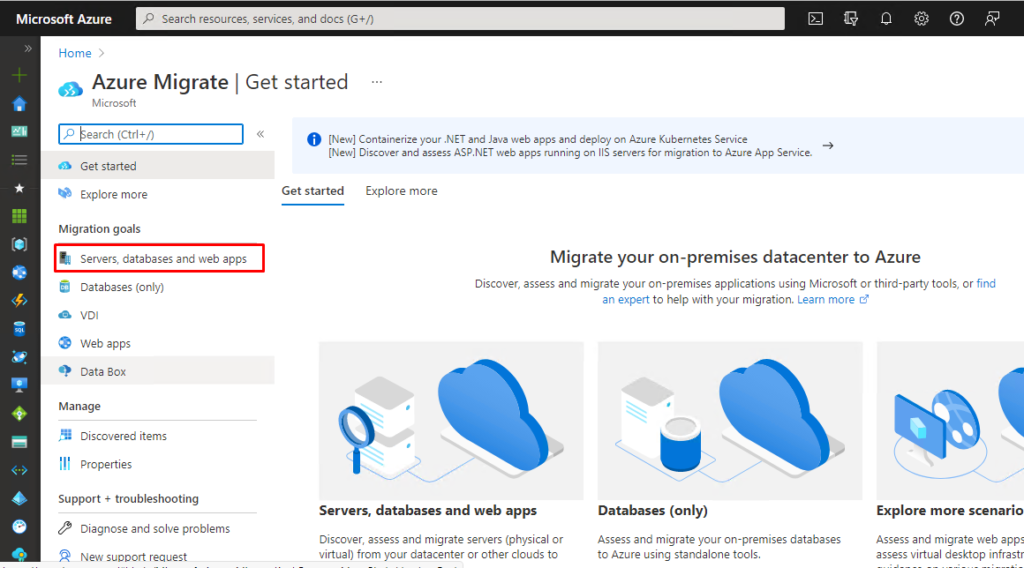
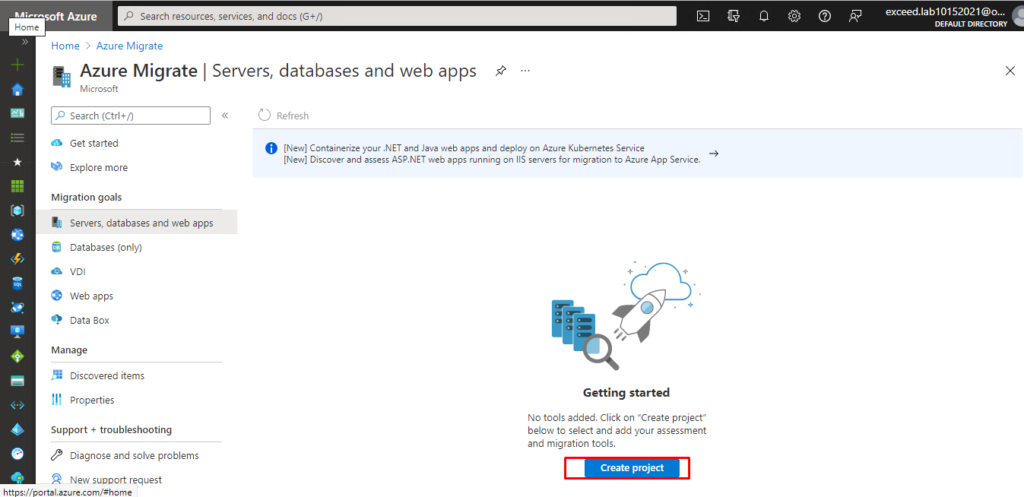
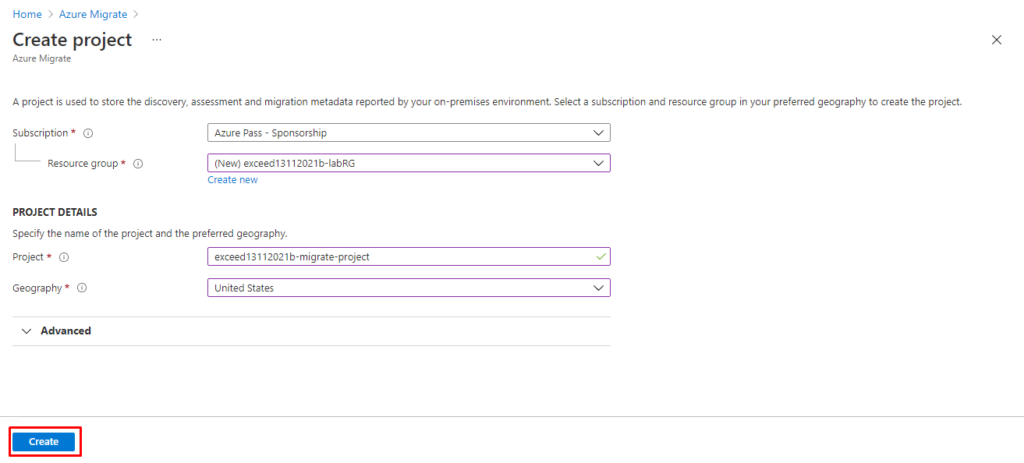
In the Azure portal, search for and select Azure Migrate, on the Azure Migrate blade, in the Migration goals section, select Windows, Linux and SQL Server and then select Create Project.
On the Azure Migrate blade, specify the following settings (leave others with their default values) and select Create
| Setting | Value |
| Subscription | the name of the Azure subscription you are using in this lab |
| Resource group | the name of a new resource group exceed13112021b-labRG |
| Migrate project | exceed13112021b-migrate-project |
| Geography | the name of your country or a geographical region |
Task 3: Implement the target Azure environment
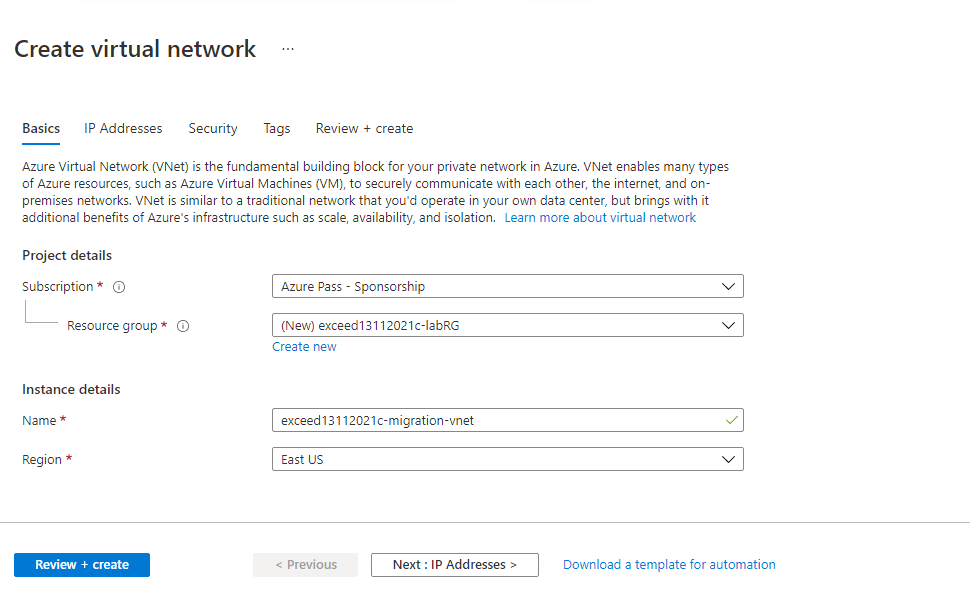
- In the Azure portal, search for and select Virtual networks and, on the Virtual networks blade, select + Add (or + Create) on the command bar.
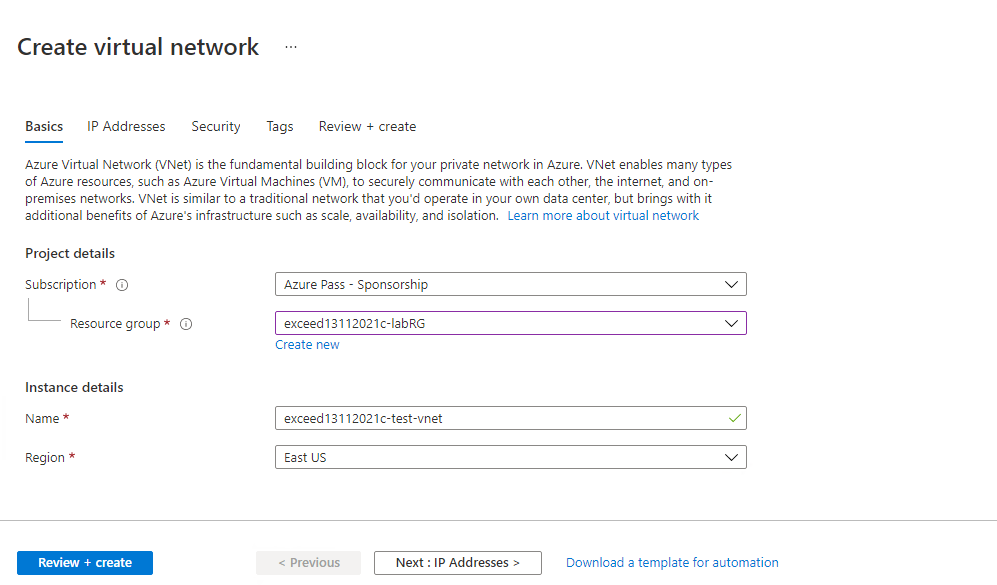
- On the Basics tab of the Create virtual network blade, specify the following settings (leave others with their default values) and select Next: IP Addresses:
| Setting | Value |
| Subscription | the name of the Azure subscription you are using in this lab |
| Resource group | the name of a new resource group exceed13112021c-labRG |
| Name | exceed13112021c-migration-vnet |
| Region | the name of the Azure region into which you deployed the virtual machine earlier in this lab |
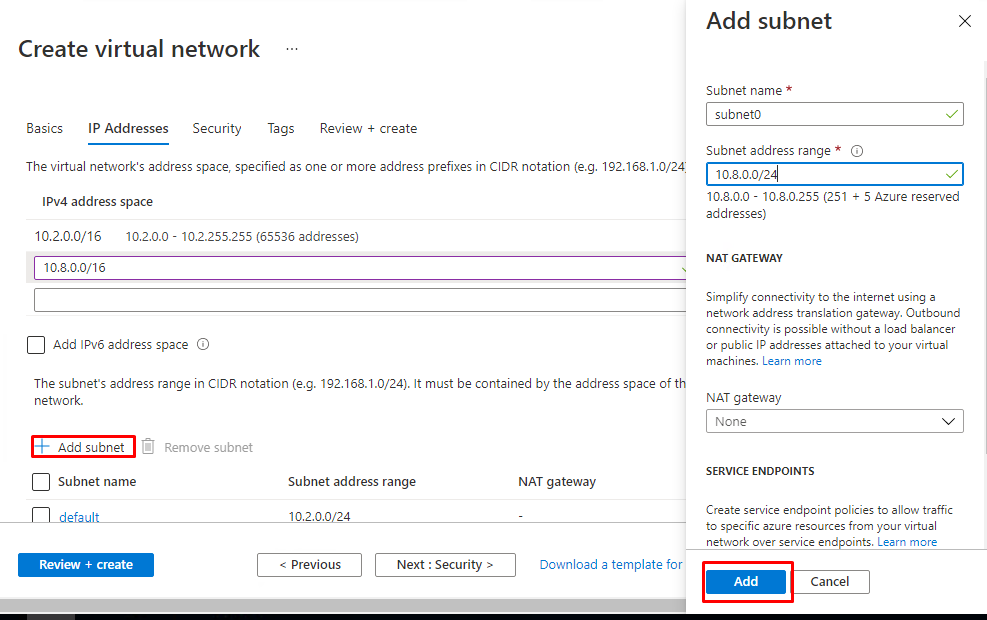
- On the IP addresses tab of the Create virtual network blade, in the IPv4 address space text box, type 10.8.0.0/16 and select + Add subnet.
- On the Add subnet blade, specify the following settings (leave others with their default values) and select Add:
| Setting | Value |
| Subnet name | subnet0 |
| Subnet address range | 10.8.0.0/24 |
Back on the IP addresses tab of the Create virtual network blade, select Review + create.
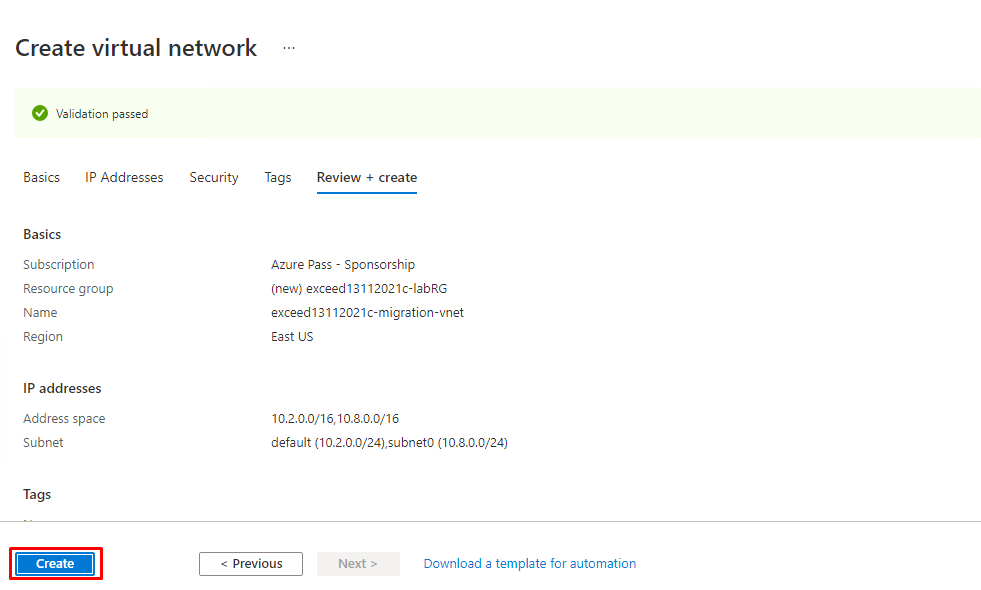
- On the Review + create tab of the Create virtual network blade, select Create.
- In the Azure portal, search for and select Virtual networks and, on the Virtual networks blade, select + Add (or + Create) on the command bar.
- On the Basics tab of the Create virtual network blade, specify the following settings (leave others with their default values) and select Next: IP Addresses:
| Setting | Value |
| Subscription | the name of the Azure subscription you are using in this lab |
| Resource group | exceed13112021c-labRG |
| Name | exceed13112021c-test-vnet |
| Region | the name of the Azure region into which you deployed the virtual machine earlier in this lab |
- On the IP addresses tab of the Create virtual network blade, in the IPv4 address space text box, type 10.8.0.0/16 and select + Add subnet.
- On the Add subnet blade, specify the following settings (leave others with their default values) and select Add:
| Setting | Value |
| Subnet name | subnet0 |
| Subnet address range | 10.8.0.0/24 |
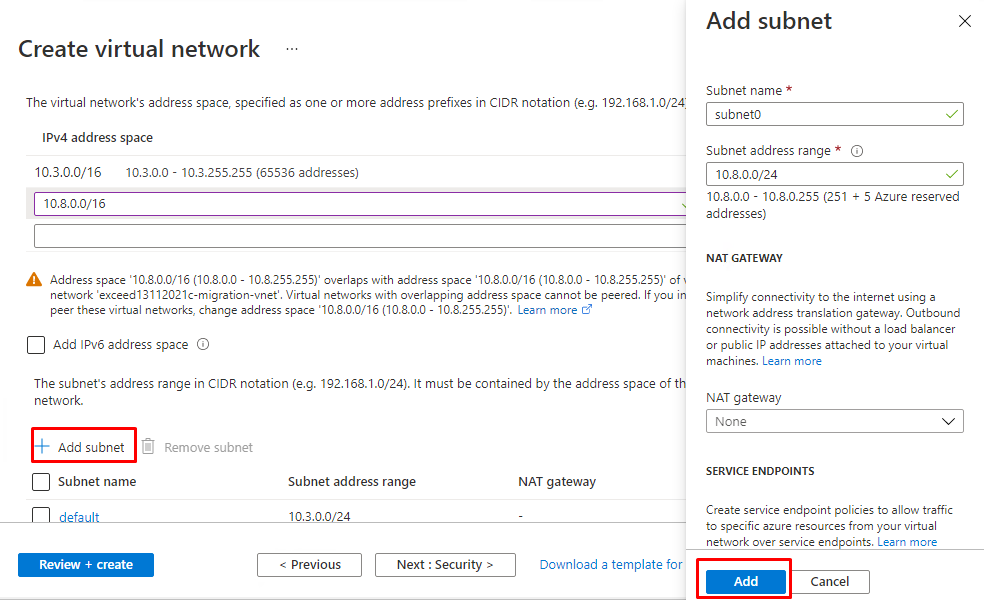
Back on the IP addresses tab of the Create virtual network blade, select Review + create.
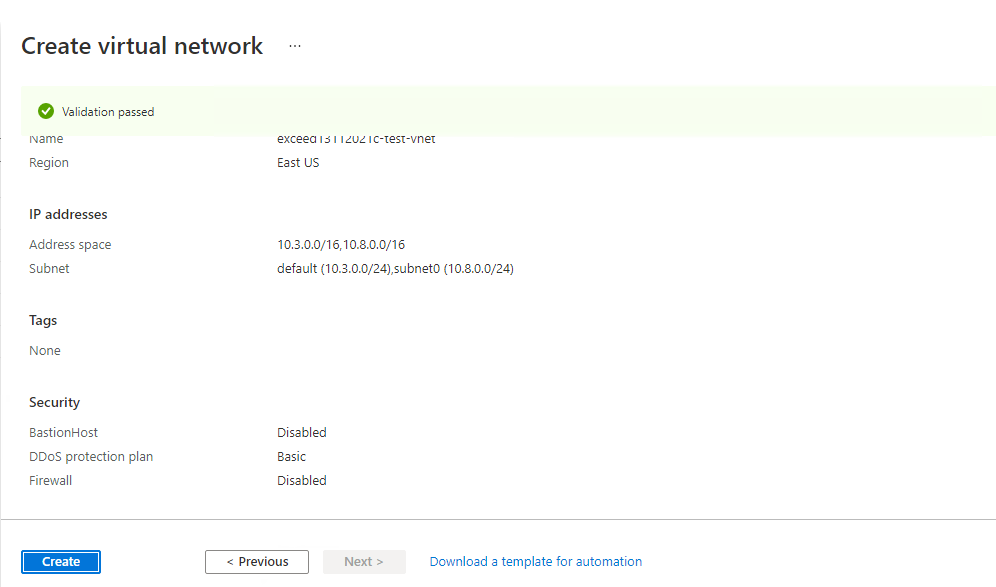
- On the Review + create tab of the Create virtual network blade, select Create.
- In the Azure portal, search for and select Storage accounts and, on the Storage accounts blade, select + Add (or + Create) on the command bar.
- On the Basics tab of the Create a storage account blade, specify the following settings (leave others with their default values):
| Setting | Value |
| Subscription | the name of the Azure subscription you are using in this lab |
| Resource group | exceed13112021c-labRG |
| Storage account name | any globally unique name between 3 and 24 in length consisting of letters and digits |
| Location | the name of the Azure region in which you created the virtual network earlier in this task |
| Performance | Standard |
| Account kind | StorageV2 (general purpose v2) |
| Redundancy | Locally redundant storage (LRS) |
- On the Basics tab of the Create a storage account blade, select Review + create.
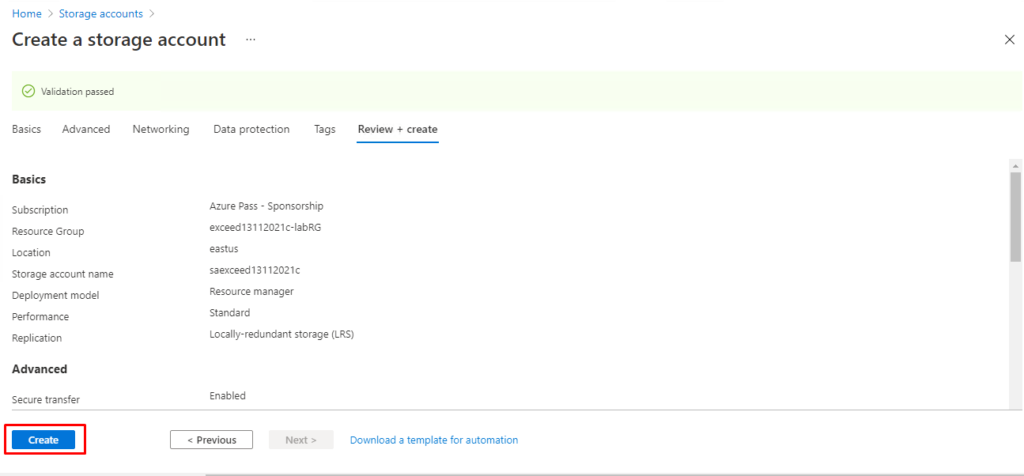
On the Review + create tab of the Create a storage account blade, select Create.
Lab 2: Assess Hyper-V for migration by using Azure Migrate
The main tasks for this exercise are as follows:
- Deploy and configure the Azure Migrate appliance
- Configure, run, and view an assessment
Task 1: Deploy and configure the Azure Migrate appliance
- Within the Remote Desktop session to exceed13-hv-vm, in the Microsoft Edge window, in the Azure portal, search for and select Azure Migrate.
| On the **Azure Migrate | Windows, Linux and SQL Server** blade, select Discover in the Azure Migrate: Server Assessment tile. |
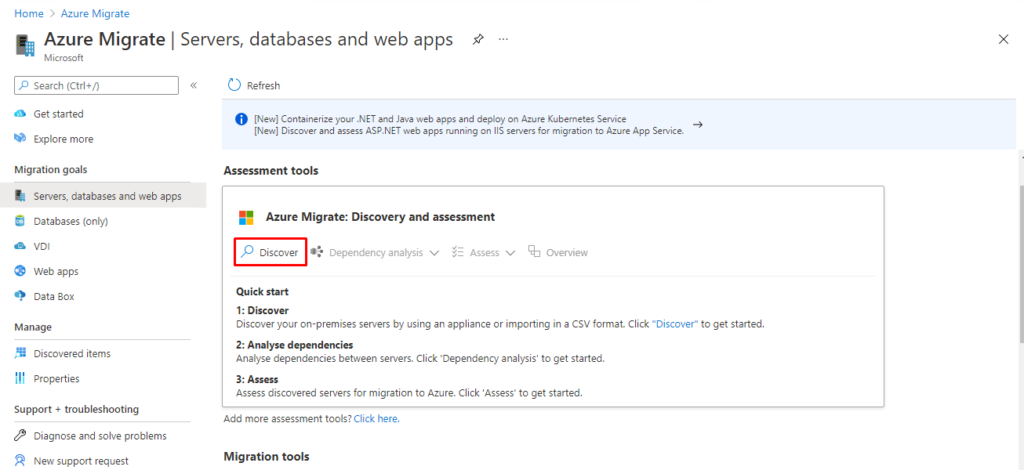
- On the Discover machines blade, in the Are your servers virtualized? drop-down list, select Yes, with Hyper-V.
- On the Discover machines blade, in the Name your appliance text box, type exceed13-vma1 and select the Generate key button.
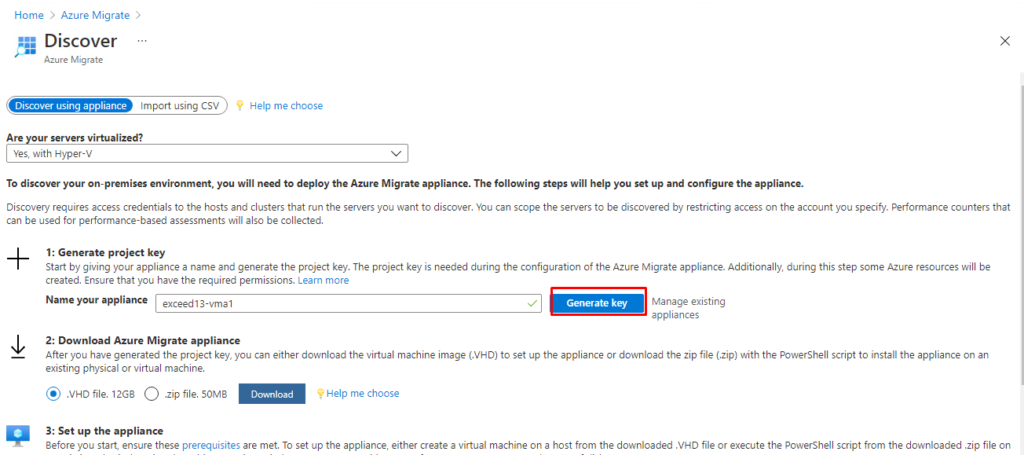
Note: If you encounter a permission-related error while generating an Azure Migrate project key, in the Azure portal, navigate to the Subscriptions blade, select your subscription, on your subscription blade, select Access Control (IAM) and then assign the Owner role to your Azure AD user account.
- Wait for the resource provisioning to complete, within the Remote Desktop session to exceed13-hv-vm, start Notepad, and copy the Azure Migrate project key into Notepad.
- On the Discover machines blade, in the Download Azure Migrate appliance text box, select the .VHD file option, select Download and, when prompted, set the download location to the F:\VMs folder.
Note: Wait for the download to complete. This might take about 5 minutes.
- Once the download completes, extract the content of the downloaded .ZIP file into the F:\VMs folder.
- Within the Remote Desktop session to exceed13-hv-vm, switch to the Hyper-V Manager console, select the exceed13-hv-vm node, select Import Virtual Machine. This will start the Import Virtual Machine wizard.
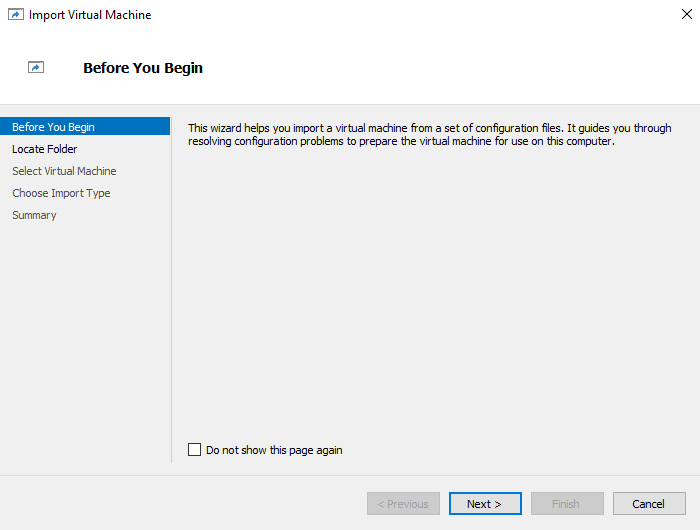
- On the Before You Begin page of the Import Virtual Machine wizard, select Next >.
- On the Locate Folder page of the Import Virtual Machine wizard, specify the location of the extracted Virtual Machines folder and select Next >:
- On the Select Virtual Machine page of the Import Virtual Machine wizard, select Next >:
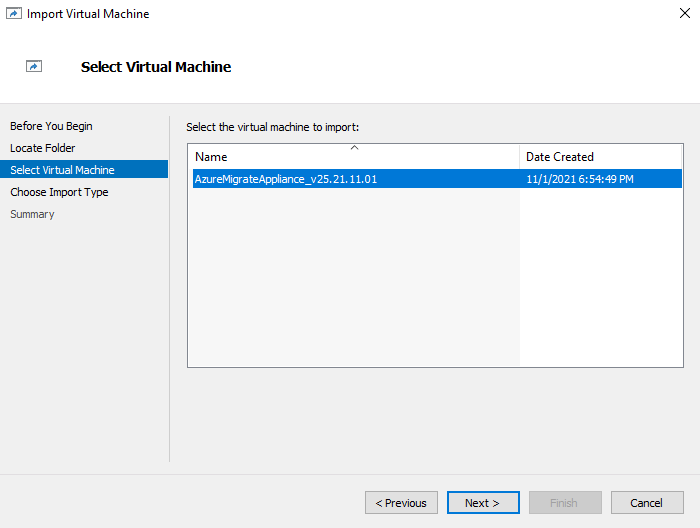
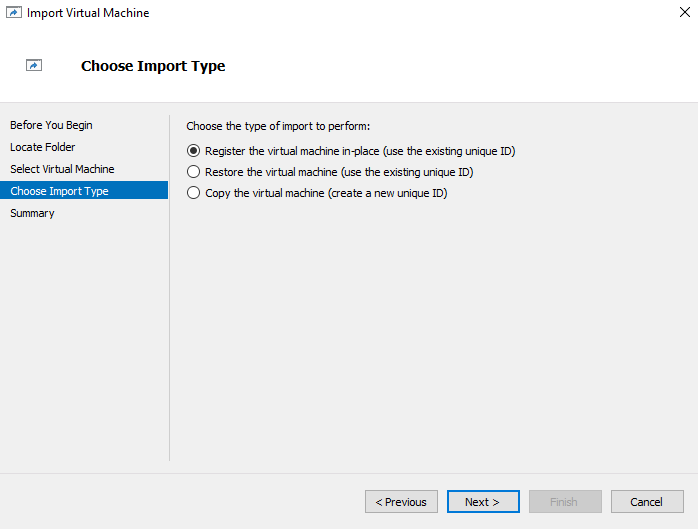
On the Choose Import Type page of the Import Virtual Machine wizard, select Register the virtual machine in place (use the existing unique ID) and select Next >.
- On the Configure Processor page of the Import Virtual Machine wizard, set Number of virtual processors to 4, and select Next >.
Note: Ignore any error messages referring to the change of the number of virtual processors.
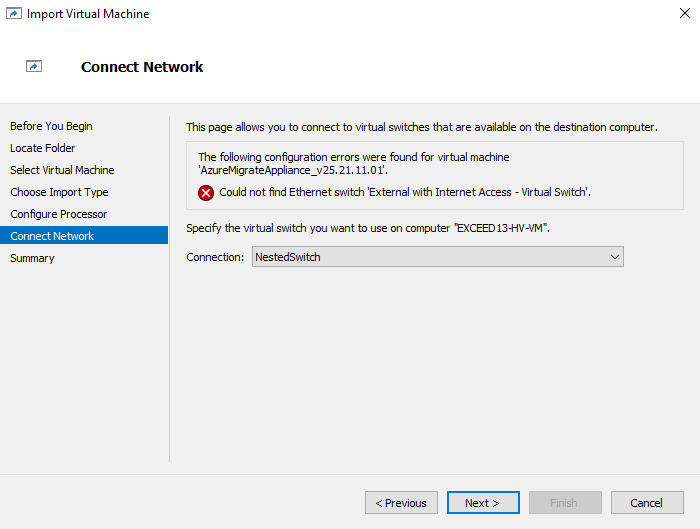
- On the Connect Network page of the Import Virtual Machine wizard, in the Connection drop-down list select NestedSwitch and select Next >.
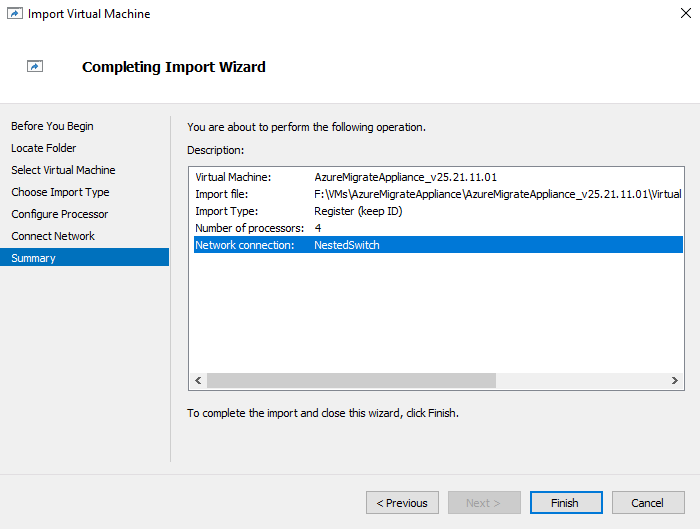
- On the Summary page of the Import Virtual Machine wizard, select Finish.
Note: Wait for the import to complete. This might take about 10 minutes.
- In the Hyper-V Manager console, select the newly imported virtual machine, select Rename and set is name to exceed13112021-vma1.
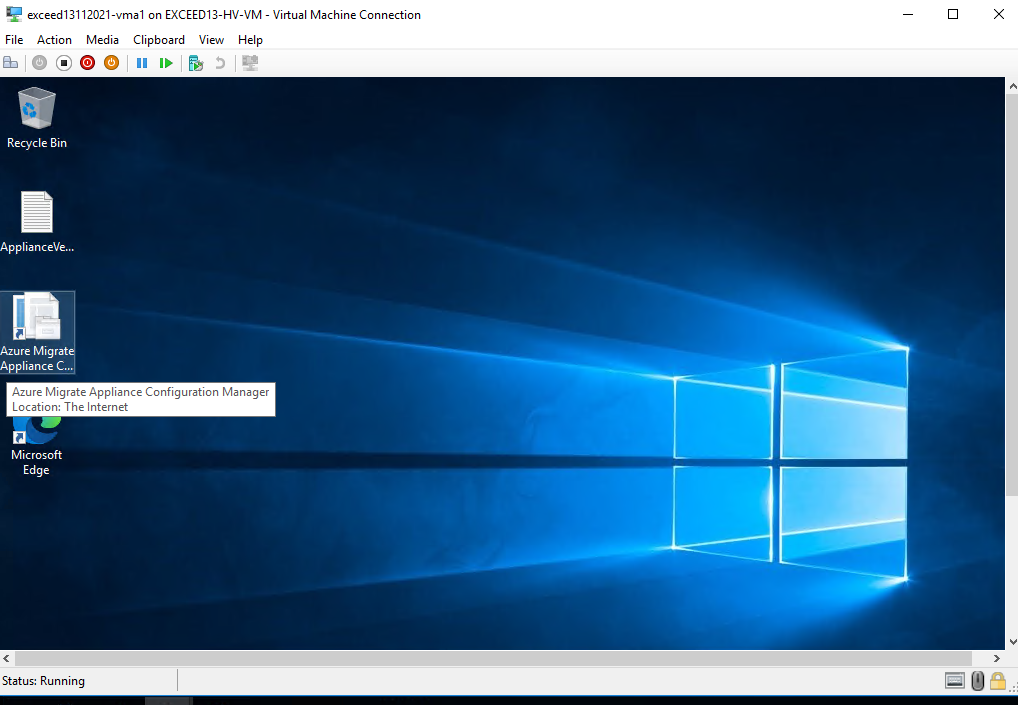
- In the Hyper-V Manager console, select the newly imported virtual machine and select Start.
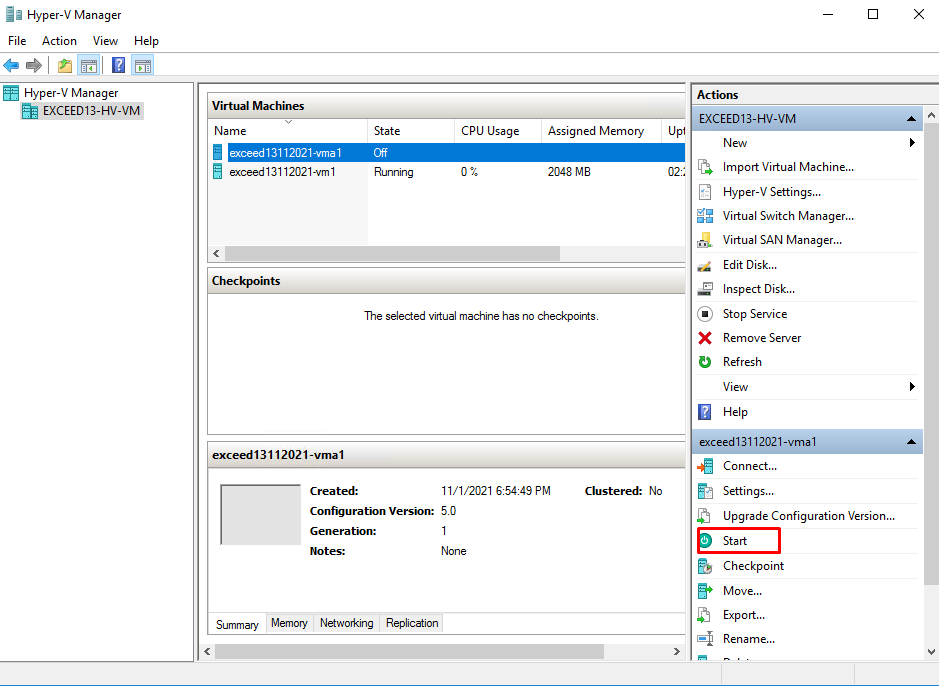
- In the Hyper-V Manager console, verify that the virtual machine is running and select Connect.
- In the Virtual Machine Connection window to the virtual appliance, on the License terms page, select Accept.
- In the Virtual Machine Connection window to the virtual appliance, on the Customize settings page, set the password of the built-in Administrator account to Pa55w.rd1234 and select Finish.
- In the Virtual Machine Connection window to the virtual appliance, sign in by using the newly set password.
- Within the Virtual Machine Connection window to the virtual appliance, start Windows PowerShell and run the following to identify its IP address.
code
(Get-NetIPAddress).IPAddress or ipconfig- Within the Remote Desktop session to exceed13112021-hv-vm, download Microsoft Edge and run the installation with the default settings.
- Within the Remote Desktop session to exceed13-hv-vm, in the Microsoft Edge window, navigate to the https://IPaddress:44368, where the IPaddress placeholder represents the IP address you identified in the previous step.
Note: Ignore the warning about the website’s security certificate.
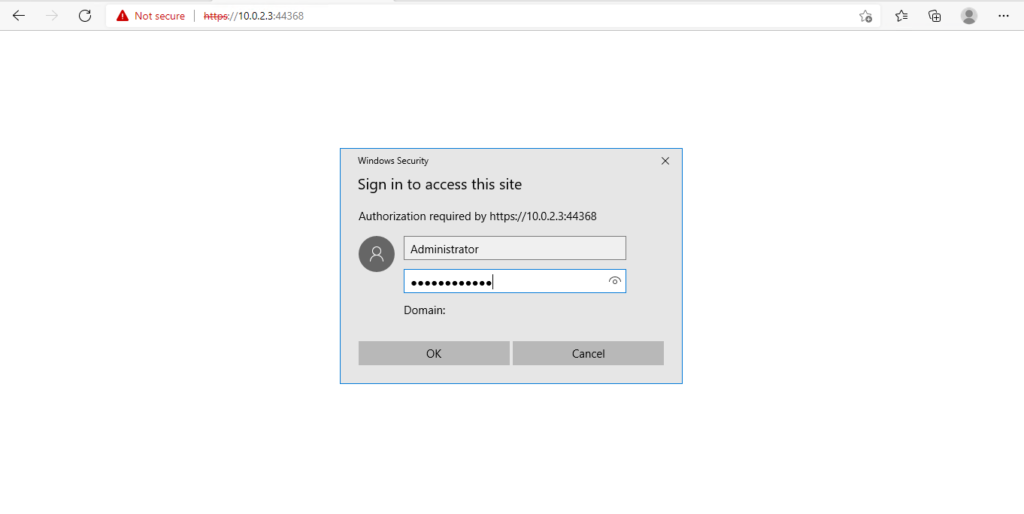
- When prompted, sign in with the following credentials:
| Setting | Value |
| User Name | Administrator |
| Password | Pa55w.rd1234 |
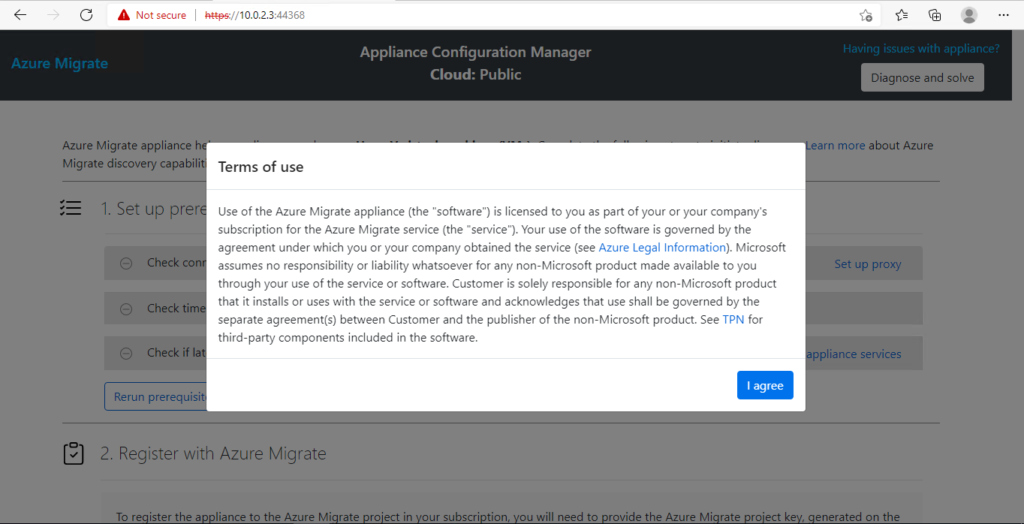
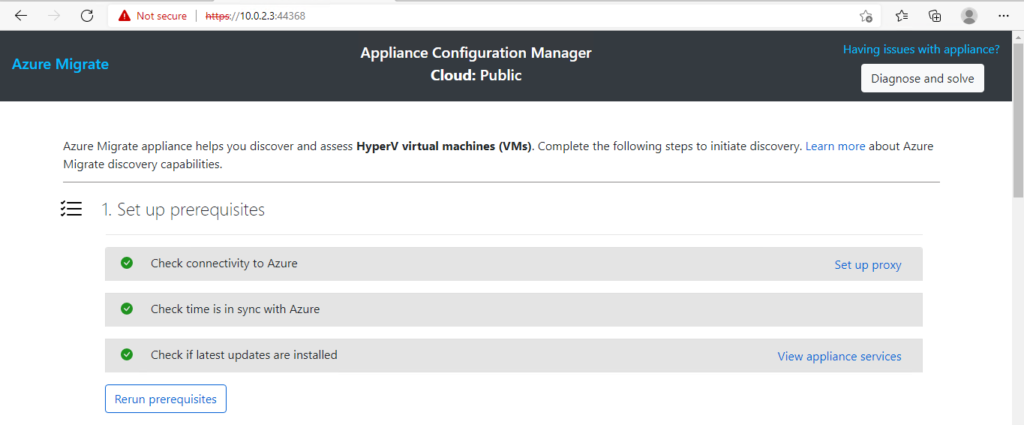
- Within the Microsoft Edge window, on the Appliance Configuration Manager page, select the I agree button, wait for the prerequisites to be successfully verified.
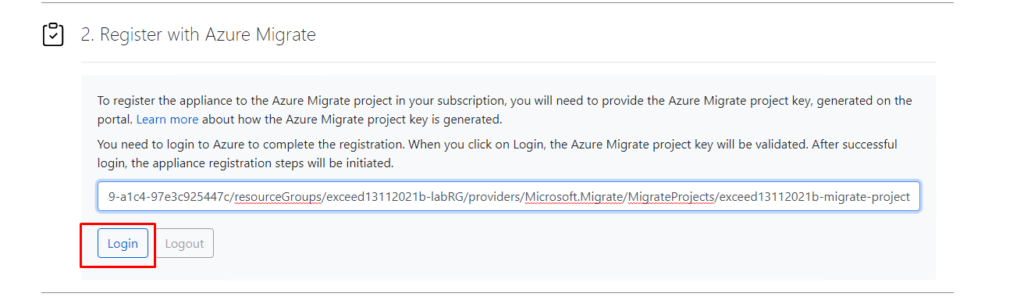
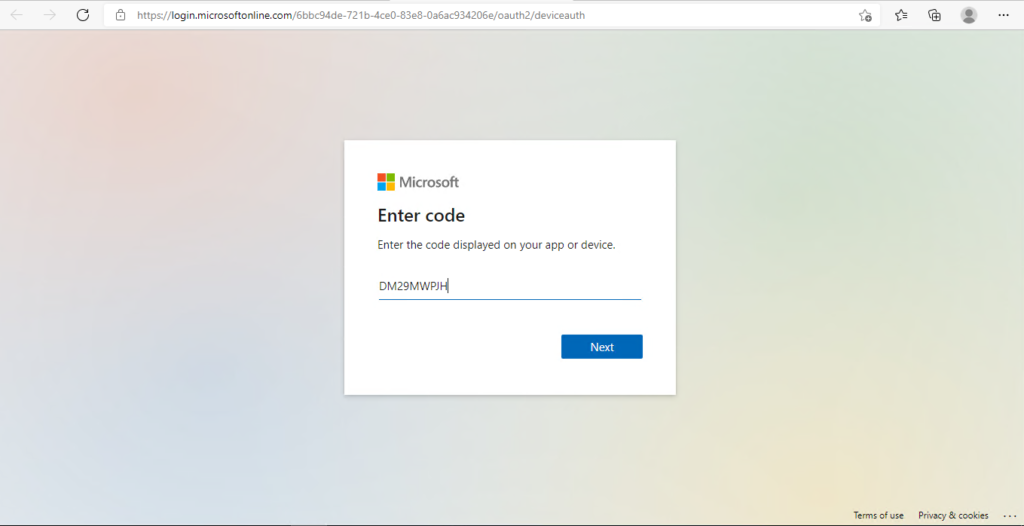
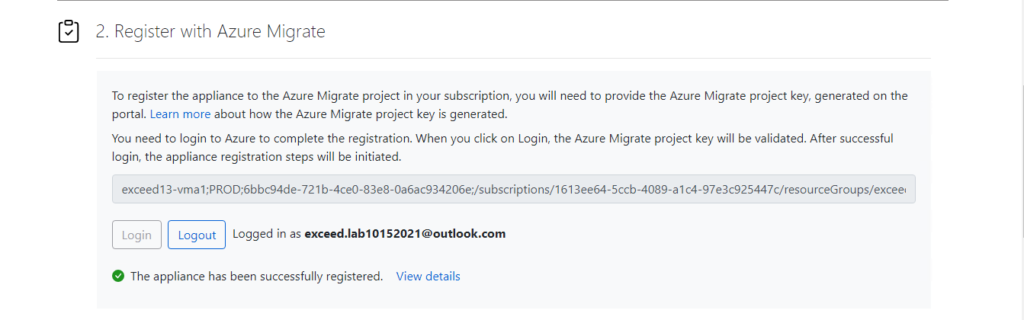
Within the Microsoft Edge window, on the Appliance Configuration Manager page, in the Register with Azure Migrate section, in the Provide Azure Migrate project key text box, paste the key you copied into Notepad earlier in this exercise, select Login, accept the default code displayed and copy it to the clipboard, then select Copy code and login then in the Enter code pane in the browser page paste in the code you copied to the clipboard and select Next, sign in by providing credentials of a user account with the Owner role in the subscription you are using in this lab and close the browser page.
Enter the Code and validate it
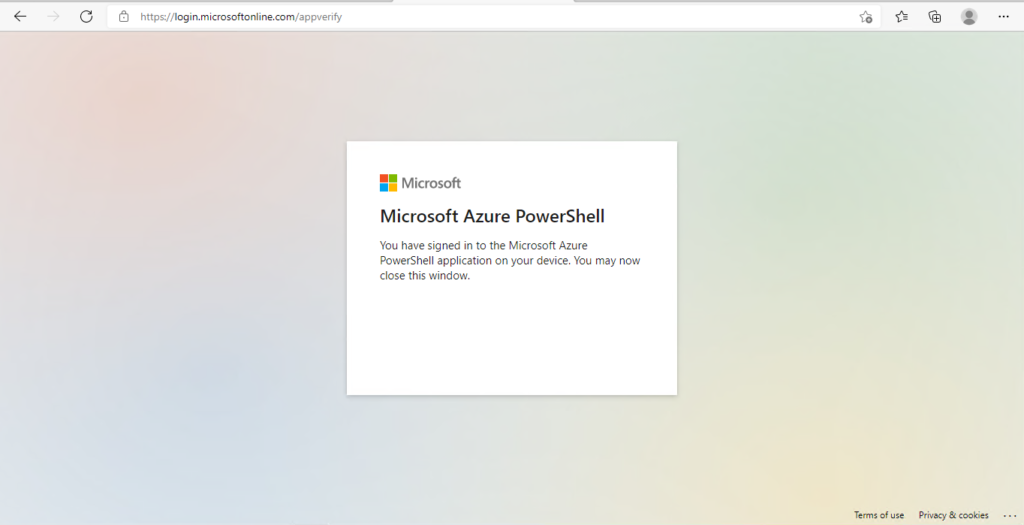
Within the Microsoft Edge window, on the Appliance Configuration Manager page, verify that registration was successful and select Continue.
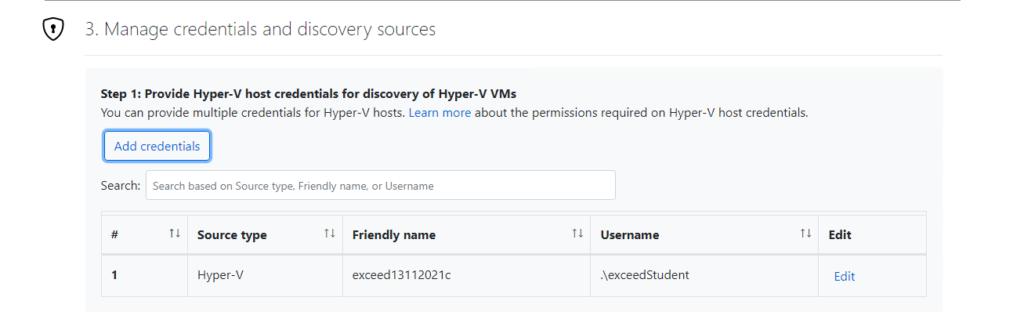
Within the Microsoft Edge window, on the Appliance Configuration Manager page, in the Manage credentials and discovery sources section, select Add credentials, in the Add credentials pane, specify the following settings, select Save:
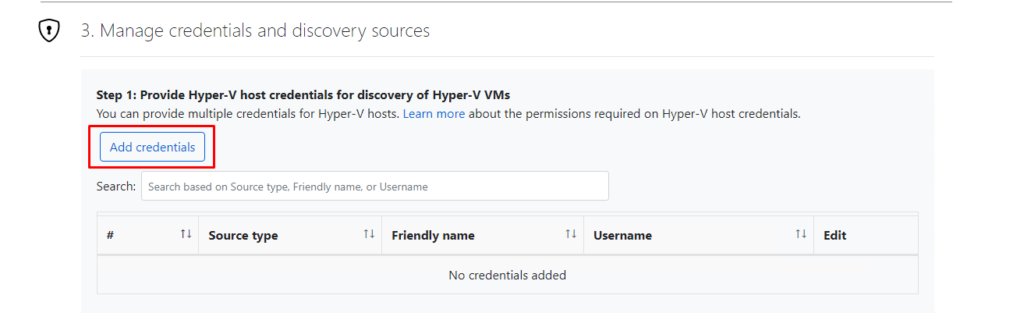
| Setting | Value |
| Friendly Name | exceed13112021creds |
| User Name | exceedStudent |
| Password | Pa55w.rd1234 |

Within the Microsoft Edge window, on the Appliance Configuration Manager page, in the Provide Hyper-V host/cluster details section, select Add discovery source, in the Add discovery source pane, select the Add single item option, ensure that the Discovery source drop-down list is set to Hyper-V Host/Cluster, in the Friendly name drop-down list, select the exceed13112021creds entry, in the IP address /FQDN text box, type 10.0.2.1, and select Save.

Click on Start Discovery
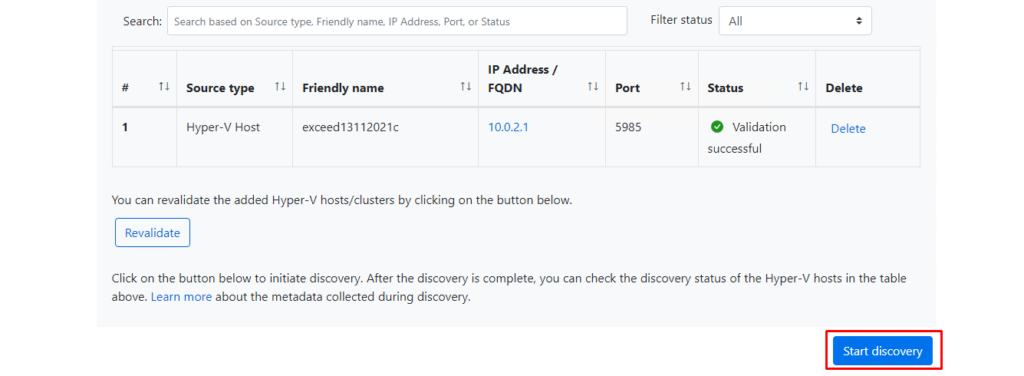
- Within the Microsoft Edge window, on the Appliance Configuration Manager page, in the Provide Hyper-V host/cluster details section, select Start discovery.
Note: In general, it might take about 15 minutes per host for metadata of discovered servers to appear in the Azure portal.
Task 2: Configure, run, and view an assessment
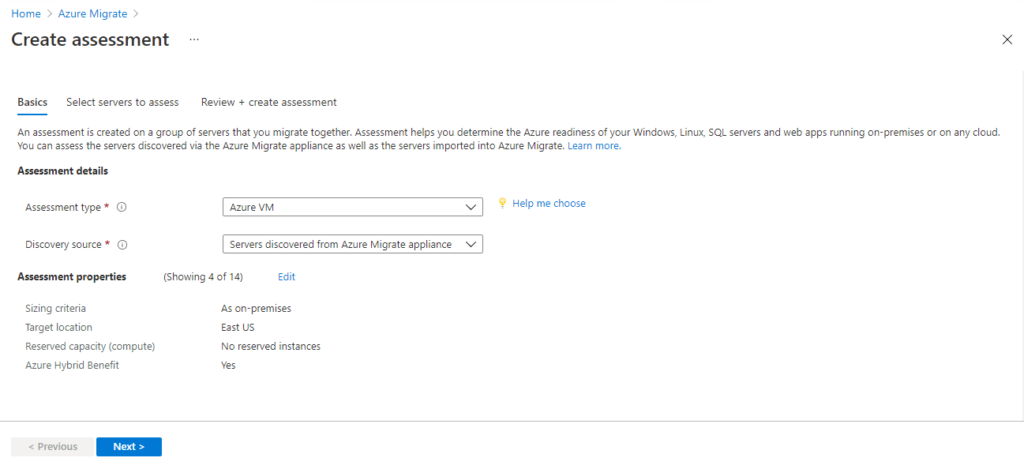
| Within the Remote Desktop session to exceed13-hv-vm, in the Microsoft Edge window displaying the Azure portal, navigate back to the **Azure Migrate | Windows, Linux and SQL Server** blade, select Refresh, and, in the Azure Migrate: Discovery and assessment tile, open the dropdown Assess and select Azure VM. |

Note: You might need to refresh the page again.
- On the Assessment properties blade select Edit, specify the following settings (leave others with their default values) and select Save:
| Setting | Value |
| Target location | the name of the Azure region you are using in this lab |
| Storage type | Automatic |
| Reserved instances | No reserved instances |
| Sizing criterion | As on premises |
| VM series | Dsv3_series |
| Comfort factor | 1 |
| Offer | Pay-As-You-Go |
| Currency | US Dollar ($) |
| Discount | 0 |
| VM uptime | Day(s) per month and 24 Hour(s) per day |
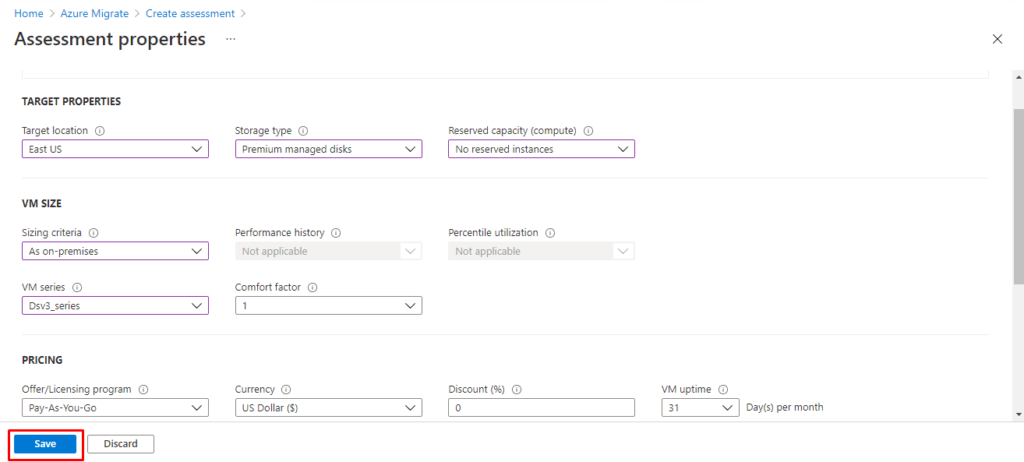
Note: Considering the limited time inherent to the lab environment, the only viable option in this case is As on-premises assessment.
- Back on the Assess servers blade, select Next and then navigate to the Select machines to assess tab.
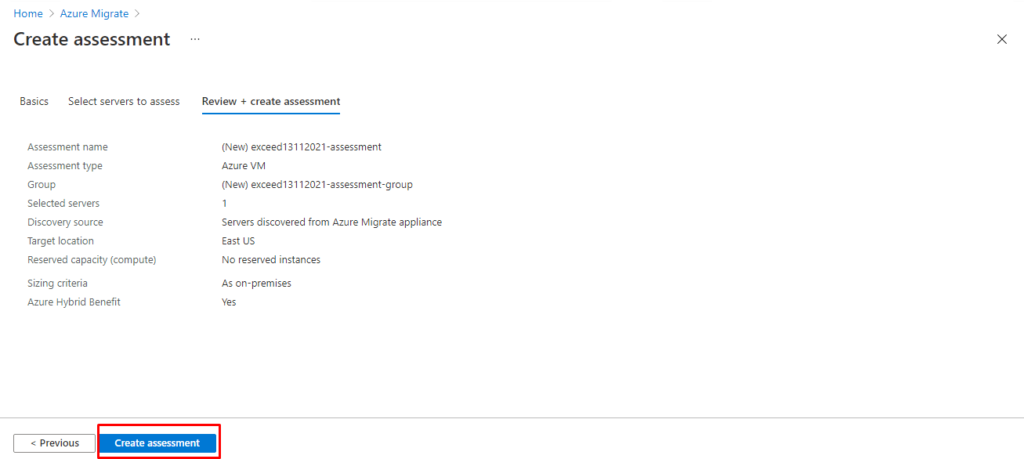
- Set Assessment name to exceed13112021-assessment.
- Ensure that the Create new option is selected, set the group name to exceed13112021-assessment-group, in the list of machines to be added to the group, select exceed13112021-vm1.

Click Next, and then click Create assessment.
| Navigate back to the **Azure Migrate | Windows, Linux and SQL Server** blade, select Refresh, in the Azure Migrate: Server Assessment tile, verify that there the Assessments line contains 1 entry, and select it. |
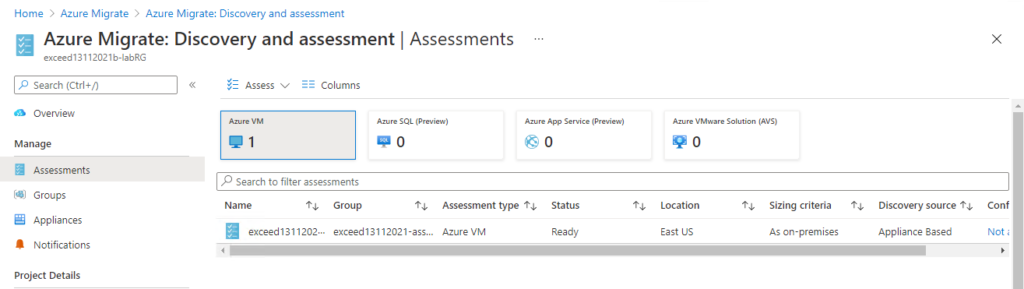
| On the **Azure Migrate: Server Assessment | Assessments** blade, select the newly created assessment exceed13112021-assessment. |

On the exceed13112021-assessment blade, review the information indicating Azure readiness and monthly cost estimate for both compute and storage.
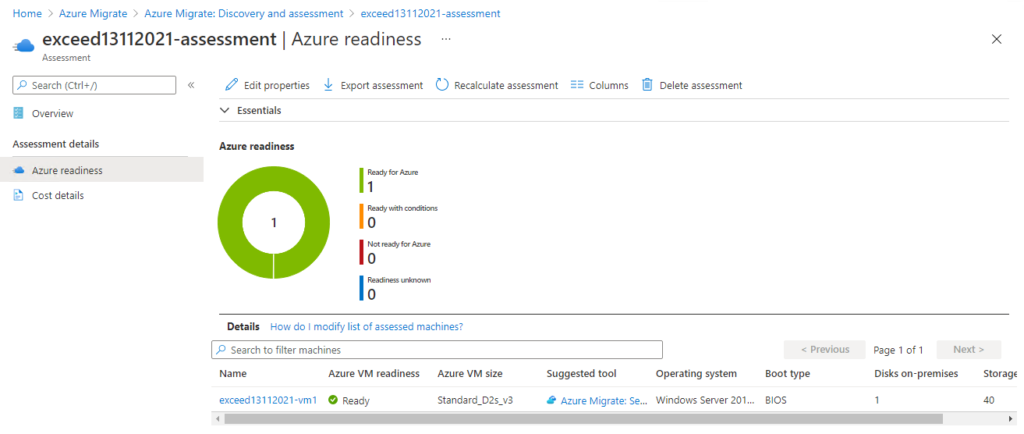
Note: In real-world scenarios, you should consider installing dependency agent to provide more insights into server dependencies during the assessment stage.
Lab 3: Migrate Hyper-V VMs by using Azure Migrate
The main tasks for this exercise are as follows:
- Prepare for migration of Hyper-V VMs
- Configure replication of Hyper-V VMs
- Perform migration of Hyper-V VMs
- Remove Azure resources deployed in the lab
Task 1: Prepare for migration of Hyper-V VMs
| Within the Remote Desktop session to exceed13-hv-vm, in the Microsoft Edge window displaying the Azure portal, navigate back to the **Azure Migrate | Windows, Linux and SQL Server** blade. |
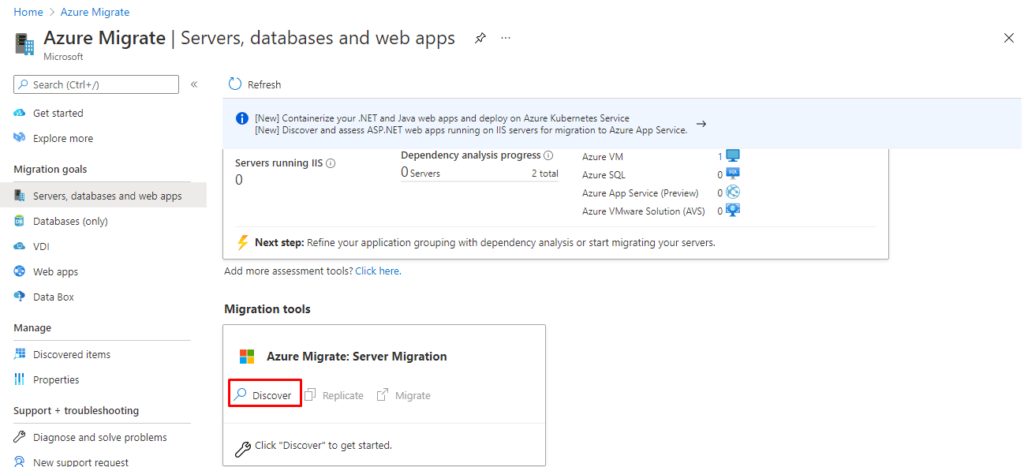
| On the **Azure Migrate | Windows, Linux and SQL Server** blade, in the Azure Migrate: Server Migration tile, select the Discover link. |
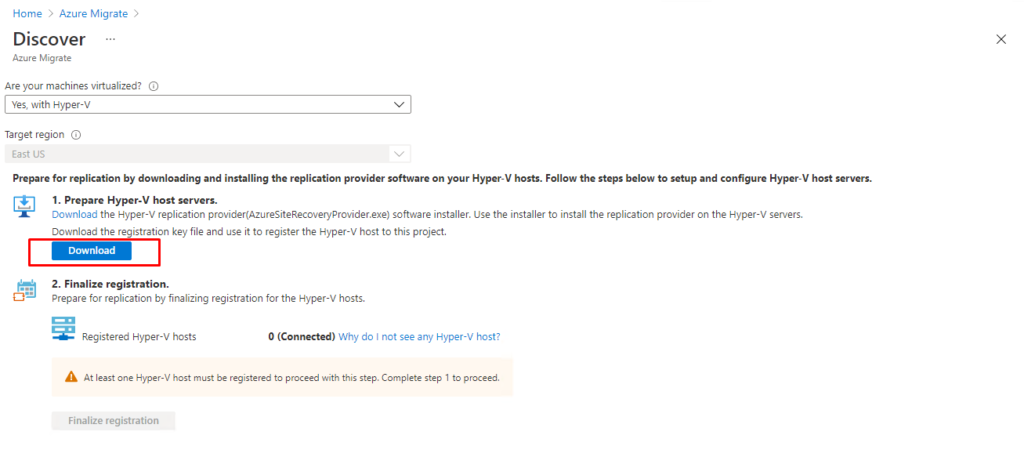
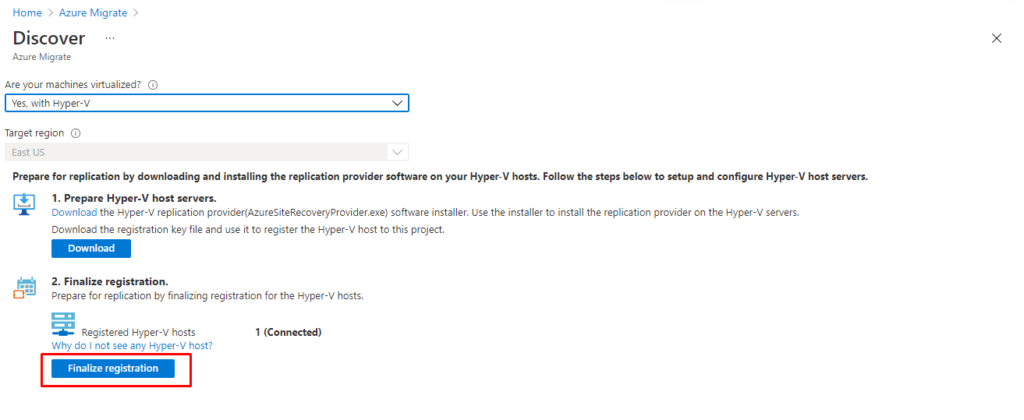
- On the Discover machines blade, specify the following settings (leave others with their default values) and select Create resources:
| Setting | Value |
| Are your machines virtualized? | Yes, with Hyper-V |
| Target region | the name of the Azure region you are using in this lab |
| Confirm that the target region for migration | selected |

Note: This step automatically triggers provisioning of an Azure Site Recovery vault.
- On the Discover machines blade, in step 1. Prepare Hyper-V host servers, select the first Download link (not the Download button), in order to download the Hyper-V replication provider software installer.
When prompted, launch AzureSiteRecoveryProvider.exe. This will start the Azure Site Recovery Provider Setup (Hyper-V server) wizard.
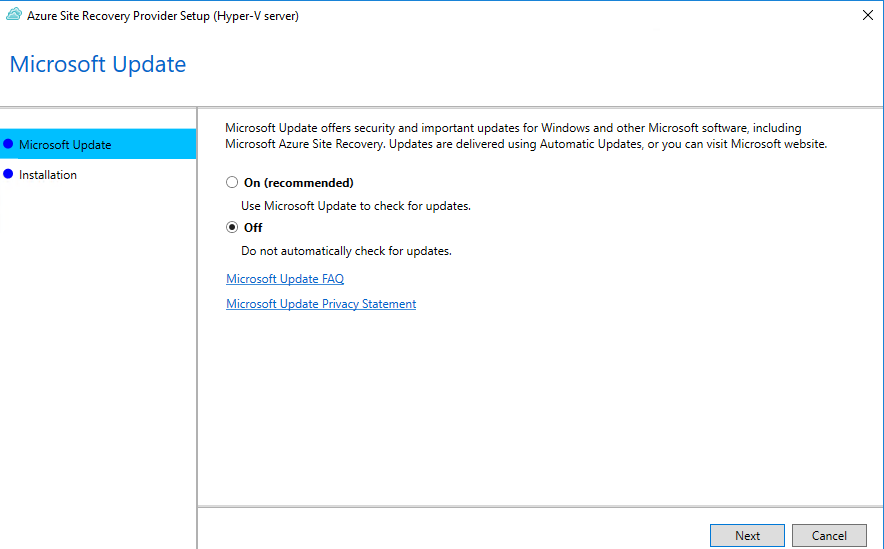
- On the Microsoft Update page, select Off and select Next.
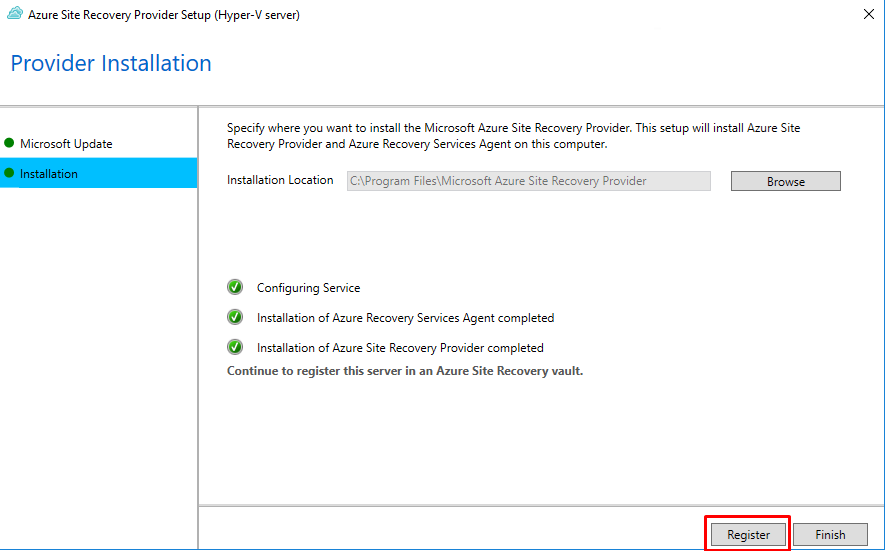
- On the Provider installation page, select Install.

- Switch to the Azure portal and, on the Discover machines blade, select the Download button in step 1 of the procedure for preparing on-premises Hyper-V hosts in order to download the vault registration key. When prompted, save the registration key in the Downloads folder.
- Switch to the Provider installation page and select Register. This will start the Microsoft Azure Site Recovery Registration Wizard.
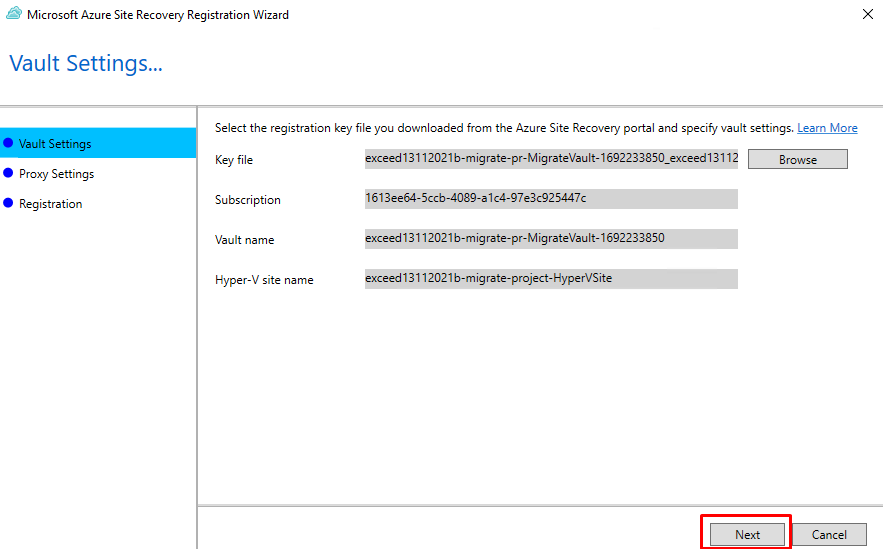
- On the Vault Settings page of the Microsoft Azure Site Recovery Registration Wizard, select Browse, navigate to the Downloads folder, select the vault credentials file, and select Open.
- Back on the Vault Settings page of the Microsoft Azure Site Recovery Registration Wizard, select Next.
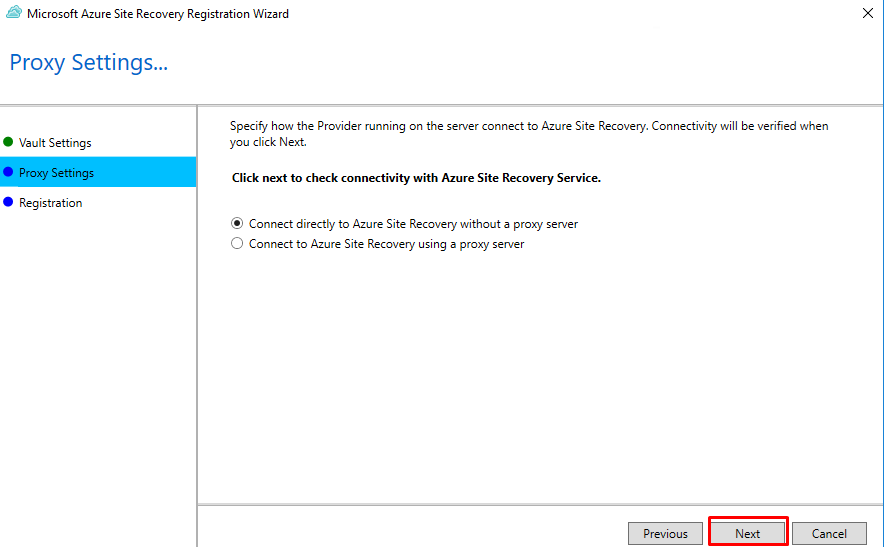
On the Proxy Settings page of the Microsoft Azure Site Recovery Registration Wizard, accept the default settings and select Next.
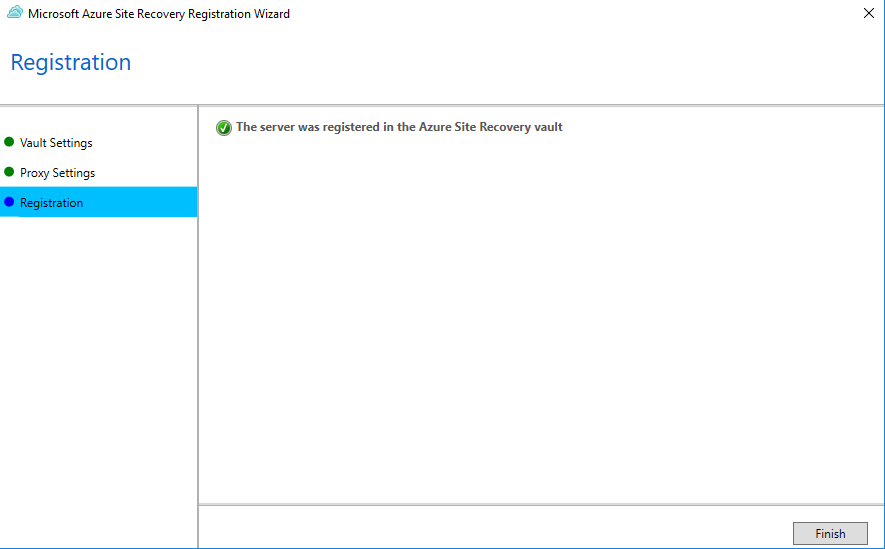
On the Registration page of the Microsoft Azure Site Recovery Registration Wizard, select Finish.
Once the registration process completes, on the Discover machines blade, select Finalize registration.
Note: You might have to refresh the browser page displaying the Discover machines blade and navigate back to it.

Note: It might take up to 15 minutes for the discovery of virtual machines to complete.
Task 2: Configure replication of Hyper-V VMs
| Once you receive the confirmation that the registration was finalized, navigate back to the **Azure Migrate | Windows, Linux and SQL Server** blade, in the Azure Migrate: Server Migration tile, select the Replicate link. |
| Note: You might have to refresh the browser page displaying the **Azure Migrate | Windows, Linux and SQL Server** blade. |
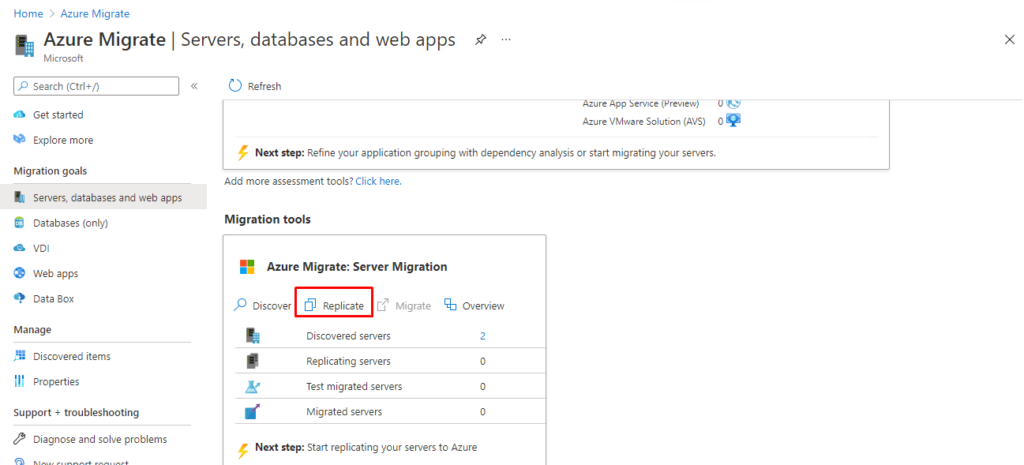
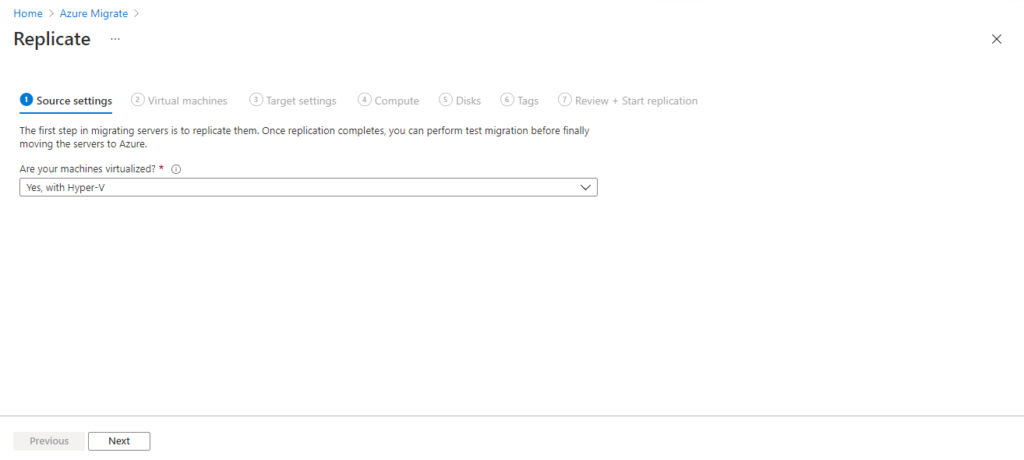
On the Source settings page of the Replicate blade, in the Are your machines virtualized? drop-down list, select Yes, with Hyper-V and select Next: Virtual machines.
- On the Virtual machines page of the Replicate blade, specify the following settings (leave others with their default values) and select Next: Next: Target settings:
| Setting | Value |
| Import migration settings from an Azure Migrate assessment | Yes, apply migration settings from an Azure Migrate assessment |
| Select group | exceed13112021-assessment-group |
| Select assessment | exceed13112021-assessment |
| Virtual machines | exceed13112021-vm1 |

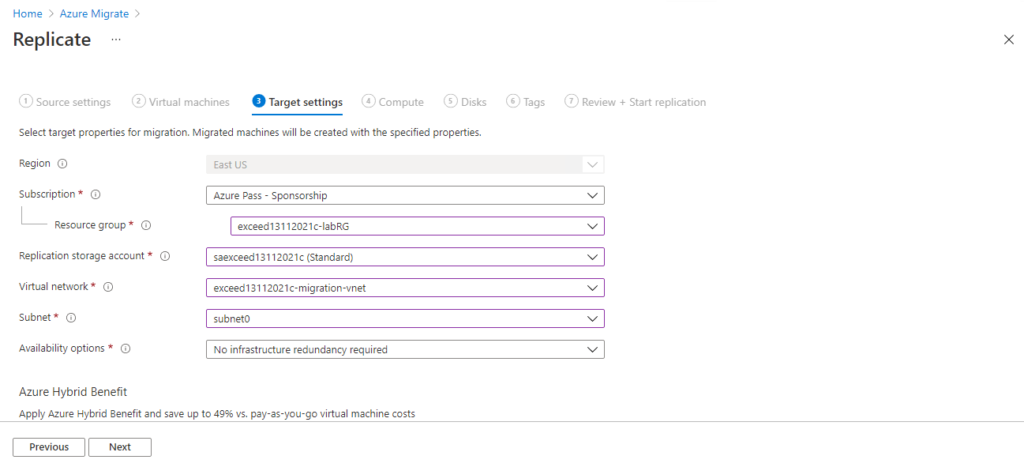
- On the Target settings page of the Replicate blade, specify the following settings (leave others with their default values) and select Next: Compute:
| Setting | Value |
| Subscription | the name of the Azure subscription you are using in this lab |
| Resource group | exceed13112021c-labRG |
| Replication Storage Account | the name of the storage account you created earlier in this lab |
| Virtual Network | exceed13112021c-migration-vnet |
| Subnet | subnet0 |
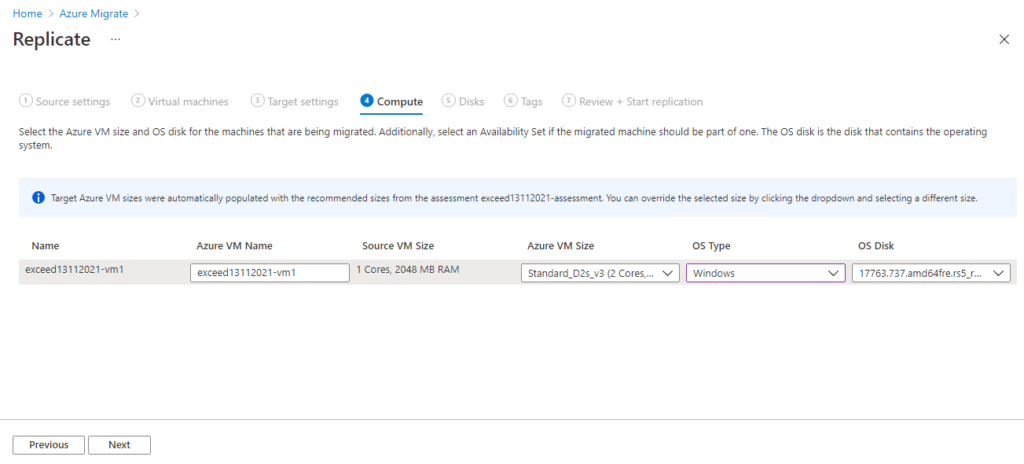
On the Compute page of the Replicate blade, ensure that the Standard_D2s_v3 is selected in the Azure VM Size drop-down list, in the OS Type drop-down list, select Windows and select Next: Disks.
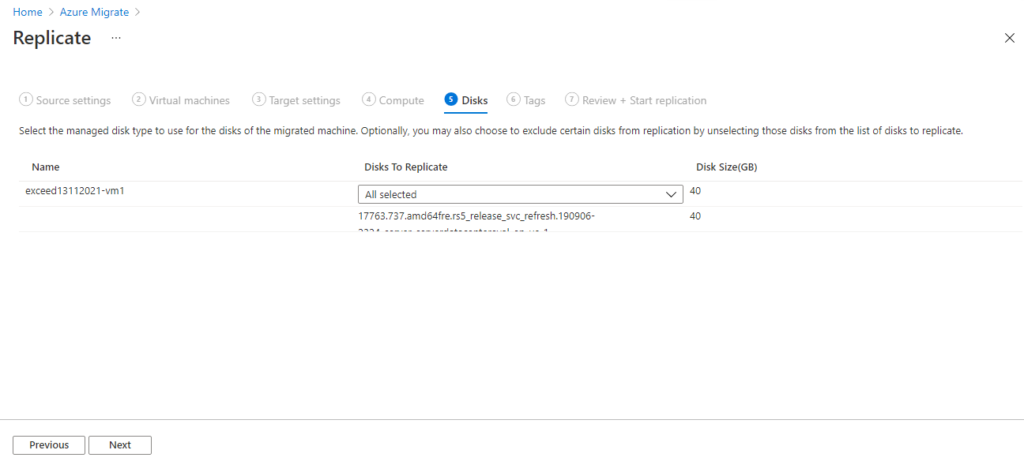
On the Disks page of the Replicate blade, accept the default settings and select Next: Review + Start replication.
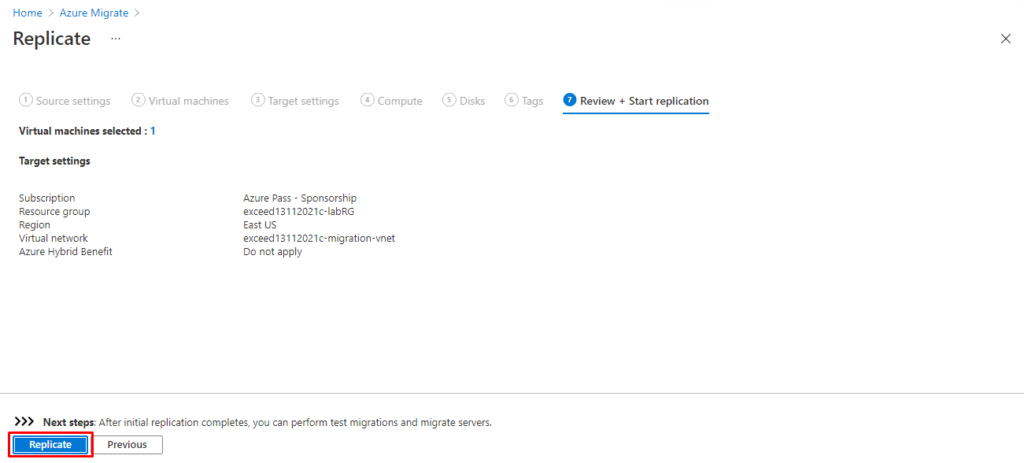
On the Review + Start replication page of the Replicate blade, select Replicate.
| To monitor the status of replication, navigate back to the **Azure Migrate | Windows, Linux and SQL Server** blade, in the Azure Migrate: Server Migration tile, select the Replicating servers entry and, on the **Azure Migrate: Server Migration | Replicating machines, examine the **Status column in the list of the replicating machines. |
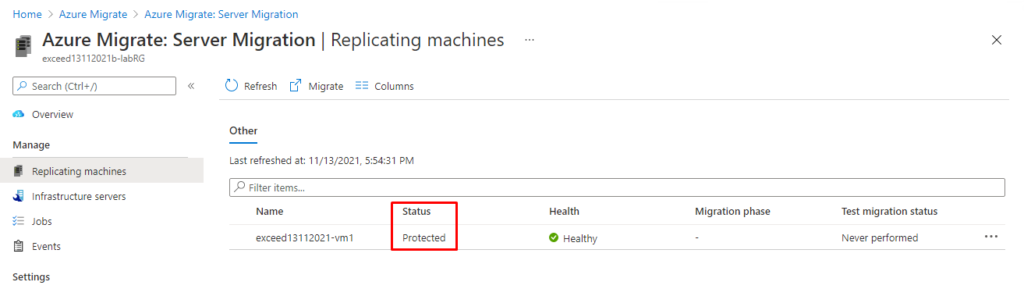
- Wait until the status changes to Protected. This might take additional 15 minutes.
Task 3: Perform migration of Hyper-V VMs
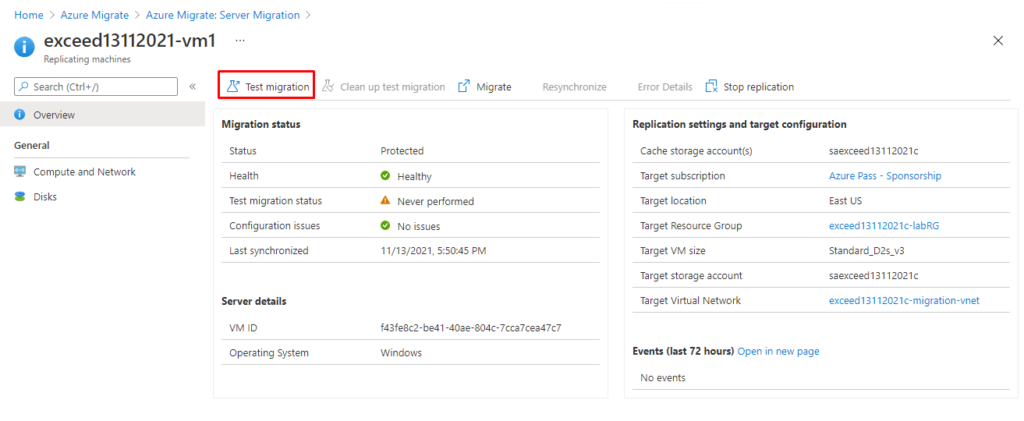
| In the Azure portal, on the **Azure Migrate: Server Migration | Replicating machines, select the entry representing the **exceed13112021-vm1 virtual machine. |
- On the exceed13112021-vm1 replicating machines blade, select Test migration.
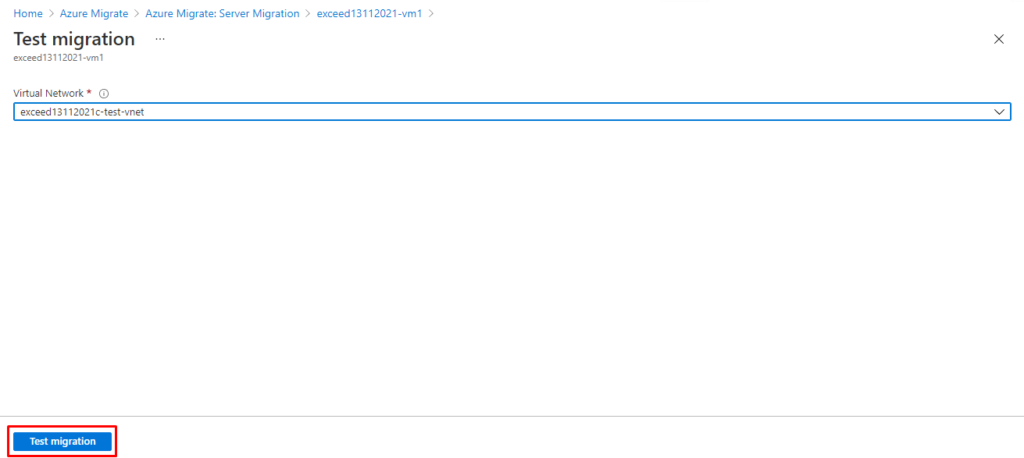
- On the Test migration blade, in the Virtual network drop-down list, select exceed13112021c-test-vnet and select Test migration.
Note: Wait for the test migration to complete. This might take about 5 minutes.
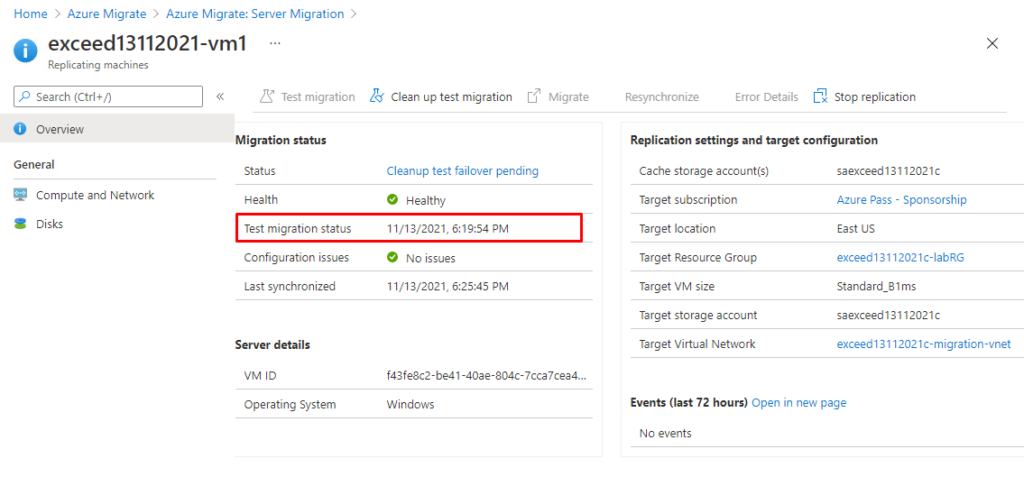
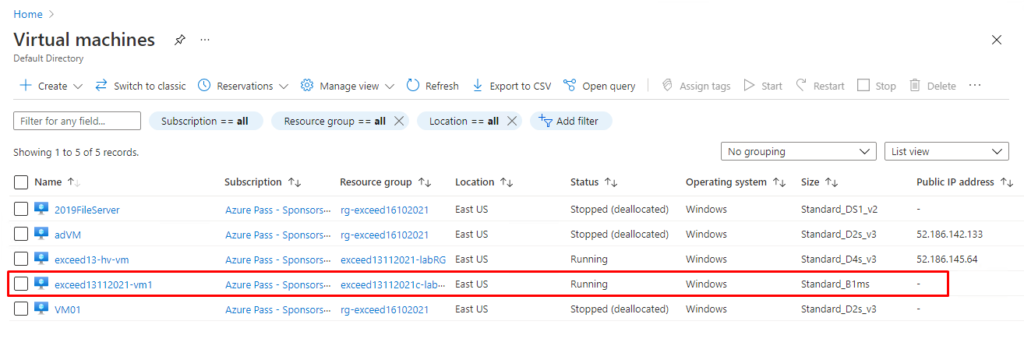
In the Azure portal, search for and select Virtual machines and, on the Virtual machines blade, note the entry representing the newly provisioned virtual machine exceed13112021-vm1-test.

| In the Azure portal, navigate back to the **Azure Migrate: Server Migration | Replicating machines, select **Refresh, and verify that the exceed13112021-vm1 virtual machine is listed with the Cleanup test failover pending status. |
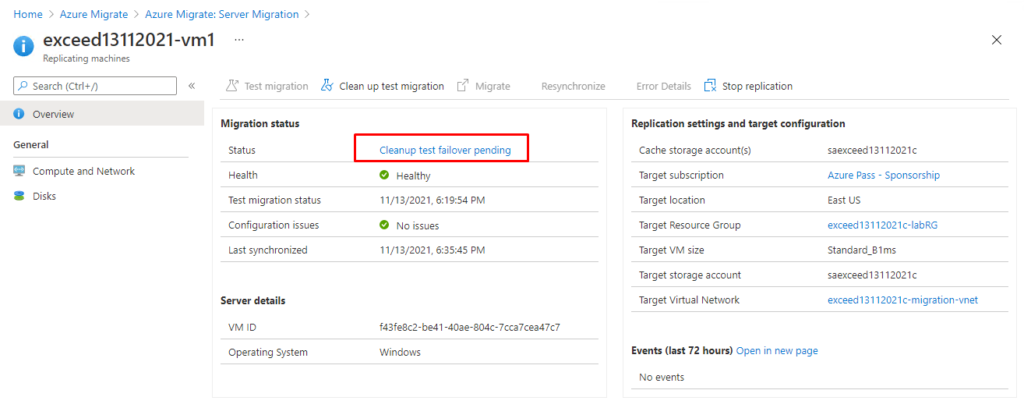
| On the **Azure Migrate: Server Migration | Replicating machines** blade, select the entry representing the exceed13112021-vm1 virtual machine. |
- On the exceed13112021-vm1 replicating machines blade, select Clean up test migration.
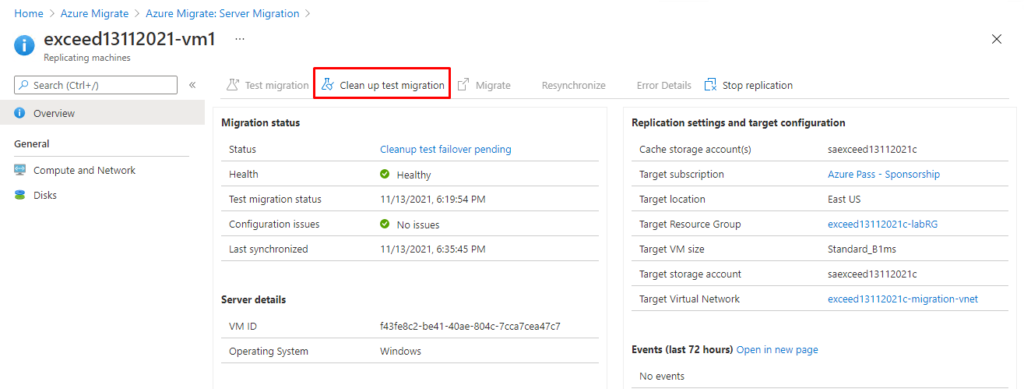
On the Test migrate cleanup blade, select the checkbox Testing is complete. Delete test virtual machine and select Cleanup Test.

Once the test failover cleanup job completes, refresh the browser page displaying the exceed13112021-vm1 replicating machines blade and note that the Migrate icon in the toolbar automatically became available.
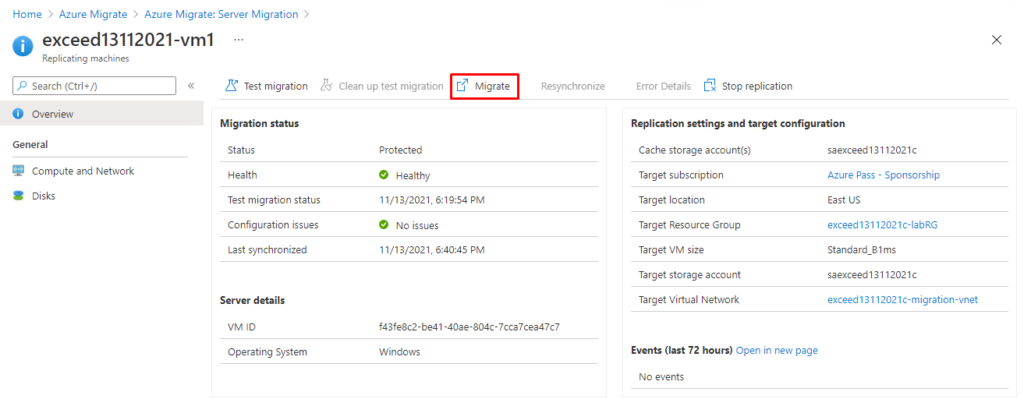
- On the exceed13112021-vm1 replicating machines blade, select the Migrate link.
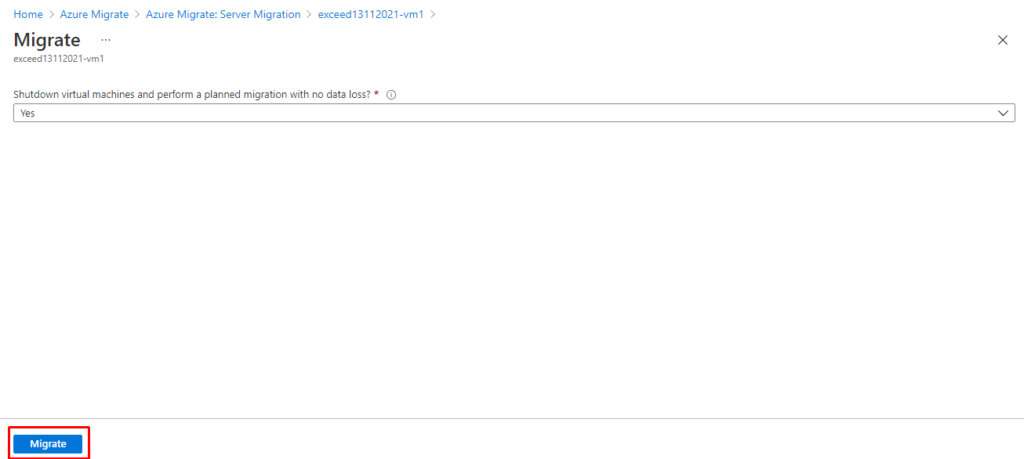
- On the Migrate blade, in the Shutdown machines before migration to minimize data loss? drop-down list, select Yes, next select the checkbox next to the exceed13112021-vm1 entry, and then select Migrate.
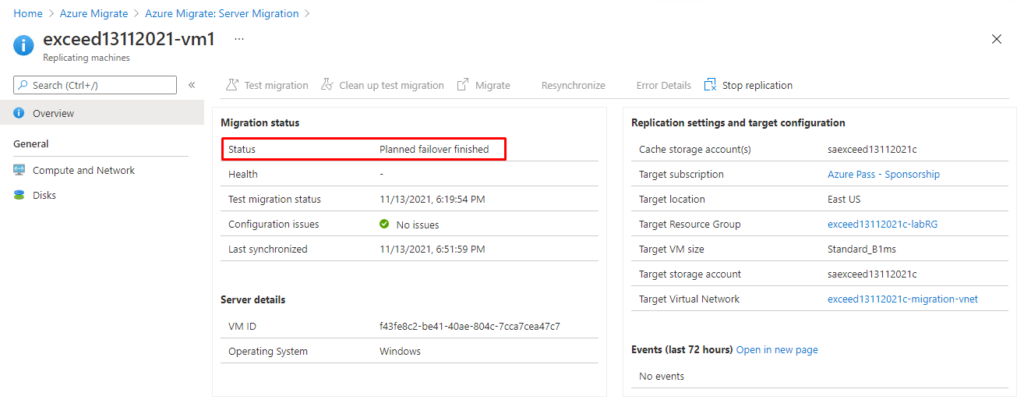
| To monitor the status of migration, navigate back to the **Azure Migrate | Windows, Linux and SQL Server** blade, in the Azure Migrate: Server Migration tile, select the Replicating servers entry and, on the **Azure Migrate: Server Migration | Replicating machines, examine the **Status column in the list of the replicating machines. Verify that the status displayed the Planned failover finished status. |
| Note: Migration is supposed to be a non-reversible action. If you want to see the completed information, navigate back to the Azure Migrate | Windows, Linux and SQL Server blade, refresh the page and verify that Migrated Servers in the Azure Migrate: Server Migration tile has a value of 1. |
Verify that the migration is effective on Azure

Reminder: Don’t forget to delete or shutdown all unused Azure resources after your labs for cost saving
Leave a Reply