Lab scenario
In this lab, you will configure DNS name resolution for Exceedlabs Ltd. You will create a private DNS zone named Exceedlabs.com, link the VNets for registration and resolution, and then create two virtual machines and test the configuration.
In this lab, you will:
- Task 1: Create a private DNS Zone
- Task 2: Link subnet for auto registration
- Task 3: Create Virtual Machines to test the configuration
- Task 4: Verify records are present in the DNS zone
Prerequisites for this labs : Azure Account
Task 1: Create a private DNS Zone
- Go to Azure Portal.
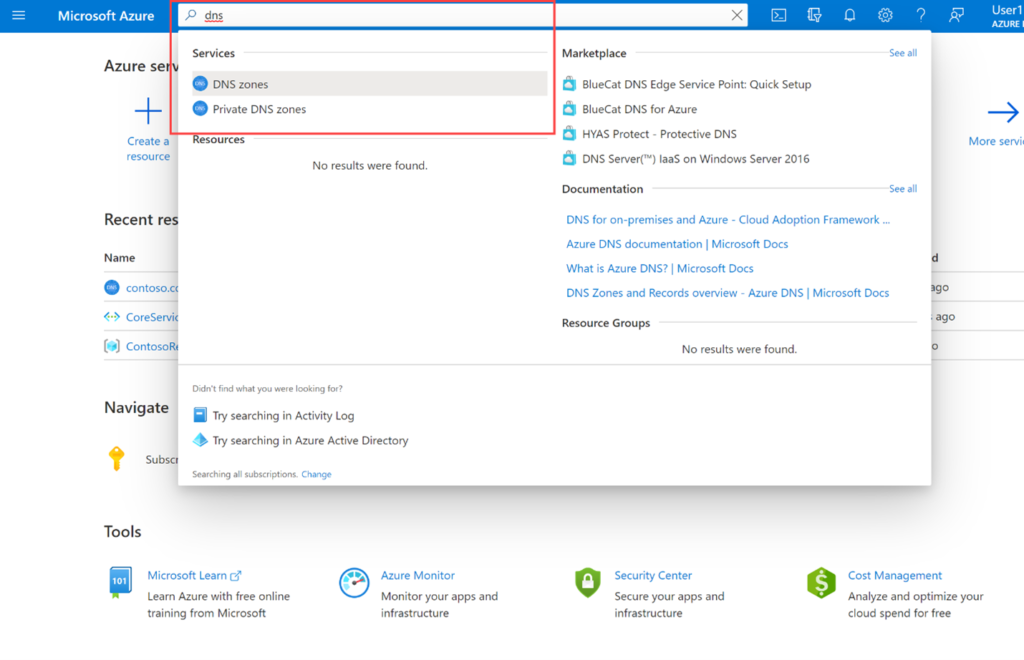
- On the Azure home page, in the search bar, type dns, and then select Private DNS zones.

- In Private DNS zones, select + Create.
- Use the information in the following table to create the private DNS zone.
| Tab | Option | Value |
| Basics | Resource group | ExceedlabsResourceGroup |
| Name | Exceedlabs.com | |
| Tags | No changes required | |
| Review + create | Review your settings and select Create |

- Wait until the deployment is complete, and then select Go to resource.
- Verify that the zone has been created.
Task 2: Link subnet for auto registration
- In Exceedlabs.com, under Settings, select Virtual network links.
| On Exceedlabs.com | Virtual network links, select + Add. |
|  |
- Use the information in the following table to add the virtual network link.
| Option | Value |
| Link name | CoreServicesVnetLink |
| Subscription | No changes required |
| Virtual Network | CoreServicesVnet (ExceedlabsResourceGroup) |
| Enable auto registration | Selected |
| Review your settings and select OK. |

- Select Refresh.
- Verify that the CoreServicesVnetLink has been created, and that auto-registration is enabled.
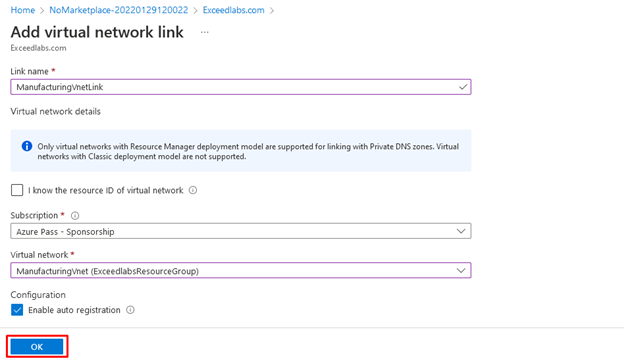
- Repeat steps 2 – 5 for the ManufacturingVnet, using the information in the following table:
| Option | Value |
| Link name | ManufacturingVnetLink |
| Subscription | No changes required |
| Virtual Network | ManufacturingVnet (ExceedlabsResourceGroup) |
| Enable auto registration | Selected |
| Review your settings and select OK. |

- Select Refresh.
- Verify that the ManufacturingVnetLink has been created, and that auto-registration is enabled.
- Repeat steps 2 – 5 for the ResearchVnet, using the information in the following table:
| Option | Value |
| Link name | ResearchVnetLink |
| Subscription | No changes required |
| Virtual Network | ResearchVnet (ExceedlabsResourceGroup) |
| Enable auto registration | Selected |
| Review your settings and select OK. |

- Select Refresh.
- Verify that the ResearchVnetLink has been created, and that auto-registration is enabled.

Task 3: Create Virtual Machines to test the configuration
In this section, you will create two test VMs to test the Private DNS zone configuration.
Create TestVM1
- On the Azure home page, using the global search type Virtual Machines and select virtual machines under services.
- In Virtual Machines, select + Create; + Virtual machine.
- Use the information in the following table to create your first VM.
| Tab | Option | Value |
| Basics | Resource group | ExceedlabsResourceGroup |
| Virtual machine name | TestVM1 | |
| Region | East US | |
| Availability options | No infrastructure redundancy required | |
| Image | Windows Server 2022 Datacenter- Gen1 | |
| Azure Spot instance | Not selected | |
| Size | Standard_D2s_v3 – 2vcpus, 8GiB memory | |
| Username | TestUser | |
| Password | TestPa$$w0rd! | |
| Public inbound ports | Allow selected ports | |
| Select inbound ports | RDP (3389) | |
| Disks | No changes required | |
| Networking | Virtual network | CoreServicesVnet |
| Subnet | DatabaseSubnet (10.20.20.0/24) | |
| Public IP | (new) TestVM1-ip | |
| NIC network security group | Basic | |
| Public inbound ports | Allow selected ports | |
| Select inbound ports | RDP (3389) | |
| Load balancing | Not selected | |
| Management | No changes required | |
| Advanced | No changes required | |
| Tags | No changes required | |
| Review + create | Review your settings and select Create |
- While the deployment is in progress, you can proceed with creating TestVM2.
Create TestVM2
- On the Azure home page, using the global search type Virtual Machines and select virtual machines under services.
- In Virtual Machines, select + Create; + Virtual machine.
- Use the information in the following table to create your second VM.
| Tab | Option | Value |
| Basics | Resource group | ExceedlabsResourceGroup |
| Virtual machine name | TestVM2 | |
| Region | East US | |
| Availability options | No infrastructure redundancy required | |
| Image | Windows Server 2022 Datacenter- Gen1 | |
| Azure Spot instance | Not selected | |
| Size | Standard_D2s_v3 – 2vcpus, 8GiB memory | |
| Username | TestUser | |
| Password | TestPa$$w0rd! | |
| Public inbound ports | Allow selected ports | |
| Select inbound ports | RDP (3389) | |
| Disks | No changes required | |
| Networking | Virtual network | CoreServicesVnet |
| Subnet | DatabaseSubnet (10.20.20.0/24) | |
| Public IP | (new) TestVM2-ip | |
| NIC network security group | Basic | |
| Public inbound ports | Allow selected ports | |
| Select inbound ports | RDP (3389) | |
| Load balancing | Not selected | |
| Management | No changes required | |
| Advanced | No changes required | |
| Tags | No changes required | |
| Review + create | Review your settings and select Create |
- When the deployment is complete, go to the Azure portal home page, and then select Virtual Machines.
- Verify that both virtual machines have been created.

Task 4: Verify records are present in the DNS zone
- On the Azure Portal home page, select Private DNS zones.

- In Private DNS zones, select Exceedlabs.com.
- Verify that host (A) records are listed for both VMs, as shown:

- Make a note of the names and IP addresses of the VMs.
Connect to the Test VMs using RDP
- On the Azure Portal home page, select Virtual Machines.
- Select TestVM1.
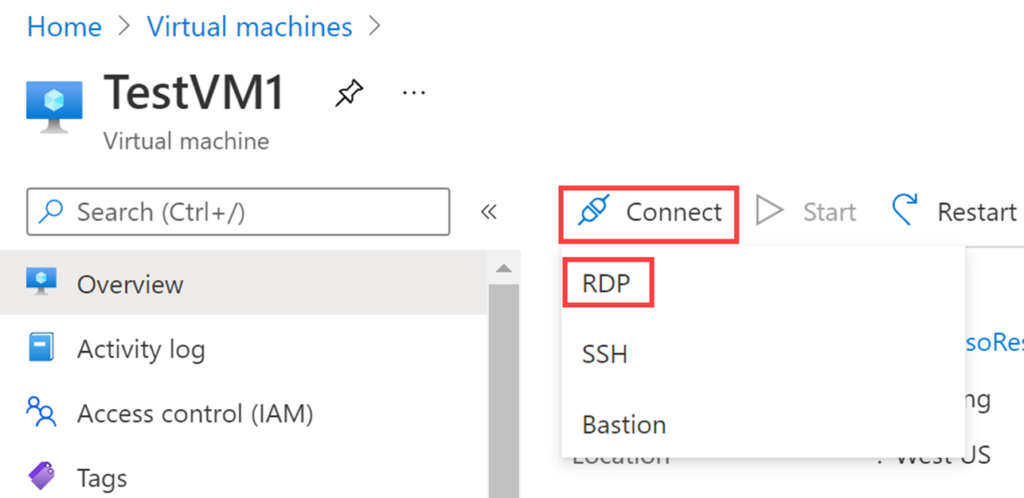
- In TestVM1, select Connect > RDP.

| In TestVM1 | Connect, select Download RDP file. |
- Save the RDP file to your desktop.
- On the Azure Portal home page, select Virtual Machines.
- Select TestVM2.
- In TestVM2, select Connect > RDP.
| In TestVM2 | Connect, select Download RDP file. |
- Save the RDP file to your desktop.
- Connect to TestVM1 using the RDP file, and the username TestUser and the password TestPa$$w0rd!.
- Connect to TestVM2 using the RDP file, and the username TestUser and the password TestPa$$w0rd!.
- On both VMs, in Choose privacy settings for your device, select Accept.
- On both VMs, if prompted, in Networks, select Yes.
- On TestVM1, open a command prompt and enter the command ipconfig /all.
- Verify that the IP address is the same as the one you noted in the DNS zone.
- Enter the command ping TestVM2.Exceedlabs.com.
- Verify that the FQDN resolves to the IP address that you noted in the Private DNS zone. The ping itself will timeout because of the Windows Firewall that is enabled on the VMs.
- Alternatively, you can enter the command nslookup TestVM2.Exceedlabs.com and verify that you receive a successful name resolution record for VM2

Congratulations! You have created a private DNS Zone, added a name resolution and auto-registration link, and tested name resolution in your configuration.
Reminder: Don’t forget to delete or shutdown all unused Azure resources after your labs for cost saving
Leave a Reply