- An Azure subscription you will be using in this lab.
- A Microsoft account or an Azure AD account with the Owner or Contributor role in the Azure subscription you will be using in this lab and with the Global Administrator role in the Azure AD tenant associated with that Azure subscription.
- The completed lab Prepare for deployment of Azure Virtual Desktop (AD DS)
Lab scenario
You need to create and configure host pools and session hosts in an Active Directory Domain Services (AD DS) environment.
Objectives
After completing this lab, you will be able to:
- Implement an Azure Virtual Desktop environment in an AD DS domain
- Validate an Azure Virtual Desktop environment in an AD DS domain
Lab 1: Implement an Azure Virtual Desktop environment in an AD DS domain
The main tasks for this Lab are as follows:
- Prepare AD DS domain and the Azure subscription for deployment of an Azure Virtual Desktop host pool
- Deploy an Azure Virtual Desktop host pool
- Manage the Azure Virtual Desktop host pool session hosts
- Configure Azure Virtual Desktop application groups
- Configure Azure Virtual Desktop workspaces
Task 1: Prepare AD DS domain and the Azure subscription for deployment of an Azure Virtual Desktop host pool
- From your lab computer, start a web browser, navigate to the Azure portal, and sign in by providing credentials of a user account with the Owner role in the subscription you will be using in this lab.
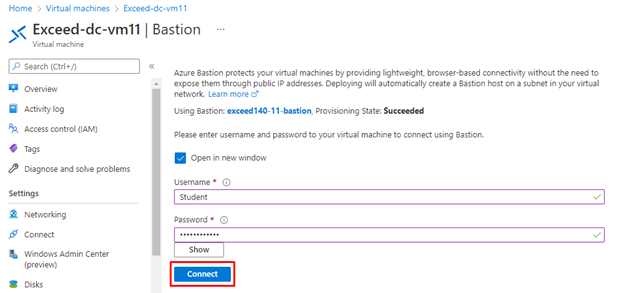
- In the Azure portal, search for and select Virtual machines and, from the Virtual machines blade, select exceed-dc-vm11.
- On the exceed-dc-vm11 blade, select Connect, in the drop-down menu, select Bastion, on the Bastion tab of the exceed-dc-vm11 | Connect blade, select Use Bastion.
- When prompted, provide the following credentials and select Connect:
| Setting | Value |
| User Name | Student |
| Password | Pa55w.rd1234 |
- Within the Remote Desktop session to exceed-dc-vm11, start Windows PowerShell ISE as administrator.
- Within the Remote Desktop session to exceed-dc-vm11, from the Administrator: Windows PowerShell ISE console, run the following to create an organizational unit that will host the computer objects of the Azure Virtual Desktop hosts:
New-ADOrganizationalUnit 'WVDInfra' –path 'DC=adatum,DC=com' -ProtectedFromAccidentalDeletion $false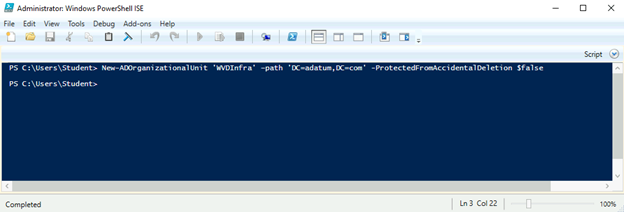
From the Administrator: Windows PowerShell ISE console, run the following to sign in to your Azure subscription:
Connect-AzAccountWhen prompted, provide the credentials of the user account with the Owner role in the subscription you are using in this lab.

From the Administrator: Windows PowerShell ISE console, run the following to identify the user principal name of the aduser1 account:
(Get-AzADUser -DisplayName 'aduser1').UserPrincipalName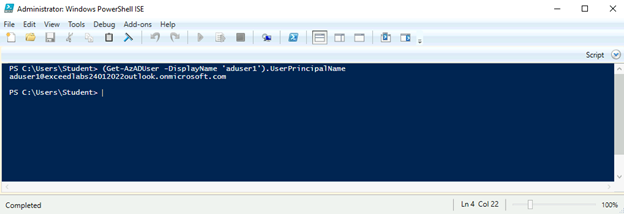
Note: Record the user principal name you identified in this step. You will need it later in this lab.
- From the Administrator: Windows PowerShell ISE console, run the following to register the Microsoft.DesktopVirtualization resource provider:
Register-AzResourceProvider -ProviderNamespace Microsoft.DesktopVirtualization- Within the Remote Desktop session to exceed-dc-vm11, start Microsoft Edge and navigate to the Azure portal. If prompted, sign in by using the Azure AD credentials of the user account with the Owner role in the subscription you are using in this lab.
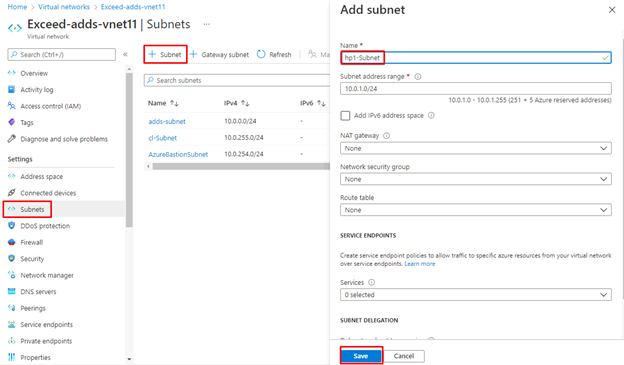
- Within the Remote Desktop session to exceed-dc-vm11, in the Azure portal, use the Search resources, services, and docs text box at the top of the Azure portal page to search for and navigate to Virtual networks and, on the Virtual networks blade, select exceed-adds-vnet11.

- On the exceed-adds-vnet11 blade, select Subnets, on the Subnets blade, select + Subnet, on the Add subnet blade, specify the following settings (leave all other settings with their default values) and click Save:
| Setting | Value |
| Name | hp1-Subnet |
| Subnet address range | 10.0.1.0/24 |
Task 2: Deploy an Azure Virtual Desktop host pool
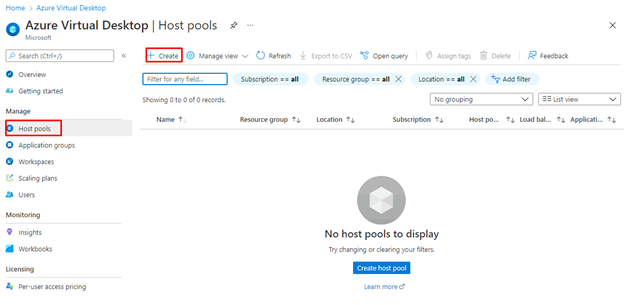
- Within the Remote Desktop session to exceed-dc-vm11, in the Microsoft Edge window displaying the Azure portal, search for and select Azure Virtual Desktop, on the Azure Virtual Desktop blade, select Host pools and, on the Azure Virtual Desktop | Host pools blade, select + Create.
- On the Basics tab of the Create a host pool blade, specify the following settings and select Next: Virtual Machines > (leave other settings with their default values):
| Setting | Value |
| Subscription | the name of the Azure subscription you are using in this lab |
| Resource group | the name of a new resource group exceed-21-RG |
| Host pool name | exceed-21-hp1 |
| Load balancing algorithm | Breadth-first |
| Max session limit | 50 |
| Location | the name of the Azure region into which you deployed resources in the first Lab of this lab or a region close to it |
| Validation environment | No |
| Host pool type | Pooled |
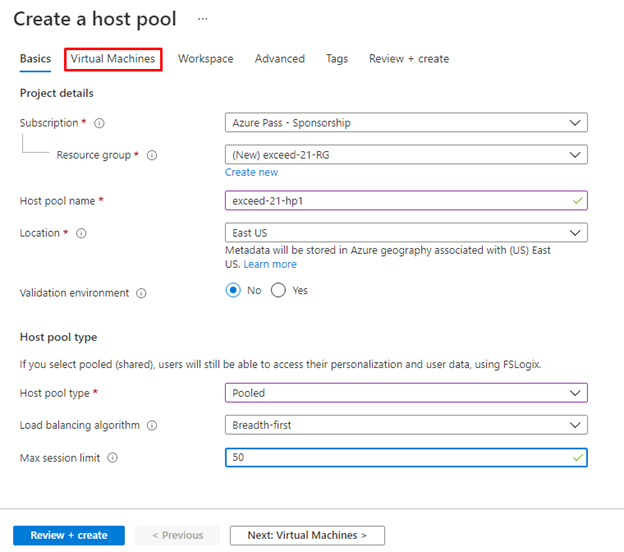
- On the Virtual machines tab of the Create a host pool blade, specify the following settings and select Next: Workspace > (leave other settings with their default values):
| Setting | Value |
| Add Azure virtual machines | Yes |
| Resource group | Defaulted to same as host pool |
| Name prefix | xceed-21-p1 |
| Virtual machine location | the name of the Azure region into which you deployed resources in the first Lab of this lab |
| Availability options | No infrastructure redundancy required |
| Image type | Gallery |
| Image | Windows 10 Enterprise multi-session, Version 20H2 + Microsoft 365 Apps |
| Virtual machine size | Standard D2s v3 |
| Number of VMs | 2 |
| OS disk type | Standard SSD |
| Virtual network | exceed-adds-vnet11 |
| Subnet | hp1-Subnet (10.0.1.0/24) |
| Network security group | Basic |
| Public inbound ports | No |
| Select which directory you would like to join | Active Directory |
| AD domain join UPN | student@adatum.com |
| Password | Pa55w.rd1234 |
| Specify domain or unit | Yes |
| Domain to join | adatum.com |
| Organizational Unit path | OU=WVDInfra,DC=adatum,DC=com |
| User name | Student |
| Password | Pa55w.rd1234 |
| Confirm password | Pa55w.rd1234 |
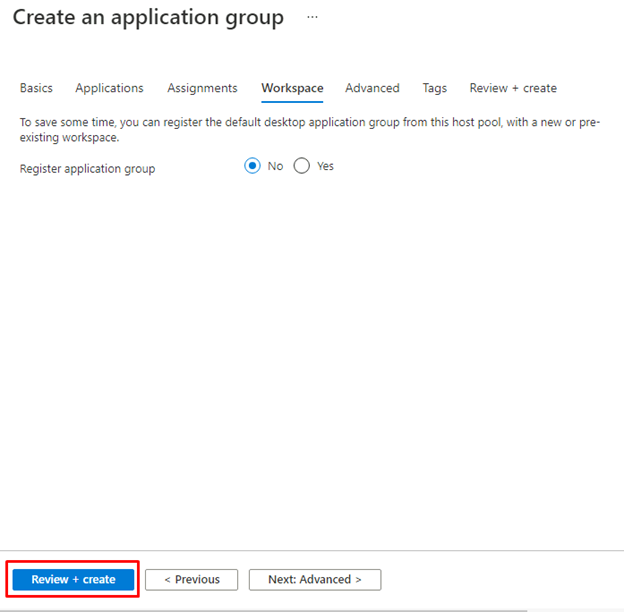
- On the Workspace tab of the Create a host pool blade, specify the following settings and select Review + create:
| Setting | Value |
| Register desktop app group | No |
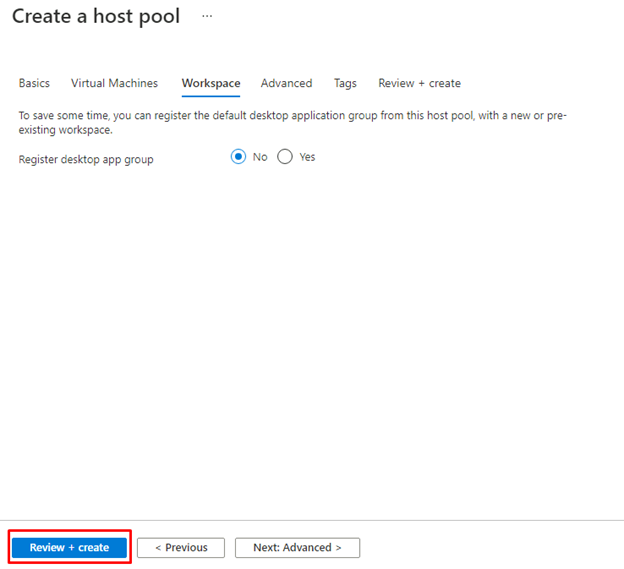
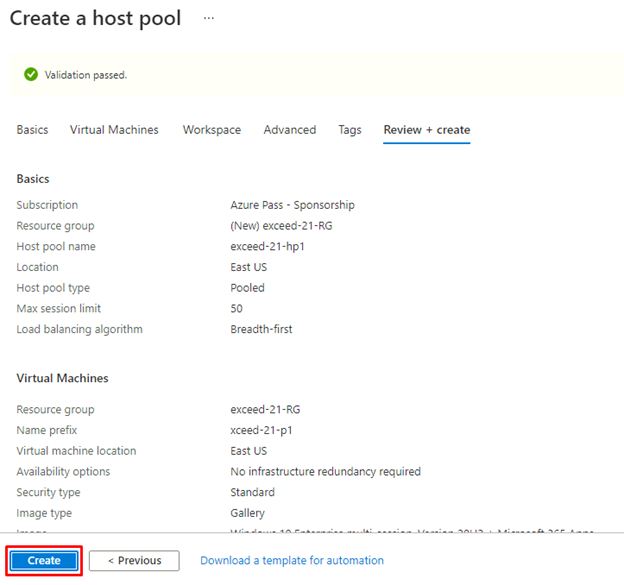
On the Review + create tab of the Create a host pool blade, select Create.
Note: Wait for the deployment to complete. This might take about 10 minutes.
Task 3: Manage the Azure Virtual Desktop host pool session hosts
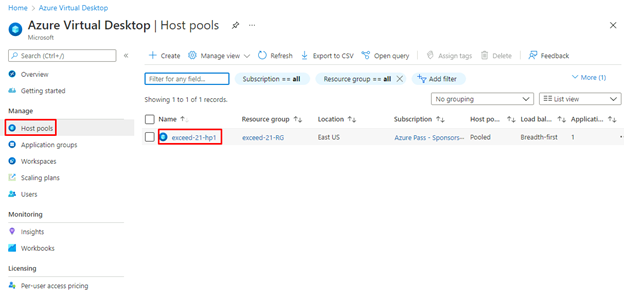
- Within the Remote Desktop session to exceed-dc-vm11, in the web browser window displaying the Azure portal, search for and select Azure Virtual Desktop and, on the Azure Virtual Desktop blade, in the vertical menu bar, in the Manage section, select Host pools.
- On the Azure Virtual Desktop | Host pools blade, in the list of host pools, select exceed-21-hp1.
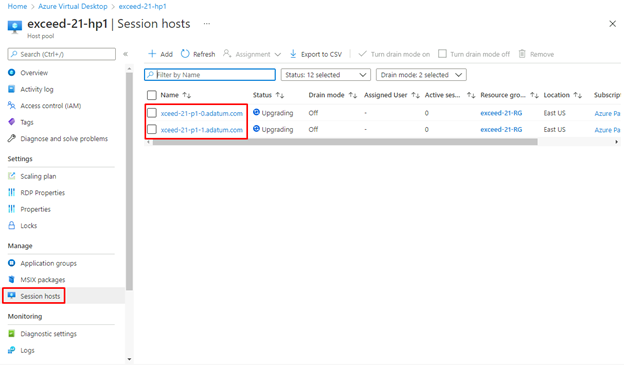
On the exceed-21-hp1 blade, in the in the vertical menu bar, in the Manage section, select Session hosts and verify that the pool consists of two hosts.
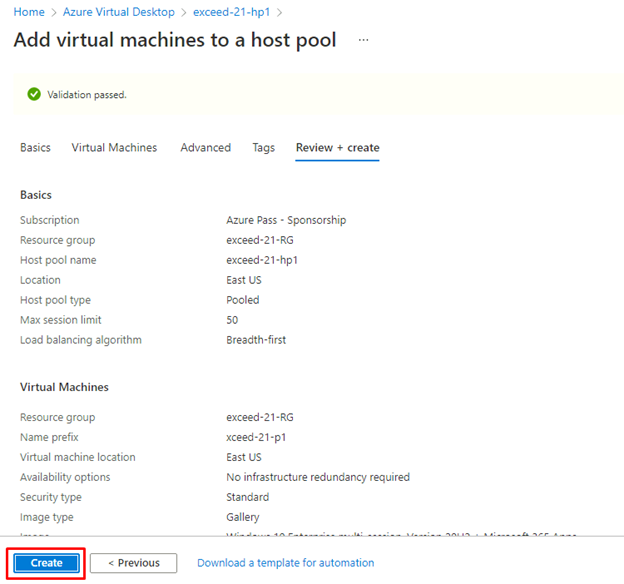
On the exceed-21-hp1 | Session hosts blade, select + Add.
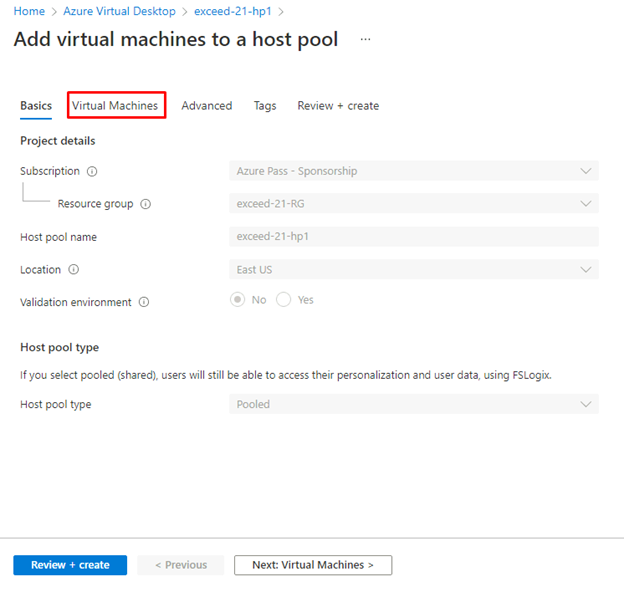
- On the Basics tab of the Add virtual machines to a host pool blade, review the preconfigured settings and select Next: Virtual Machines.
- On the Virtual Machines tab of the Add virtual machines to a host pool blade, specify the following settings and select Review + create (leave others with their default settings):
| Setting | Value |
| Resource group | exceed-21-RG |
| Name prefix | xceed-21-p1 |
| Virtual machine location | the name of the Azure region into which you deployed the first two session host VMs |
| Availability options | No infrastructure redundancy required |
| Image type | Gallery |
| Image | Windows 10 Enterprise multi-session, Version 2004 + Microsoft 365 Apps |
| Number of VMs | 1 |
| Virtual network | exceed-adds-vnet11 |
| Subnet | hp1-Subnet (10.0.1.0/24) |
| Network security group | Basic |
| Public inbound ports | No |
| AD domain join UPN | student@adatum.com |
| Password | Pa55w.rd1234 |
| Specify domain or unit | Yes |
| Domain to join | adatum.com |
| Organizational Unit path | OU=WVDInfra,DC=adatum,DC=com |
| Virtual Machine Administrator account username | student |
| Virtual Machine Administrator account pasword | Pa55w.rd1234 |
- Note: As you likely noticed, it’s possible to change the image and prefix of the VMs as you add session hosts to the existing pool. In general, this is not recommended unless you plan to replace all VMs in the pool.
- On the Review + create tab of the Add virtual machines to a host pool blade, select Create
Note: Wait for the deployment to complete before you proceed to the next task. The deployment might take about 5 minutes.
Task 4: Configure Azure Virtual Desktop application groups
- Within the Remote Desktop session to exceed-dc-vm11, in the web browser window displaying the Azure portal, search for and select Azure Virtual Desktop and, on the Azure Virtual Desktop blade, select Application groups.
- On the Azure Virtual Desktop | Application groups blade, note the existing, auto-generated exceed-21-hp1-DAG desktop application group, and select it.
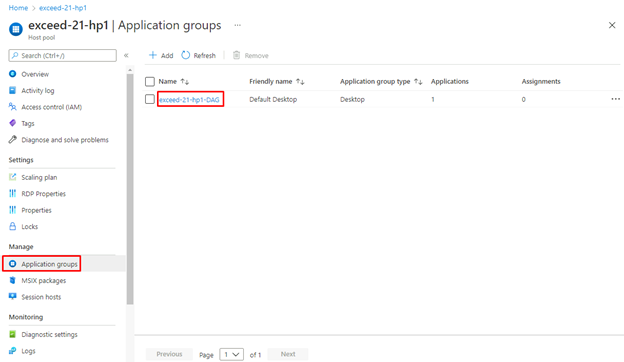
- On the exceed-21-hp1-DAG blade, select Assignments.
- On the exceed-21-hp1-DAG | Assignments blade, select + Add.
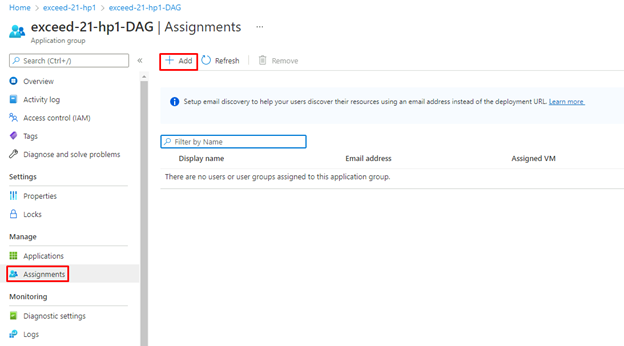
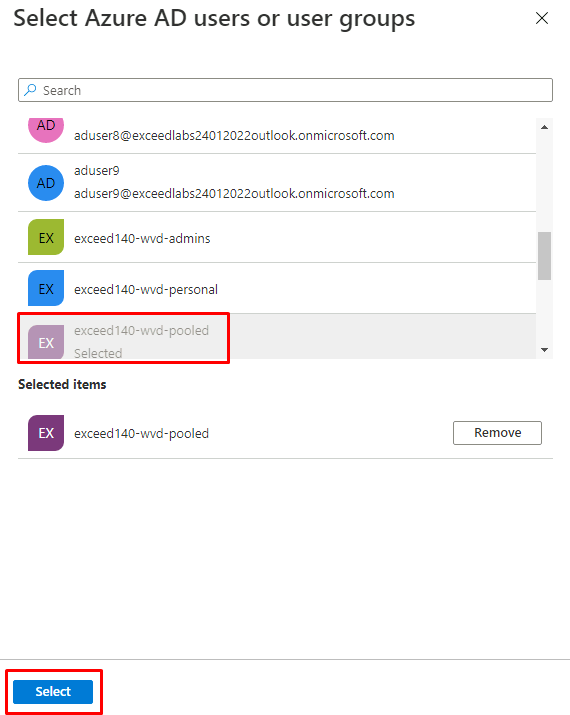
On the Select Azure AD users or user groups blade, select exceed140-wvd-pooled and click Select.
- Navigate back to the Azure Virtual Desktop | Application groups blade, select + Create.
- On the Basics tab of the Create an application group blade, specify the following settings and select Next: Applications >:
| Setting | Value |
| Subscription | the name of the Azure subscription you are using in this lab |
| Resource group | exceed-21-RG |
| Host pool | exceed-21-hp1 |
| Application group type | RemoteApp |
| Application group name | exceed-21-hp1-Office365-RAG |
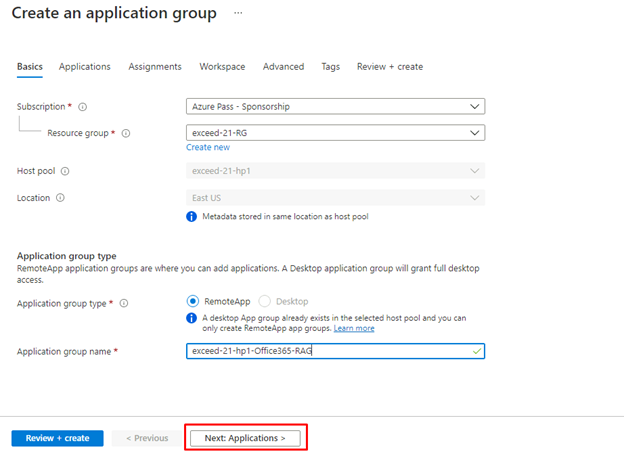
- On the Applications tab of the Create an application group blade, select + Add applications.
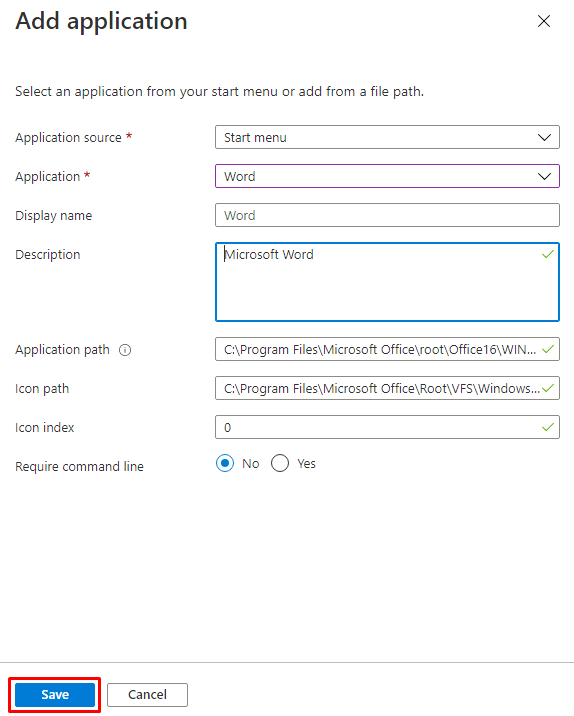
- On the Add application blade, specify the following settings and select Save:
| Setting | Value |
| Application source | Start menu |
| Application | Word |
| Description | Microsoft Word |
| Require command line | No |
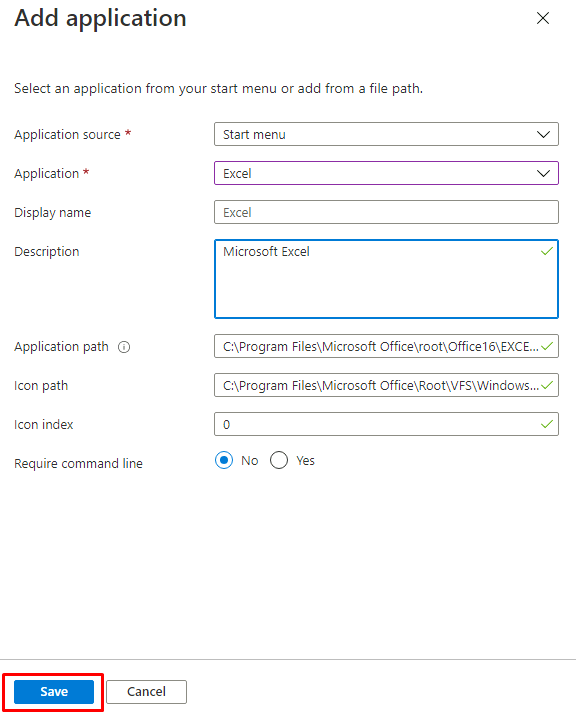
- Back on the Applications tab of the Create an application group blade, select + Add applications.
- On the Add application blade, specify the following settings and select Save:
| Setting | Value |
| Application source | Start menu |
| Application | Excel |
| Description | Microsoft Excel |
| Require command line | No |
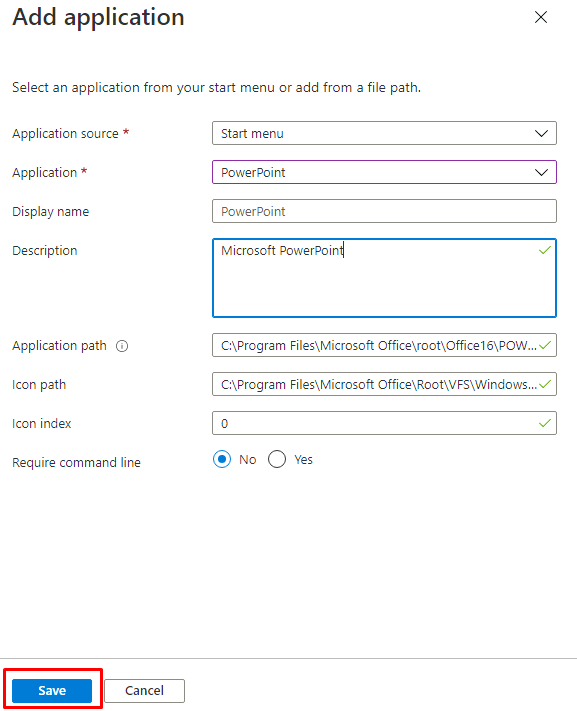
- Back on the Applications tab of the Create an application group blade, select + Add applications.
- On the Add application blade, specify the following settings and select Save:
| Setting | Value |
| Application source | Start menu |
| Application | PowerPoint |
| Description | Microsoft PowerPoint |
| Require command line | No |
- Back on the Applications tab of the Create an application group blade, select Next: Assignments >.
- On the Assignments tab of the Create an application group blade, select + Add Azure AD users or user groups.
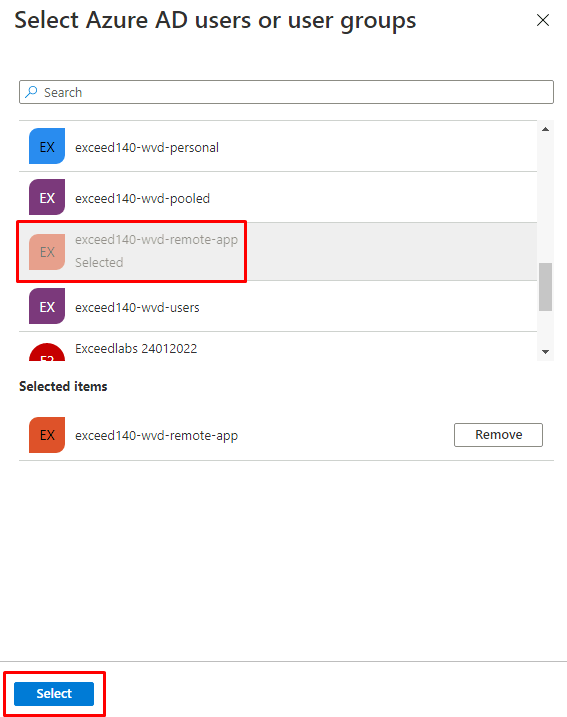
- On the Select Azure AD users or user groups blade, select exceed140-wvd-remote-app and click Select.
- Back on the Assignments tab of the Create an application group blade, select Next: Workspace >.
- On the Workspace tab of the Create a workspace blade, specify the following setting and select Review + create:
| Setting | Value |
| Register application group | No |
- On the Review + create tab of the Create an application group blade, select Create.

Note: Wait for the Application Group to be created. This should take less than 1 minute.
Note: Next you will create an application group based on file path as the application source.
- Within the Remote Desktop session to exceed-dc-vm11, search for and select Azure Virtual Desktop and, on the Azure Virtual Desktop blade, select Application groups.
- On the Azure Virtual Desktop | Application groups blade, select + Create.
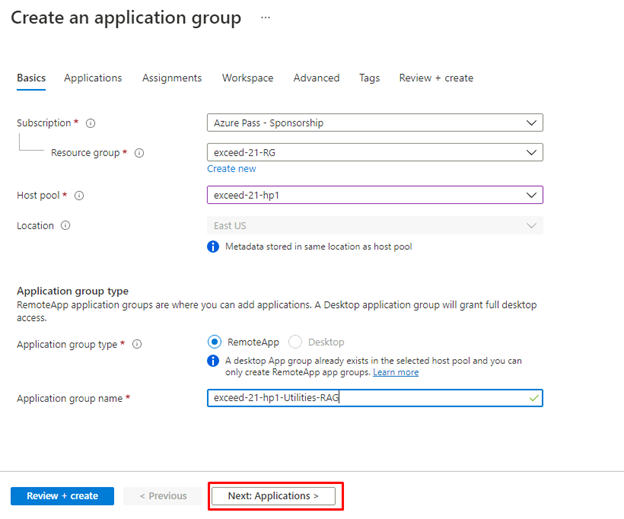
- On the Basics tab of the Create an application group blade, specify the following settings and select Next: Applications >:
| Setting | Value |
| Subscription | the name of the Azure subscription you are using in this lab |
| Resource group | exceed-21-RG |
| Host pool | exceed-21-hp1 |
| Application group type | RemoteApp |
| Application group name | exceed-21-hp1-Utilities-RAG |
- On the Applications tab of the Create an application group blade, select + Add applications.
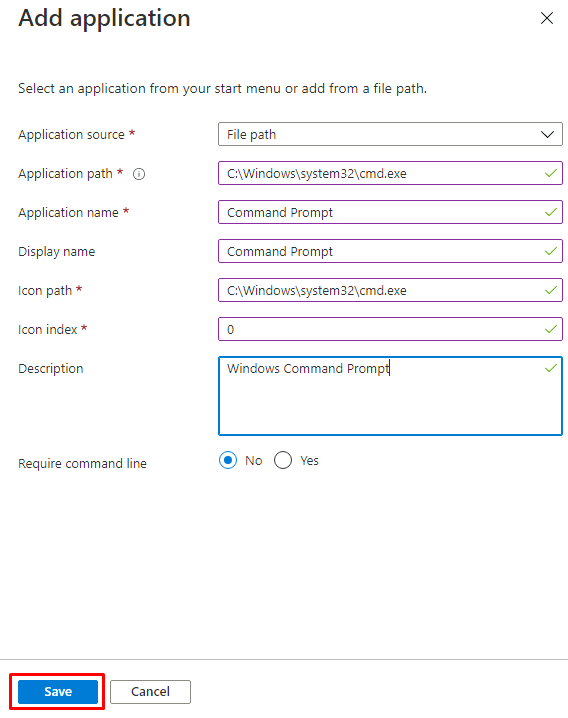
- On the Add application blade, specify the following settings and select Save:
| Setting | Value |
| Application source | File path |
| Application path | C:\Windows\system32\cmd.exe |
| Application name | Command Prompt |
| Display name | Command Prompt |
| Icon path | C:\Windows\system32\cmd.exe |
| Icon index | 0 |
| Description | Windows Command Prompt |
| Require command line | No |
- Back on the Applications tab of the Create an application group blade, select Next: Assignments >.
- On the Assignments tab of the Create an application group blade, select + Add Azure AD users or user groups.
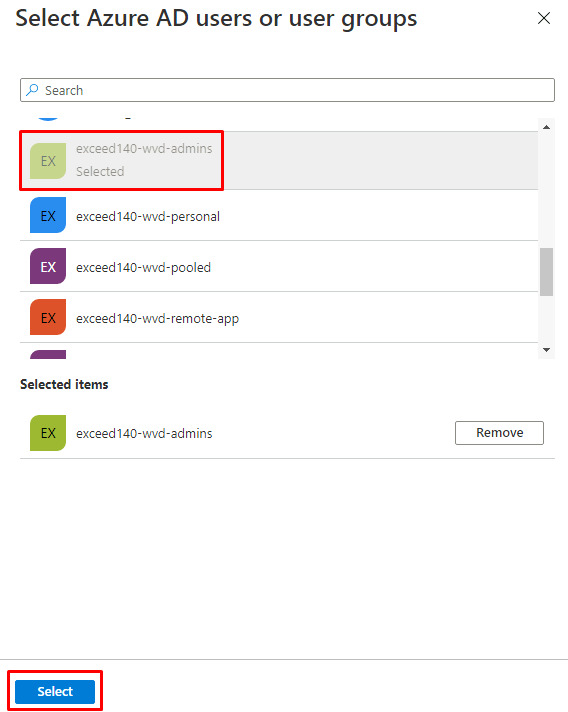
- On the Select Azure AD users or user groups blade, select az140-wvd-remote-app and exceed140-wvd-admins and click Select.
- Back on the Assignments tab of the Create an application group blade, select Next: Workspace >.
- On the Workspace tab of the Create a workspace blade, specify the following setting and select Review + create:
| Setting | Value |
| Register application group | No |
On the Review + create tab of the Create an application group blade, select Create.

Task 5: Configure Azure Virtual Desktop workspaces
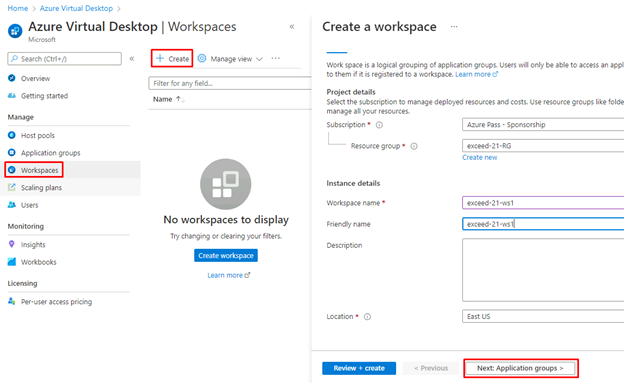
- Within the Remote Desktop session to exceed-dc-vm11, in the Microsoft Edge window displaying the Azure portal, search for and select Azure Virtual Desktop and, on the Azure Virtual Desktop blade, select Workspaces.
- On the Azure Virtual Desktop | Workspaces blade, select + Create.
- On the Basics tab of the Create a workspace blade, specify the following settings and select Next: Application groups >:
| Setting | Value |
| Subscription | the name of the Azure subscription you are using in this lab |
| Resource group | exceed-21-RG |
| Workspace name | exceed-21-ws1 |
| Friendly name | exceed-21-ws1 |
| Location | the name of the Azure region into which you deployed resources in the first Lab of this lab or a region close to it |
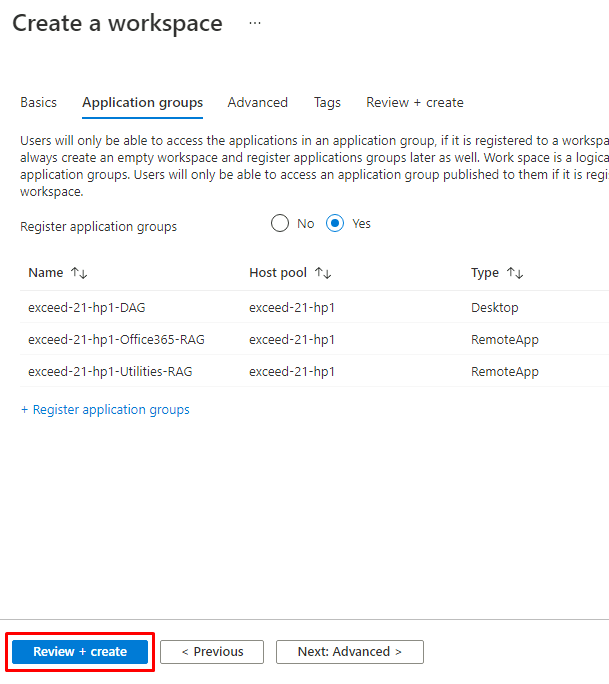
- On the Application groups tab of the Create a workspace blade, specify the following settings:
| Setting | Value |
| Register application groups | Yes |
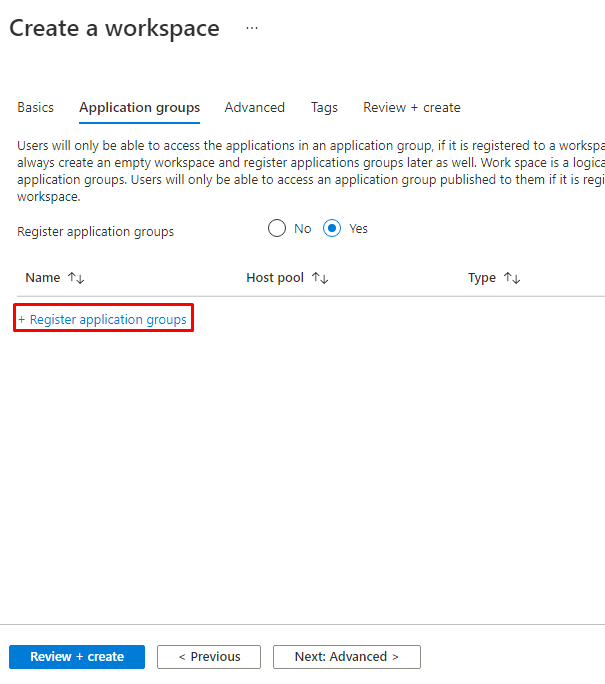
- On the Workspace tab of the Create a workspace blade, select + Register application groups.
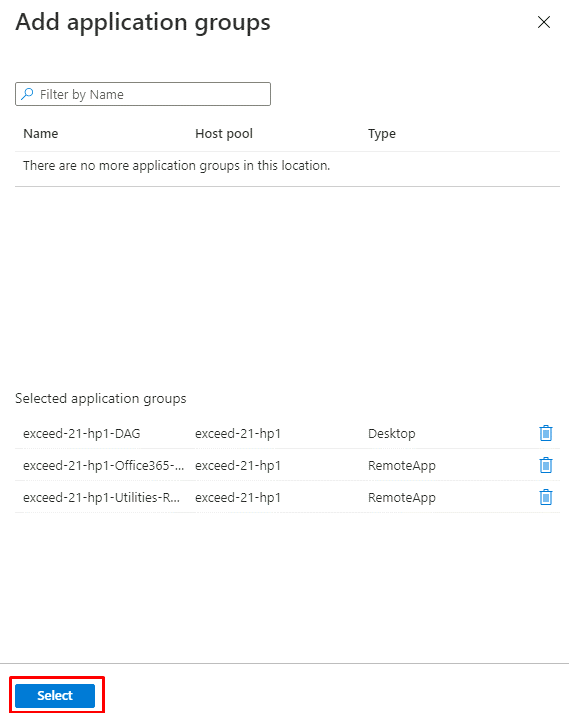
- On the Add application groups blade, select the plus sign next to the exceed-21-hp1-DAG, exceed-21-hp1-Office365-RAG, and exceed-21-hp1-Utilities-RAG entries and click Select.
Back on the Application groups tab of the Create a workspace blade, select Review + create.
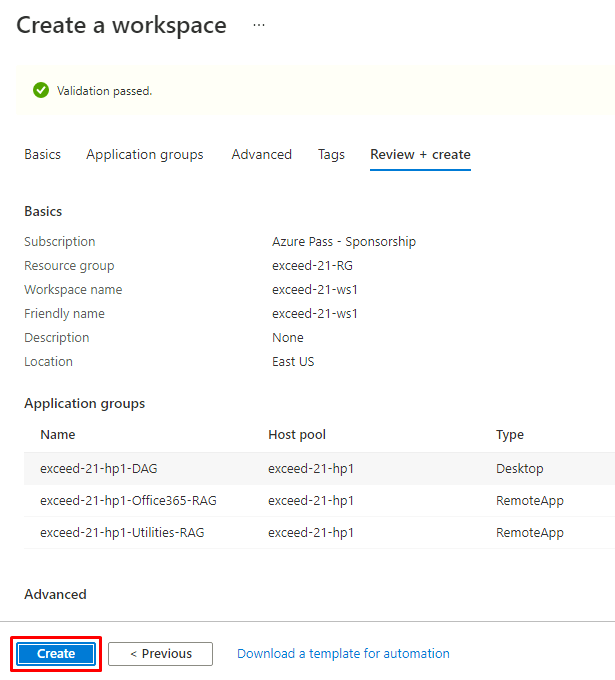
On the Review + create tab of the Create a workspace blade, select Create.
Lab 2: Validate Azure Virtual Desktop environment
The main tasks for this Lab are as follows:
- Install Microsoft Remote Desktop client (MSRDC) on a Windows 10 computer
- Subscribe to a Azure Virtual Desktop workspace
- Test Azure Virtual Desktop apps
Task 1: Install Microsoft Remote Desktop client (MSRDC) on a Windows 10 computer
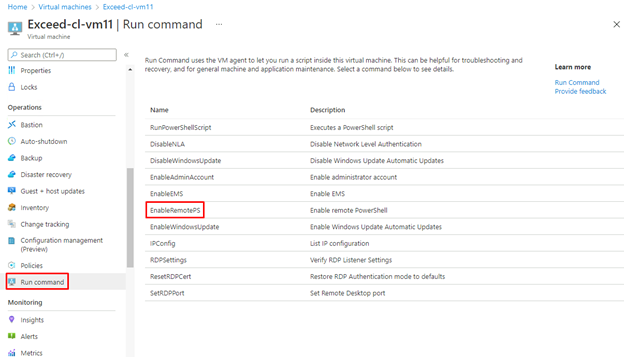
- Within the Remote Desktop session to exceed-dc-vm11, in the browser window displaying the Azure portal, search for and select Virtual machines and, on the Virtual machines blade, select the exceed-cl-vm11 entry.
- On the exceed-cl-vm11 blade, scroll down to the Operations section and select Run Command.
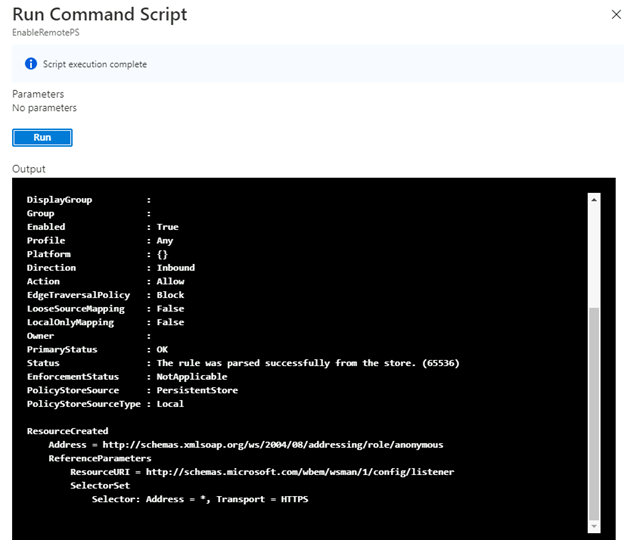
- On the exceed-cl-vm11 | Run command blade, select EnableRemotePS and select Run.
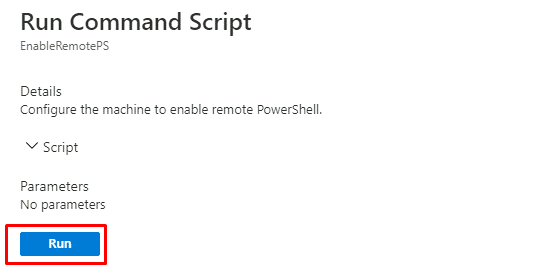
Note: Wait for the command to complete before you proceed to the next step. This might take about 1 minute. You may get red text errors addressing the Public profile being used and not the Domain profile, if so, you can ignore and go to the next step.
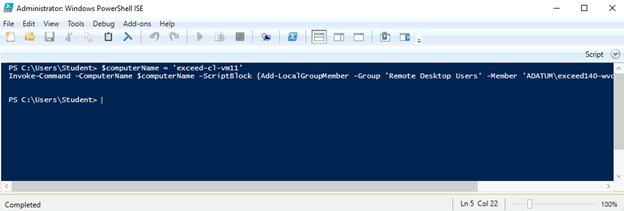
Within the Remote Desktop session to exceed-dc-vm11, from the Administrator: Windows PowerShell ISE script pane, run the following to add all members of the ADATUM\exceed140-wvd-users to the local Remote Desktop Users group on the Azure VM exceed-cl-vm11 running Windows 10 which you deployed in the lab Prepare for deployment of Azure Virtual Desktop (AD DS).
$computerName = 'exceed-cl-vm11'
Invoke-Command -ComputerName $computerName -ScriptBlock {Add-LocalGroupMember -Group 'Remote Desktop Users' -Member 'ADATUM\exceed140-wvd-users'}
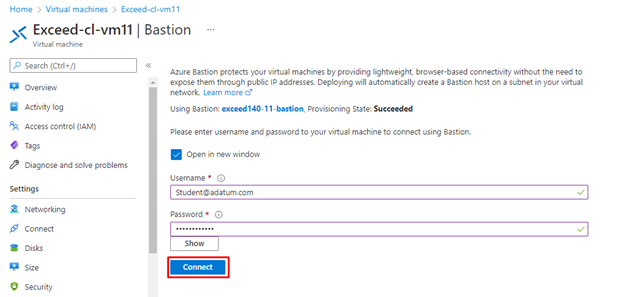
- Switch to your lab computer, from the lab computer, in the browser window displaying the Azure portal, search for and select Virtual machines and, on the Virtual machines blade, select the exceed-cl-vm11 entry.
- On the exceed-cl-vm11 blade, select Connect, in the drop-down menu, select Bastion, on the Bastion tab of the exceed-cl-vm11 | Connect blade, select Use Bastion.
- When prompted, provde the following credentials and select Connect:
| Setting | Value |
| User Name | Student@adatum.com |
| Password | Pa55w.rd1234 |
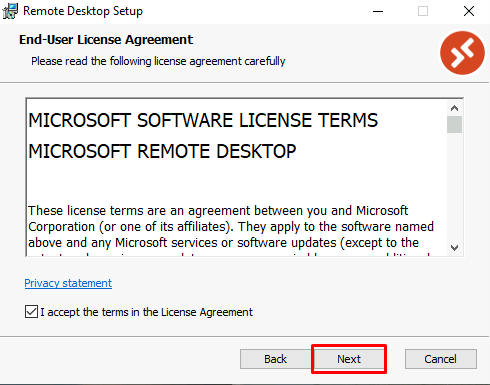
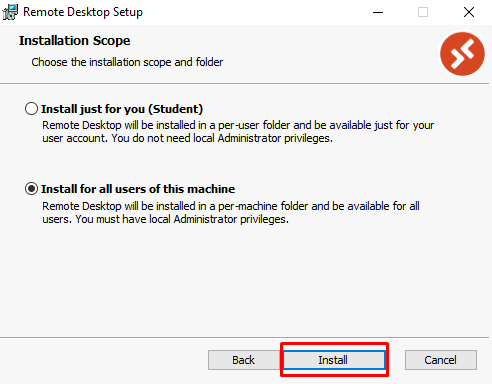
Within the Remote Desktop session to exceed-cl-vm11 , start Microsoft Edge and navigate to Windows Desktop client download page and, when prompted, select Run to start its installation. On the Installation Scope page of the Remote Desktop Setup wizard, select the option Install for all users of this machine and click Install. When prompted by User Account Control for administrative credentials, authenticate by using the ADATUM\Student username with Pa55w.rd1234 as its password.
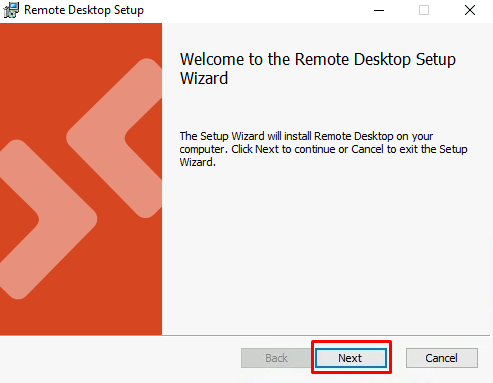
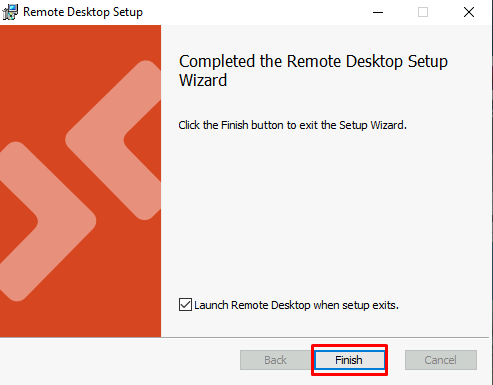
Once the installation completes, ensure that the Launch Remote Desktop when setup exits checkbox is selected and click Finish to start the Remote Desktop client.
Task 2: Subscribe to a Azure Virtual Desktop workspace
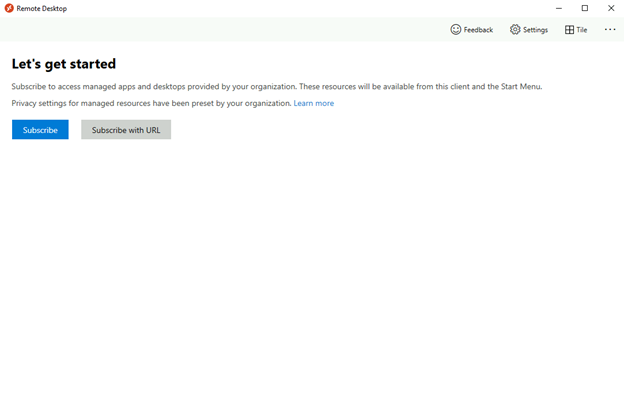
- In the Remote Desktop client window, select Subscribe and, when prompted, sign in with the aduser1 credentials, by providing its userPrincipalName you identified earlier in this lab and the password you set when creating this account.
Note: Alternatively, in the Remote Desktop client window, select Subscribe with URL, in the Subscribe to a Workspace pane, in the Email or Workspace URL, type https://rdweb.wvd.microsoft.com/api/arm/feeddiscovery, select Next, and, once prompted, sign in with the aduser1 credentials (using its userPrincipalName attribute as the user name and the password you set when creating this account).
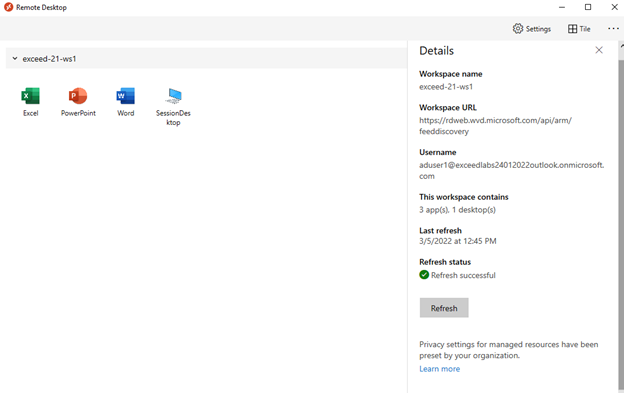
- In the Stay signed in to all your apps window, clear the checkbox Allow my organization to manage my device checkbox and select No, sign in to this app only.
- Ensure that the Remote Desktop page displays the listing of applications that are included in the application groups published to the workspace and associated with the user account aduser1 via its group membership.
Task 3: Test Azure Virtual Desktop apps
- Within the Remote Desktop session to exceed-cl-vm11 , in the Remote Desktop client window, in the list of applications, double-click Command Prompt and verify that it launches a Command Prompt window. When prompted to authenticate, type the password you set when creating the aduser1 user account, select the checkbox Remember me, and select OK.
Note: Initially, it might take a few minutes for the application to start, but subsequently, the application startup should be much faster.
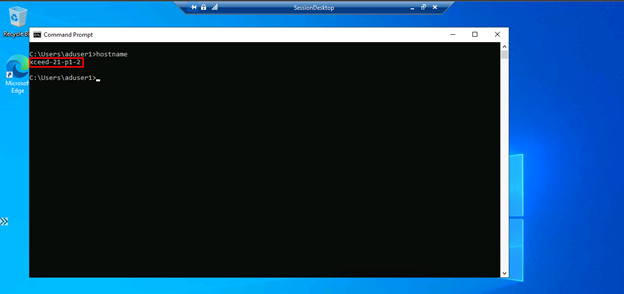
- At the Command Prompt, type hostname and press the Enter key to display the name of the computer on which the Command Prompt is running.
Note: Verify that the displayed name is xceed-21-p1-0, xceed-21-p1-1 or xceed-21-p1-2, rather than exceed-cl-vm11 .
- At the Command Prompt, type logoff and press the Enter key to log off from the current Remote App session.
- Within the Remote Desktop session to exceed-cl-vm11 , in the Remote Desktop client window, in the list of applications, double-click SessionDesktop and verify that it launches a Remote Desktop session.
- Within the Default Desktop session, right-click Start, select Run, in the Open text box of the Run dialog box, type cmd and select OK.
- Within the Default Desktop session, at the Command Prompt, type hostname and press the Enter key to display the name of the computer on which the Remote Desktop session is running.
- Verify that the displayed name is either xceed-21-p1-0, xceed-21-p1-1 or xceed-21-p1-2.
Lab 3: Stop and deallocate Azure VMs provisioned in the lab
The main tasks for this Lab are as follows:
- Stop and deallocate Azure VMs provisioned in the lab
Note: In this Lab, you will deallocate the Azure VMs provisioned in this lab to minimize the corresponding compute charges
Task 1: Deallocate Azure VMs provisioned in the lab
- Switch to the lab computer and, in the web browser window displaying the Azure portal, open the PowerShell shell session within the Cloud Shell pane.
- From the PowerShell session in the Cloud Shell pane, run the following to list all Azure VMs created in this lab:
Get-AzVM -ResourceGroup 'exceed-21-RG'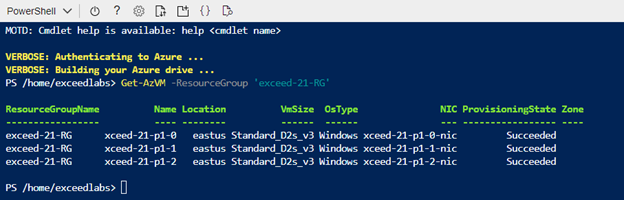
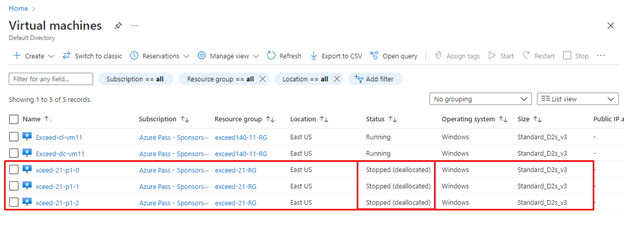
From the PowerShell session in the Cloud Shell pane, run the following to stop and deallocate all Azure VMs you created in this lab:
Get-AzVM -ResourceGroup 'exceed-21-RG' | Stop-AzVM -NoWait -Force
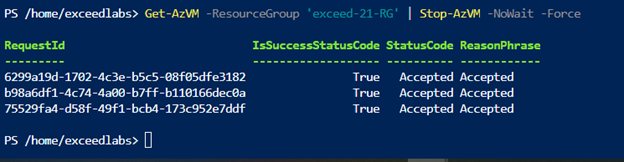
Note: The command executes asynchronously (as determined by the -NoWait parameter), so while you will be able to run another PowerShell command immediately afterwards within the same PowerShell session, it will take a few minutes before the Azure VMs are actually stopped and deallocated.
Congratulations, you are now able to create and configure Azure Virtual Desktop host pools and session hosts in an Active Directory Domain Services (AD DS) environment.
Reminder: Don’t forget to delete or shutdown all unused Azure resources after your labs for cost saving
Leave a Reply