You need to implement and manage storage for a Azure Virtual Desktop deployment in an Azure Active Directory Domain Services (Azure AD DS) environment.
Objectives
After completing this lab, you will be able to:
- Configure Azure Files to store profile containers for Azure Virtual Desktop
Prerequisites for this labs : Azure Account / Download Labs Files here
- An Azure subscription you will be using in this lab.
- A Microsoft account or an Azure AD account with the Owner or Contributor role in the Azure subscription you will be using in this lab and with the Global Administrator role in the Azure AD tenant associated with that Azure subscription.
- The completed lab Prepare for deployment of Azure Virtual Desktop (AD DS)
Exercise 1: Configure Azure Files to store profile containers for Azure Virtual Desktop
The main tasks for this exercise are as follows:
- Create an Azure Storage account
- Create an Azure Files share
- Enable AD DS authentication for the Azure Storage account
- Configure the Azure Files RBAC-based permissions
- Configure the Azure Files file system permissions
Task 1: Create an Azure Storage account
- From your lab computer, start a web browser, navigate to the Azure portal, and sign in by providing credentials of a user account with the Owner role in the subscription you will be using in this lab.
- In the Azure portal, search for and select Virtual machines and, from the Virtual machines blade, select exceed-dc-vm11.
- On the exceed-dc-vm11 blade, select Connect, in the drop-down menu, select Bastion, on the Bastion tab of the exceed-dc-vm11 | Connect blade, select Use Bastion.
- When prompted, provide the following credentials and select Connect:
| Setting | Value |
| User Name | Student@adatum.com |
| Password | Pa55w.rd1234 |

- Within the Remote Desktop session to exceed-dc-vm11, start Microsoft Edge and navigate to the Azure portal. If prompted, sign in by using the Azure AD credentials of the user account with the Owner role in the subscription you are using in this lab.
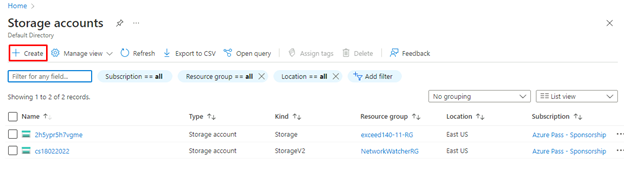
- Within the Remote Desktop session to exceed-dc-vm11, in the Microsoft Edge window displaying the Azure portal, search for and select Storage accounts and, on the Storage accounts blade, select + Create.
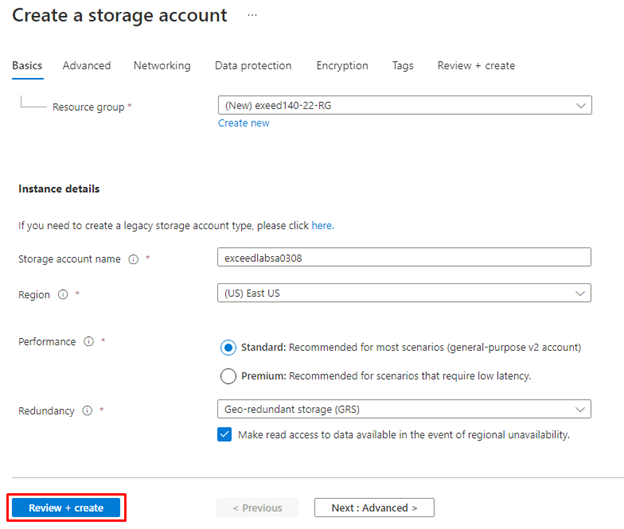
- On the Basics tab of the Create storage account blade, specify the following settings (leave others with their default values):
| Setting | Value |
| Subscription | the name of the Azure subscription you are using in this lab |
| Resource group | the name of a new resource group exeed140-22-RG |
| Storage account name | any globally unique name between 3 and 15 in length consisting of lower case letters and digits, starting with a letter |
| Region | the name of an Azure region hosting the Azure Virtual Desktop lab environment |
| Performance | Standard |
| Redundancy | Geo-redundant storage (GRS) |
| Make read access to data available in the event of regional unavailability | enabled |
Note: Make sure that the length of the storage account name does not exceed 15 characters. The name will be used to create a computer account in the Active Directory Domain Services (AD DS) domain that is integrated with the Azure AD tenant associated with the Azure subscription containing the storage account. This will allow for AD DS-based authentication when accessing file shares hosted in this storage account.
- On the Basics tab of the Create storage account blade, select Review + Create, wait for the validation process to complete, and then select Create.
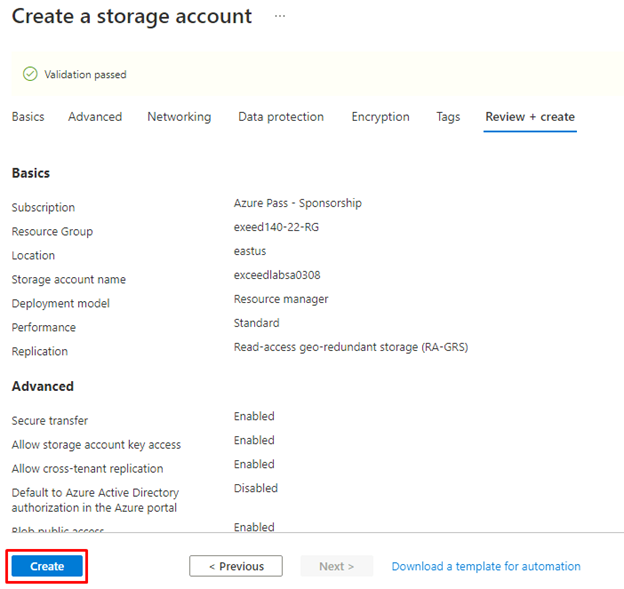
Note: Wait for the Storage account to be created. This should take about 2 minutes.
Task 2: Create an Azure Files share
- Within the Remote Desktop session to exceed-dc-vm11, in the Microsoft Edge window displaying the Azure portal, navigate back to the Storage accounts blade and select the entry representing the newly created storage account.
- On the storage account blade, in the Data storage section, select File shares and then select + File share.

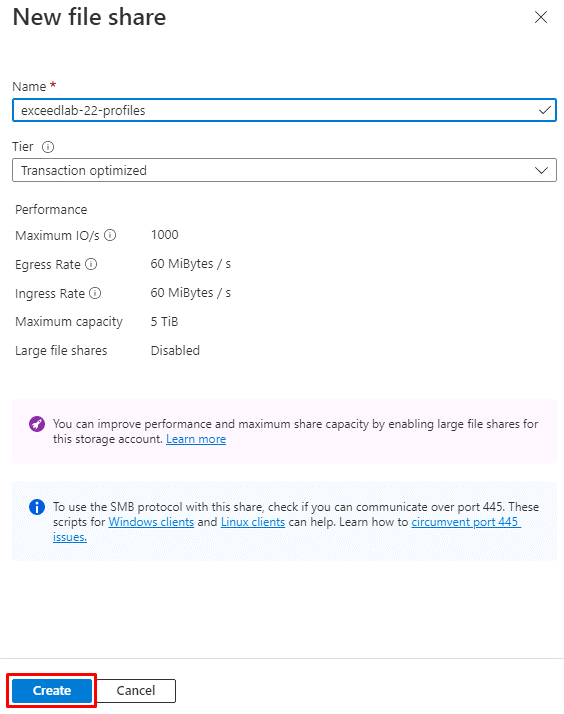
- On the New file share blade, specify the following settings and select Create (leave other settings with their default values):
| Setting | Value |
| Name | exceedlab-22-profiles |
| Tiers | Transaction optimized |
Task 3: Enable AD DS authentication for the Azure Storage account
- Within the Remote Desktop session to exceed-dc-vm11, open another tab in the Microsoft Edge window, navigate to the Azure Files samples GitHub repository, download [the most recent version of the compressed AzFilesHybrid.zip PowerShell module, and extract its content into C:\Allfiles\Labs\02 folder (create the folder if needed).

Within the Remote Desktop session to exceed-dc-vm11, start Windows PowerShell ISE as administrator and, from the Administrator: Windows PowerShell ISE script pane, run the following to remove the Zone.Identifier alternate data stream, which has a value of 3, indicating that it was downloaded from the Internet:
Get-ChildItem -Path C:\Allfiles\Labs\02 -File -Recurse | Unblock-File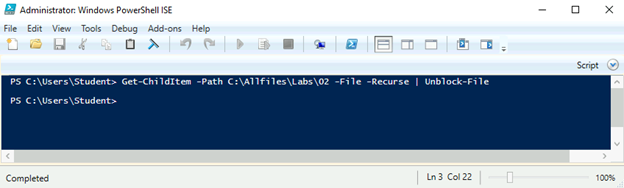
From the Administrator: Windows PowerShell ISE console, run the following to sign in to your Azure subscription:
Connect-AzAccount
- When prompted, sign in with the Azure AD credentials of the user account with the Owner role in the subscription you are using in this lab.
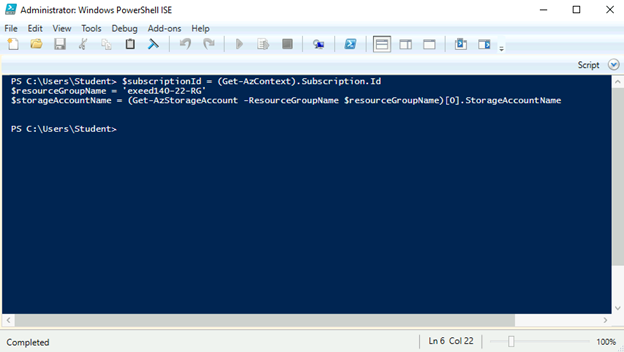
- Within the Remote Desktop session to exceed-dc-vm11, from the Administrator: Windows PowerShell ISE script pane, run the following to set the variables necessary to run the subsequent script:
$subscriptionId = (Get-AzContext).Subscription.Id
$resourceGroupName = 'exeed140-22-RG'
$storageAccountName = (Get-AzStorageAccount -ResourceGroupName $resourceGroupName)[0].StorageAccountName
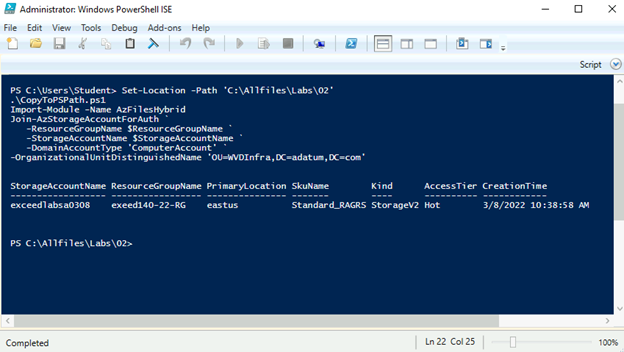
Within the Remote Desktop session to exceed-dc-vm11, from the Administrator: Windows PowerShell ISE script pane, run the following to create an AD DS computer object that represents the Azure Storage account you created earlier in this task and is used to implement its AD DS authentication:
Set-Location -Path 'C:\Allfiles\Labs\02'
.\CopyToPSPath.ps1
Import-Module -Name AzFilesHybrid
Join-AzStorageAccountForAuth `
   -ResourceGroupName $ResourceGroupName `
   -StorageAccountName $StorageAccountName `
   -DomainAccountType 'ComputerAccount' `
-OrganizationalUnitDistinguishedName 'OU=WVDInfra,DC=adatum,DC=com'
Within the Remote Desktop session to exceed-dc-vm11, from the Administrator: Windows PowerShell ISE script pane, run the following to verify that the AD DS authentication is enabled on the Azure Storage account:
$storageaccount = Get-AzStorageAccount -ResourceGroupName $resourceGroupName -Name $storageAccountName
$storageAccount.AzureFilesIdentityBasedAuth.ActiveDirectoryProperties
$storageAccount.AzureFilesIdentityBasedAuth.DirectoryServiceOptions
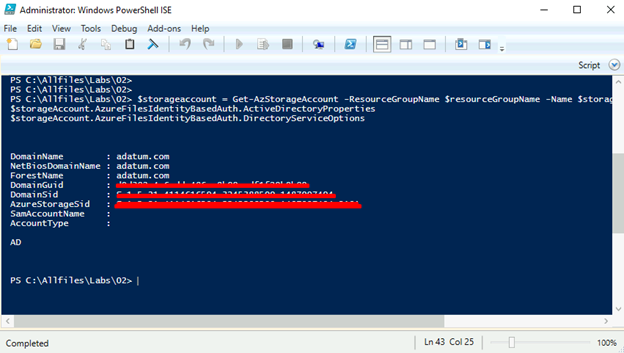
Verify that that the output of the command $storageAccount.AzureFilesIdentityBasedAuth.ActiveDirectoryProperties returns AD, representing the directory service of the storage account, and that the output of the $storageAccount.AzureFilesIdentityBasedAuth.DirectoryServiceOptions command, representing the directory domain information, resembles the following format (the values of DomainGuid, DomainSid, and AzureStorageSid will differ):
DomainName        : adatum.com
NetBiosDomainName : adatum.com
ForestName        : adatum.com
DomainGuid        : 47c93969-9b12-4e01-ab81-1508cae3ddc8
DomainSid         : S-1-5-21-1102940778-2483248400-1820931179
AzureStorageSid   : S-1-5-21-1102940778-2483248400-1820931179-2109
Within the Remote Desktop session to exceed-dc-vm11, switch to the Microsoft Edge window displaying the Azure portal, on the blade displaying the storage account, select File shares and verify that the Active Directory setting is Configured.
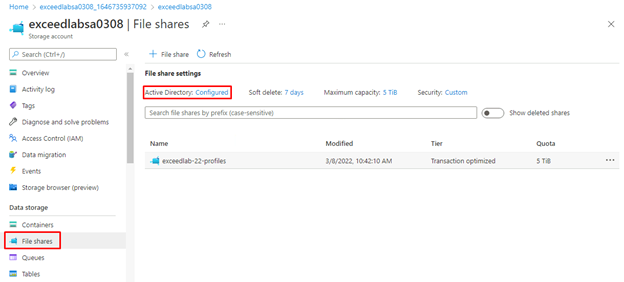
Note: You might have to refresh the browser page for the change to be reflected within the Azure portal.
Task 4: Configure the Azure Files RBAC-based permissions
- Within the Remote Desktop session to exceed-dc-vm11, in the Microsoft Edge window displaying the Azure portal, on the blade displaying properties of the storage account you created earlier in this exercise, in the vertical menu on the left side, in the Data storage section, select File shares.
- On the File shares blade, in the list of shares, select the exceedlab-22-profiles entry.
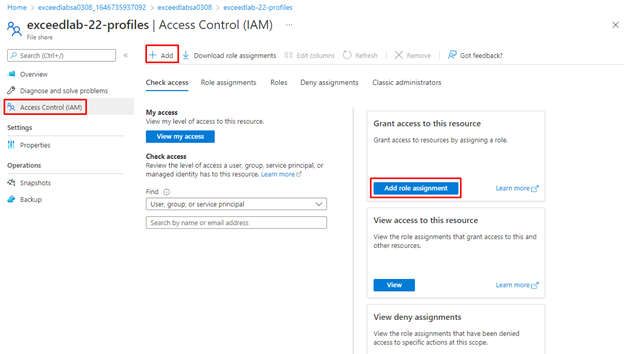
- On the exceedlab-22-profiles blade, in the vertical menu on the left side, select Access Control (IAM).

On the Access Control (IAM) blade of the storage account, select + Add and, in the drop-down menu, select Add role assignment,
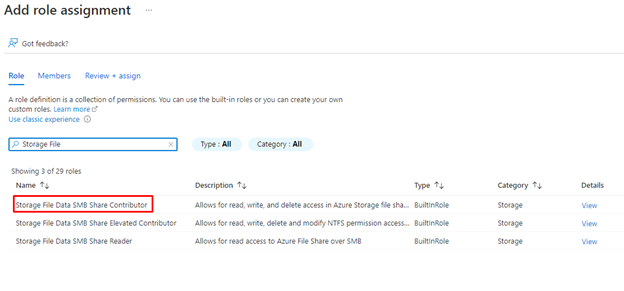
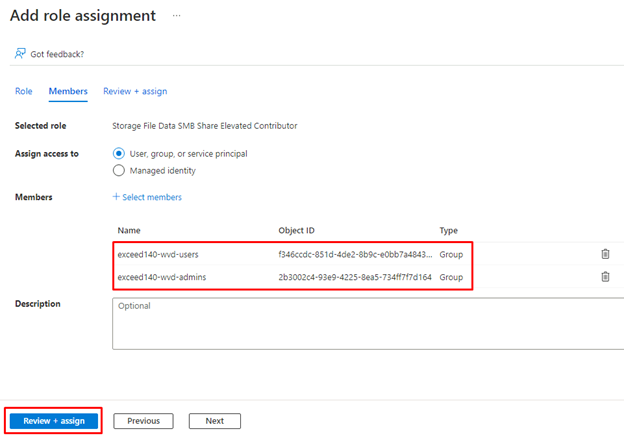
- On the Add role assignment blade, specify the following settings and select Review + assign:
| Setting | Value |
| Role | Storage File Data SMB Share Contributor |
| Assign access to | User, group, or service principal |
| Select | exceed140-wvd-users |

- On the Access Control (IAM) blade of the storage account, select + Add and, in the drop-down menu, select Add role assignment,
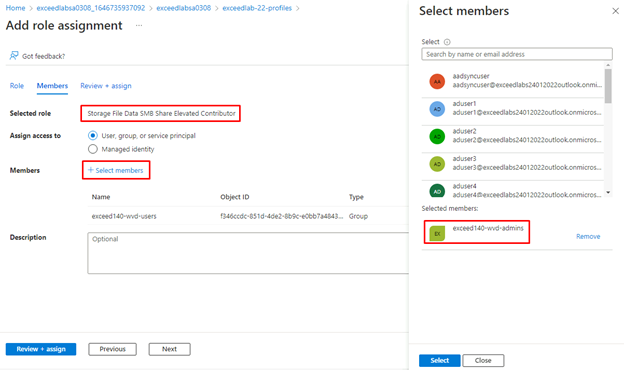
- On the Add role assignment blade, specify the following settings and select Review + assign:
| Setting | Value |
| Role | Storage File Data SMB Share Elevated Contributor |
| Assign access to | User, group, or service principal |
| Select | exceed140-wvd-admins |
Task 5: Configure the Azure Files file system permissions
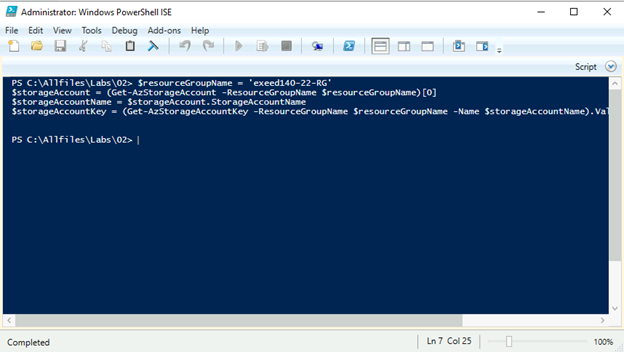
- Within the Remote Desktop session to exceed-dc-vm11, switch to the Administrator: Windows PowerShell ISE window and, from the Administrator: Windows PowerShell ISE script pane, run the following to create a variable referencing the name and key of the storage account you created earlier in this exercise:
$resourceGroupName = 'exeed140-22-RG'
$storageAccount = (Get-AzStorageAccount -ResourceGroupName $resourceGroupName)[0]
$storageAccountName = $storageAccount.StorageAccountName
$storageAccountKey = (Get-AzStorageAccountKey -ResourceGroupName $resourceGroupName -Name $storageAccountName).Value[0]
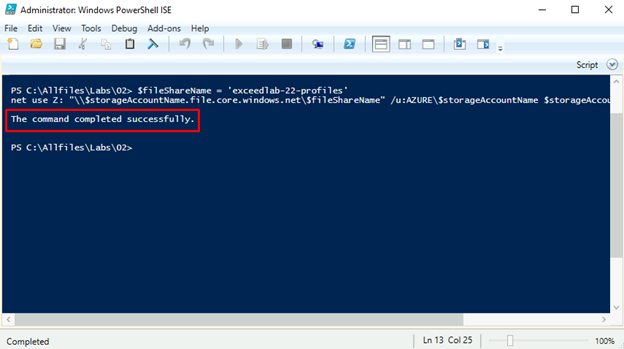
From the Administrator: Windows PowerShell ISE script pane, run the following to create a drive mapping to the file share you created earlier in this exercise:
$fileShareName = 'exceedlab-22-profiles'
net use Z: "\\$storageAccountName.file.core.windows.net\$fileShareName" /u:AZURE\$storageAccountName $storageAccountKey
From the Administrator: Windows PowerShell ISE console, run the following to view the current file system permissions:
icacls Z: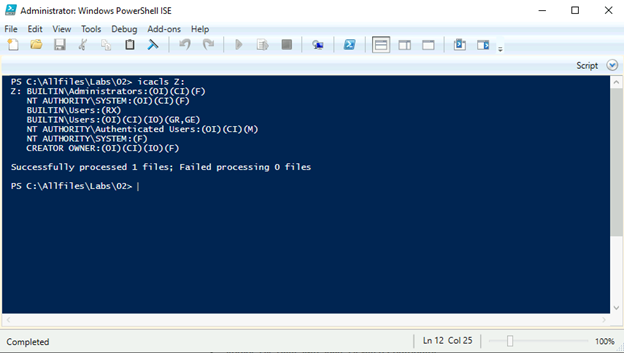
Note: By default, both NT Authority\Authenticated Users and BUILTIN\Users have permissions that would allow users read other users’ profile containers. You will remove them and add minimum required permissions instead.
- From the Administrator: Windows PowerShell ISE script pane, run the following to adjust the file system permissions to comply with the principle of least privilege:
$permissions = 'ADATUM\exceed140-wvd-admins'+':(F)'
cmd /c icacls Z: /grant $permissions
$permissions = 'ADATUM\exceed140-wvd-users'+':(M)'
cmd /c icacls Z: /grant $permissions
$permissions = 'Creator Owner'+':(OI)(CI)(IO)(M)'
cmd /c icacls Z: /grant $permissions
icacls Z: /remove 'Authenticated Users'
icacls Z: /remove 'Builtin\Users'
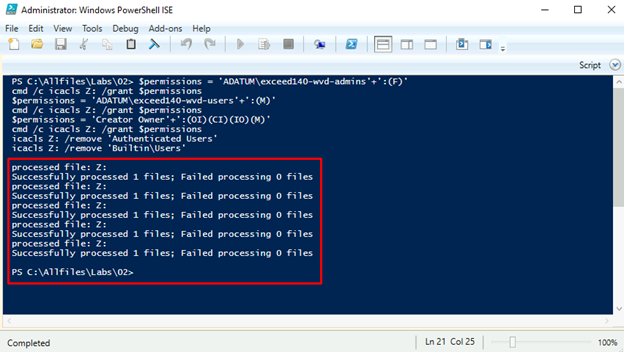
icacls Z: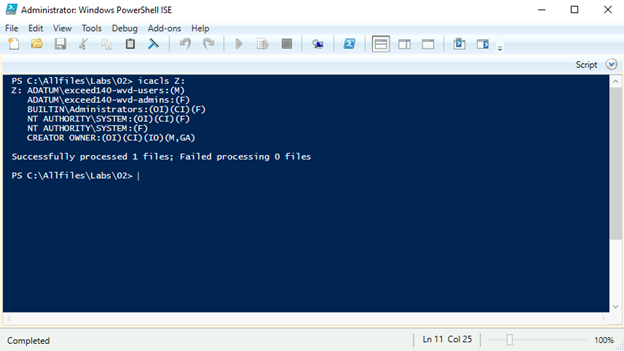
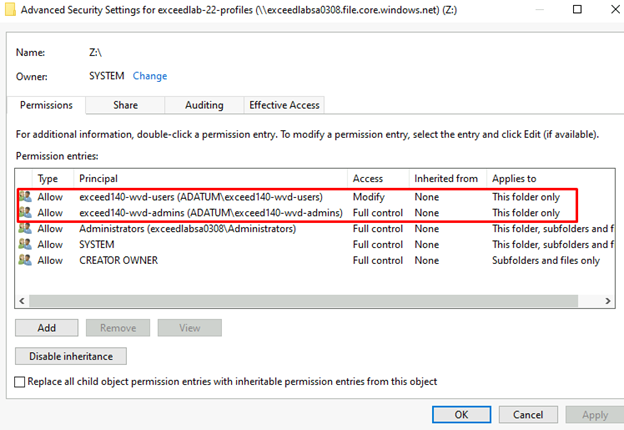
Note: Alternatively, you could set permissions by using File Explorer.
Congratulations, you are now able to configure Azure Files to store profile containers for Azure Virtual Desktop !
Reminder: Don’t forget to delete or shutdown all unused Azure resources after your labs for cost saving
jisim
Good read