You need to automate deployment of Azure Virtual Desktop host pools and hosts by using PowerShell in an Active Directory Domain Services (AD DS) environment.
Prerequisites for this labs : Azure Account / Download Labs Files here
- An Azure subscription you will be using in this lab.
- A Microsoft account or an Azure AD account with the Owner or Contributor role in the Azure subscription you will be using in this lab and with the Global Administrator role in the Azure AD tenant associated with that Azure subscription.
- The completed lab Prepare for deployment of Azure Virtual Desktop (AD DS)
Objectives
After completing this lab, you will be able to:
- Deploy Azure Virtual Desktop host pools and hosts by using PowerShell
- Add hosts to the Azure Virtual Desktop host pool by using PowerShell
Lab 1: Implement Azure Virtual Desktop host pools and session hosts by using PowerShell
The main tasks for this Lab are as follows:
- Prepare for deployment of Azure Virtual Desktop host pool by using PowerShell
- Create a Azure Virtual Desktop host pool by using PowerShell
- Perform a template-based deployment of an Azure VM running Windows 10 Enterprise by using PowerShell
- Add an Azure VM running Windows 10 Enterprise as a session host to the Azure Virtual Desktop host pool by using PowerShell
- Verify the deployment of the Azure Virtual Desktop session host
Task 1: Prepare for deployment of Azure Virtual Desktop host pool by using PowerShell
- From your lab computer, start a web browser, navigate to the Azure portal, and sign in by providing credentials of a user account with the Owner role in the subscription you will be using in this lab.
- In the Azure portal, search for and select Virtual machines and, from the Virtual machines blade, select exceed-dc-vm11.
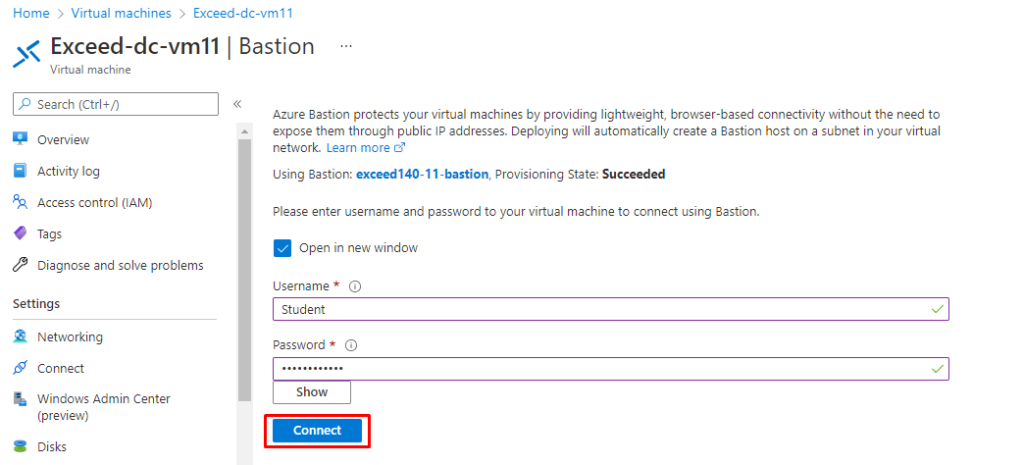
- On the exceed-dc-vm11 blade, select Connect, in the drop-down menu, select Bastion, on the Bastion tab of the exceed-dc-vm11 | Connect blade, select Use Bastion.
- When prompted, provide the following credentials and select Connect:
| Setting | Value |
| User Name | Student |
| Password | Pa55w.rd1234 |
- Within the Remote Desktop session to exceed-dc-vm11, start Windows PowerShell ISE as administrator.
- Within the Remote Desktop session to exceed-dc-vm11, from the Administrator: Windows PowerShell ISE console, run the following to identify the distinguished name of the organizational unit named WVDInfra that will host the computer objects of the Azure Virtual Desktop pool session hosts:
(Get-ADOrganizationalUnit -Filter "Name -eq 'WVDInfra'").distinguishedName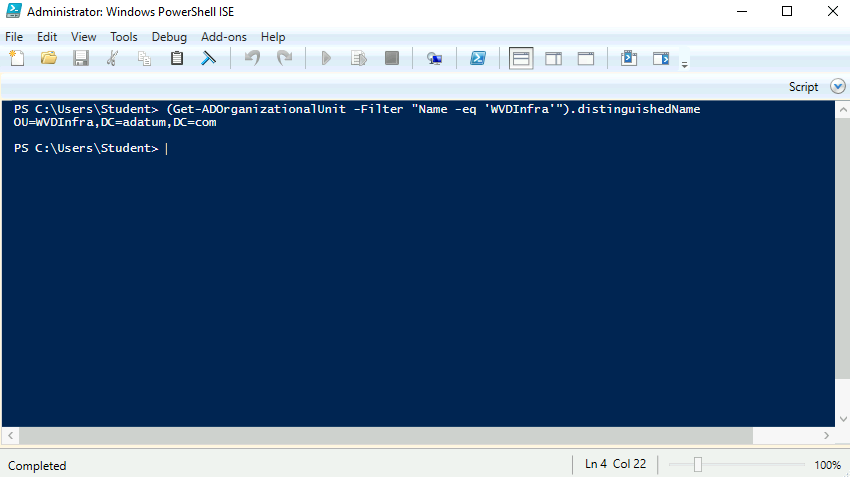
Within the Remote Desktop session to exceed-dc-vm11, from the Administrator: Windows PowerShell ISE script pane, run the following to identify the UPN suffix of the ADATUM\Student account that you will use to join the Azure Virtual Desktop hosts to the AD DS domain (student@adatum.com):
(Get-ADUser -Filter {sAMAccountName -eq 'student'} -Properties userPrincipalName).userPrincipalName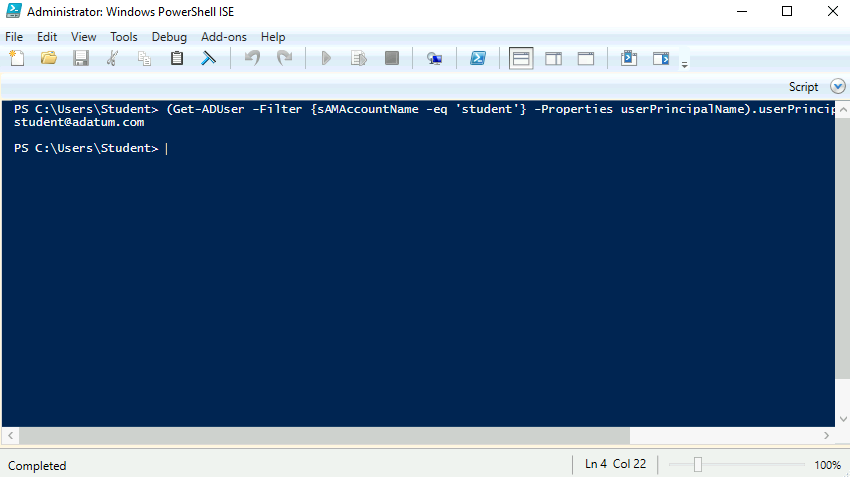
Within the Remote Desktop session to exceed-dc-vm11, from the Administrator: Windows PowerShell ISE script pane, run the following to install the DesktopVirtualization PowerShell module (when prompted, click Yes to All):
Install-Module -Name Az.DesktopVirtualization -Force
Note: Ignore any warnings regarding existing PowerShell modules in use.
- Within the Remote Desktop session to exceed-dc-vm11, start Microsoft Edge and navigate to the Azure portal. If prompted, sign in by using the Azure AD credentials of the user account with the Owner role in the subscription you are using in this lab.
- Within the Remote Desktop session to exceed-dc-vm11, in the Azure portal, use the Search resources, services, and docs text box at the top of the Azure portal page to search for and navigate to Virtual networks and, on the Virtual networks blade, select exceed-adds-vnet11.
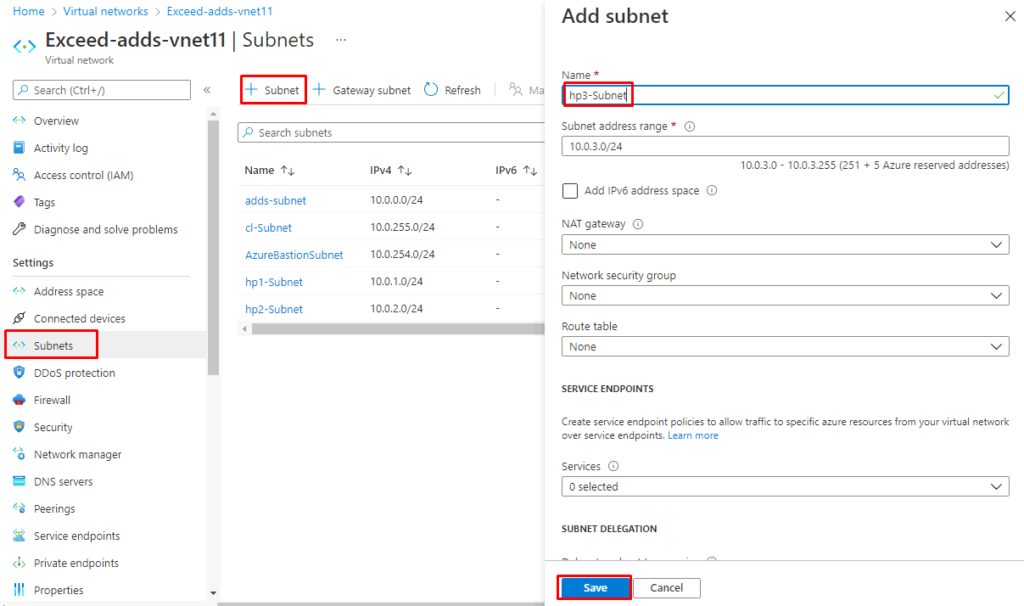
- On the exceed-adds-vnet11 blade, select Subnets, on the Subnets blade, select + Subnet, on the Add subnet blade, specify the following settings (leave all other settings with their default values) and click Save:
| Setting | Value |
| Name | hp3-Subnet |
| Subnet address range | 10.0.3.0/24 |
- Within the Remote Desktop session to exceed-dc-vm11, in the Azure portal, use the Search resources, services, and docs text box at the top of the Azure portal page to search for and navigate to Network security groups and, on the Network security groups blade, select the security group in the exceed140-11-RG resource group.
- On the network security group blade, in the vertical menu on the left, in the Settings section, click Properties.
- On the Properties blade, click the Copy to clipboard icon on the right side of the Resource ID textbox.
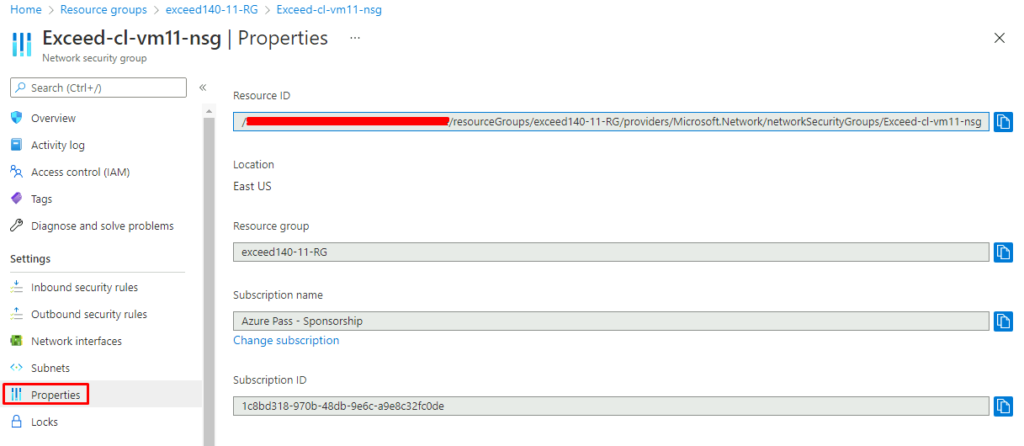
Note: The value should resemble the format /subscriptions/de8279a3-0675-40e6-91e2-5c3728792cb5/resourceGroups/exceed140-11-RG/providers/Microsoft.Network/networkSecurityGroups/exceed-cl-vm11-nsg, although the subscription ID will differ. Record it since you will need it in the next task.
Task 2: Create a Azure Virtual Desktop host pool by using PowerShell
- Within the Remote Desktop session to exceed-dc-vm11, from the Administrator: Windows PowerShell ISE script pane, run the following to sign in to your Azure subscription:
Connect-AzAccount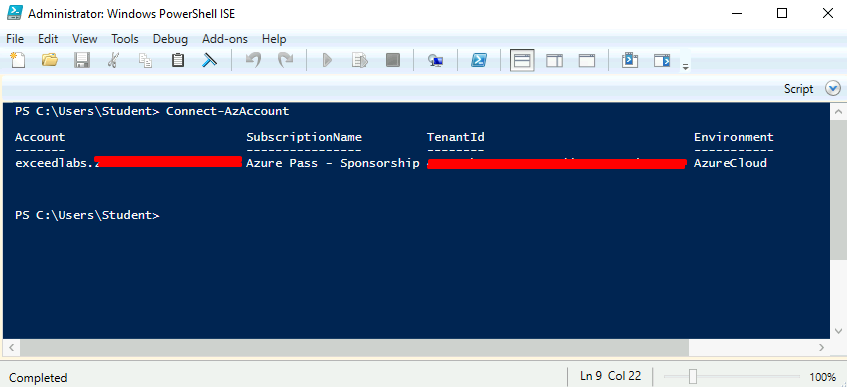
- When prompted, provide the credentials of the user account with the Owner role in the subscription you are using in this lab.
- Within the Remote Desktop session to exceed-dc-vm11, from the Administrator: Windows PowerShell ISE script pane, run the following to identify the Azure region hosting the Azure virtual network exceed-adds-vnet11:
$location = (Get-AzVirtualNetwork -ResourceGroupName 'exceed140-11-RG' -Name 'exceed-adds-vnet11').Location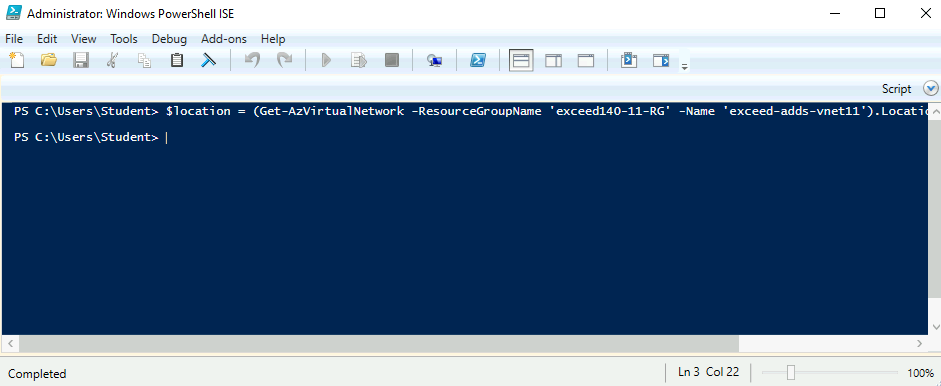
Within the Remote Desktop session to exceed-dc-vm11, from the Administrator: Windows PowerShell ISE script pane, run the following to create a resource group that will host the host pool and its resources:
$resourceGroupName = 'exceed140-24-RG'
New-AzResourceGroup -Location $location -Name $resourceGroupName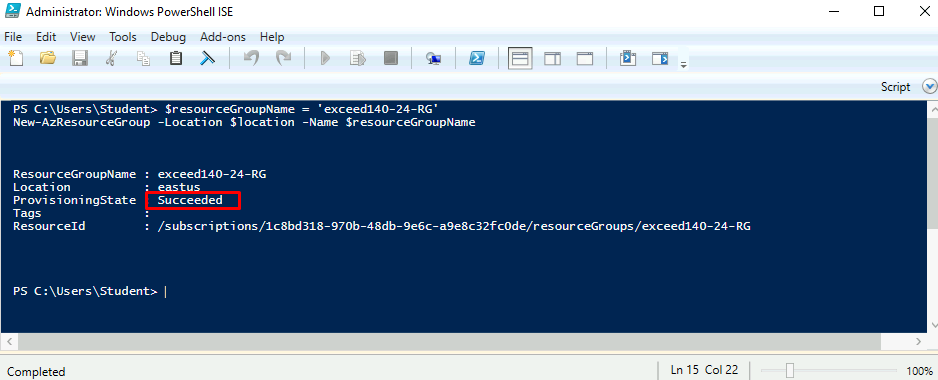
Within the Remote Desktop session to exceed-dc-vm11, from the Administrator: Windows PowerShell ISE script pane, run the following to create an empty host pool:
$hostPoolName = 'exceed140-24-hp3'
$workspaceName = 'exceed140-24-ws1'
$dagAppGroupName = "$hostPoolName-DAG"
New-AzWvdHostPool -ResourceGroupName $resourceGroupName -Name $hostPoolName -WorkspaceName $workspaceName -HostPoolType Pooled -LoadBalancerType BreadthFirst -Location $location -DesktopAppGroupName $dagAppGroupName -PreferredAppGroupType Desktop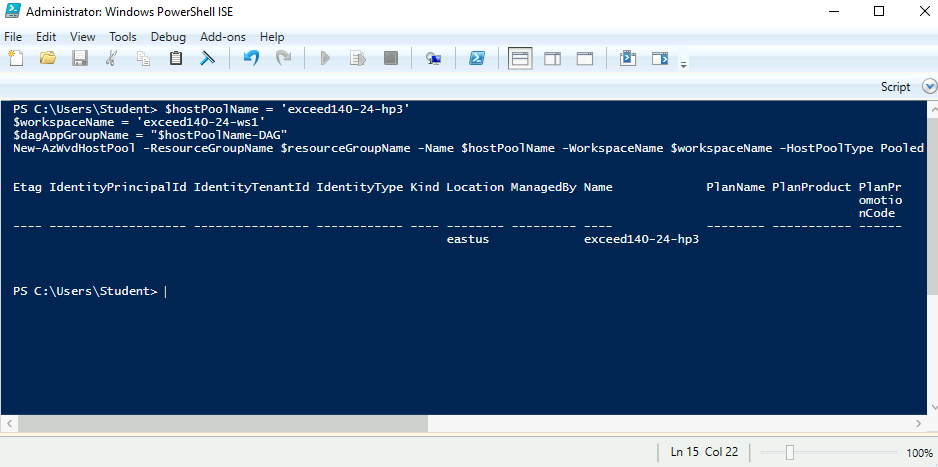
Note: The New-AzWvdHostPool cmdlet allows you to create a host pool, workspace, and the desktop app group, as well as to register the desktop app group with the workspace. You have the option of creating a new workspace or using an existing one.
- Within the Remote Desktop session to exceed-dc-vm11, from the Administrator: Windows PowerShell ISE console, run the following to retrieve the objectID attribute of the Azure AD group named exceed140-wvd-pooled:
$aadGroupObjectId = (Get-AzADGroup -DisplayName 'exceed140-wvd-pooled').IdWithin the Remote Desktop session to exceed-dc-vm11, from the Administrator: Windows PowerShell ISE console, run the following to assign the Azure AD group named exceed140-wvd-pooled to the default desktop app group of the newly created host pool:
$roleDefinitionName = 'Desktop Virtualization User'
New-AzRoleAssignment -ObjectId $aadGroupObjectId -RoleDefinitionName $roleDefinitionName -ResourceName $dagAppGroupName -ResourceGroupName $resourceGroupName -ResourceType 'Microsoft.DesktopVirtualization/applicationGroups'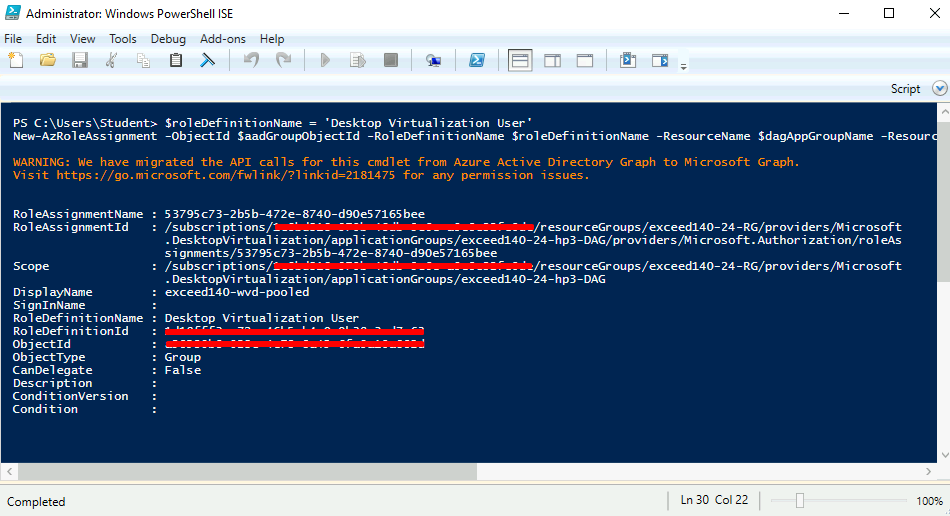
Task 3: Perform a template-based deployment of an Azure VM running Windows 10 Enterprise by using PowerShell
- From your lab computer, use the Remote Desktop session to the exceed-dc-vm11 Azure VM to copy the lab files \\Yourfolder\exceed140-24_azuredeployhp3.json and \\Yourfolder\exceed140-24_azuredeployhp3.parameters.json to the C:\AllFiles\Labs\02 folder (create it if needed).
Note: If you’re having trouble getting the files from the Lab computer over to the nested virtual machine, in the Azure portal on the lab computer, you can upload the 2 files to the exceed140-22-profiles file share you made in the previous lab. After uploading the files to the share, simply go to exceed-dc-vm1 and, in the Azure portal, from the file share there, download the files locally.
- Within the Remote Desktop session to exceed-dc-vm11, from the Administrator: Windows PowerShell ISE console, run the following to deploy an Azure VM running Windows 10 Enterprise (multi-session) that will serve as a Azure Virtual Desktop session host in the host pool you created in the previous task:
$resourceGroupName = 'exceed140-24-RG'
$location = (Get-AzResourceGroup -ResourceGroupName $resourceGroupName).Location
New-AzResourceGroupDeployment `
  -ResourceGroupName $resourceGroupName `
  -Location $location `
  -Name exceed140lab24hp3Deployment `
  -TemplateFile C:\AllFiles\Labs\02\exceed140-24_azuredeployhp3.json `
-TemplateParameterFile C:\AllFiles\Labs\02\exceed140-24_azuredeployhp3.parameters.json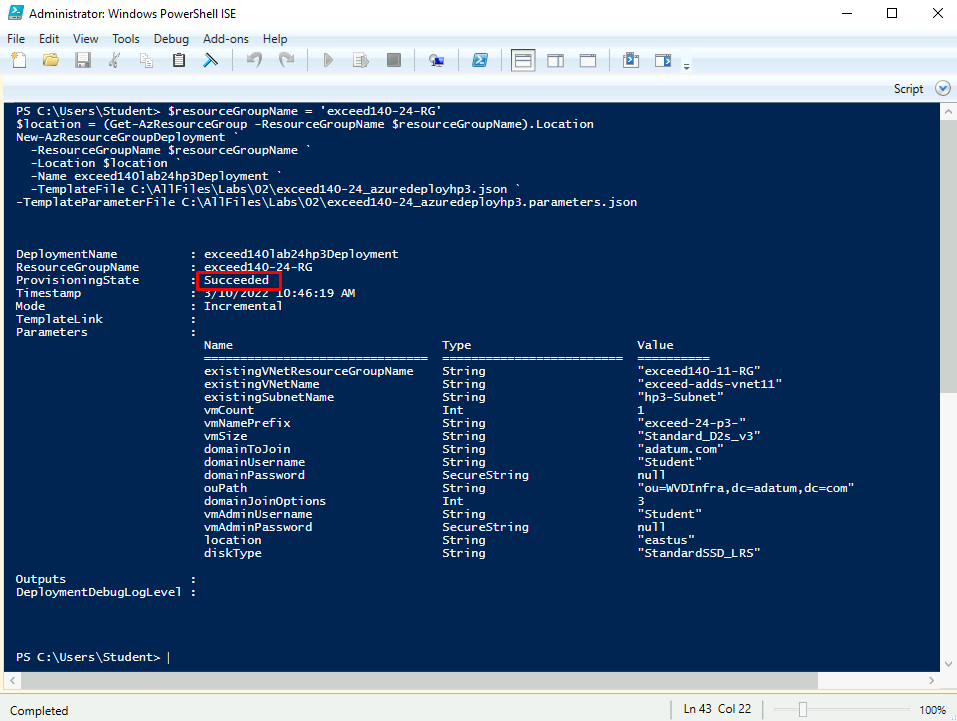
Note: Wait for the deployment to complete before you proceed to the next task. This might take about 5 minutes.
Note: The deployment uses an Azure Resource Manager template to provision an Azure VM and applies a VM extension that automatically joins the operating system to the adatum.com AD DS domain.
- Within the Remote Desktop session to exceed-dc-vm11, from the Administrator: Windows PowerShell ISE console, run the following to verify that the third session host was successfully joined to the adatum.com AD DS domain:
Get-ADComputer -Filter "sAMAccountName -eq 'exceed-24-p3-0$'"
Task 4: Add an Azure VM running Windows 10 Enterprise as a host to the Azure Virtual Desktop host pool by using PowerShell
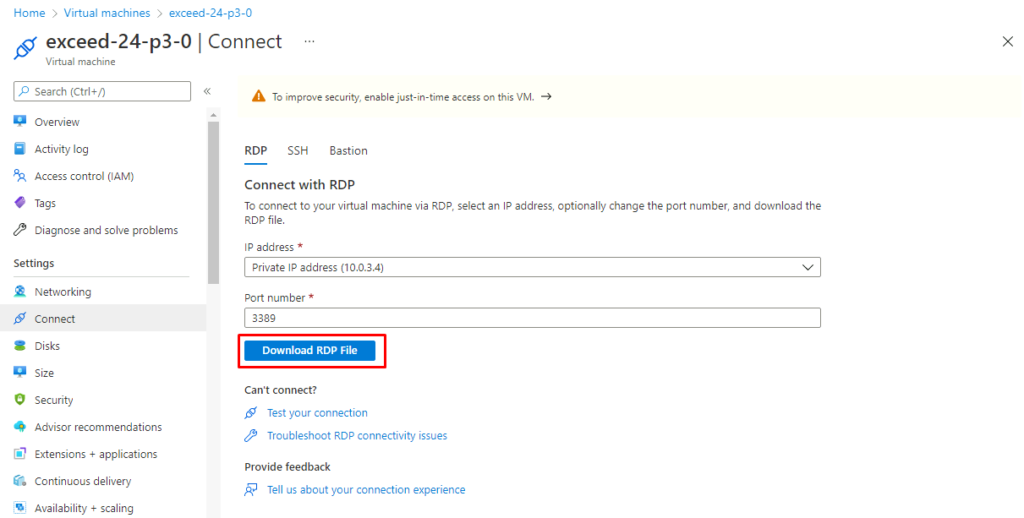
- Within the Remote Desktop session to exceed-dc-vm11, in the browser window displaying the Azure portal, search for and select Virtual machines and, on the Virtual machines blade, in the list of virtual machines, select exceed-24-p3-0.
- On the exceed-24-p3-0 blade, select Connect, in the drop-down menu, select RDP, on the RDP tab of the exceed-24-p3-0 | Connect blade, in the IP address drop-down list, select the Private IP address (10.0.3.4) entry, and then select Download RDP File.
- When prompted, sign in with the following credentials:
| Setting | Value |
| User Name | ADATUM\Student |
| Password | Pa55w.rd1234 |
- Within the Remote Desktop session to exceed-24-p3-0, start Windows PowerShell ISE as administrator.
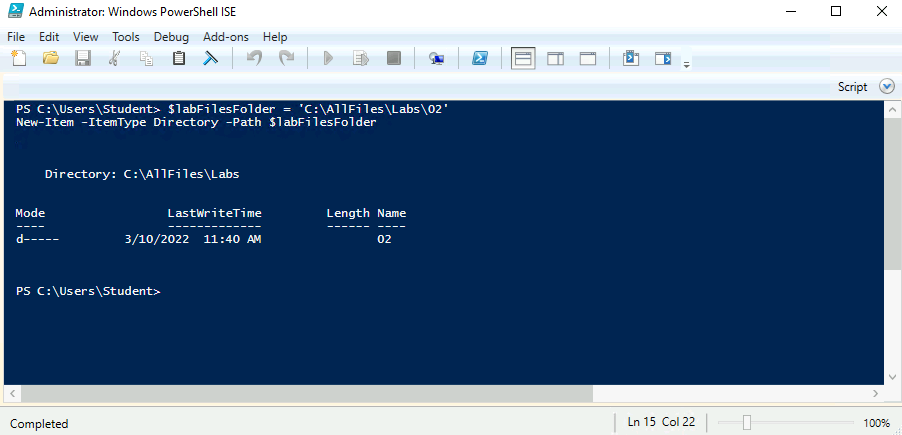
- Within the Remote Desktop session to exceed-24-p3-0, from the Administrator: Windows PowerShell ISE script pane, run the following to create a folder that will host files required to add the newly deployed Azure VM as a session host to the host pool you provisioned earlier in this lab:
$labFilesFolder = 'C:\AllFiles\Labs\02'
New-Item -ItemType Directory -Path $labFilesFolder
Note take care using the [T] construct to copy over the PowerShell cmdlets. In some instances, the text copied over can be incorrect, such as the $ sign showing as a 4 number character. You will need to correct these before issuing the cmdlet. Copy over to the PowerShell ISE Script pane, make the corrections there, and then highlight the corrected text and press F8 (Run Selection).
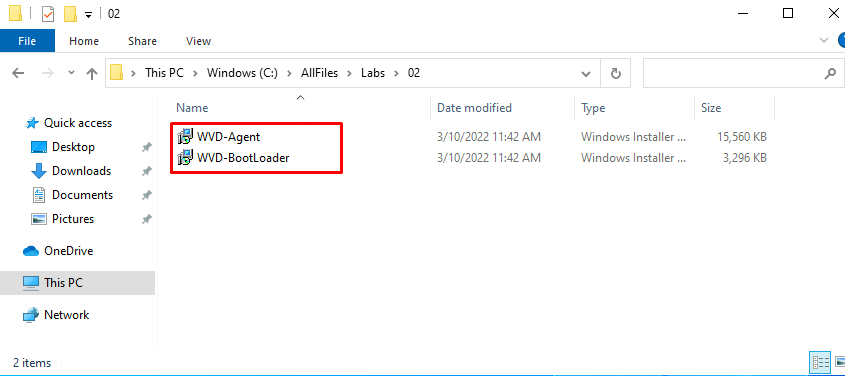
- Within the Remote Desktop session to exceed-24-p3-0, from the Administrator: Windows PowerShell ISE script pane, run the following to download the Azure Virtual Desktop Agent and Boot Loader installers, required to add the session host to the host pool:
$webClient = New-Object System.Net.WebClient
$wvdAgentInstallerURL = 'https://query.prod.cms.rt.microsoft.com/cms/api/am/binary/RWrmXv'
$wvdAgentInstallerName = 'WVD-Agent.msi'
$webClient.DownloadFile($wvdAgentInstallerURL,"$labFilesFolder/$wvdAgentInstallerName")
$wvdBootLoaderInstallerURL = 'https://query.prod.cms.rt.microsoft.com/cms/api/am/binary/RWrxrH'
$wvdBootLoaderInstallerName = 'WVD-BootLoader.msi'
$webClient.DownloadFile($wvdBootLoaderInstallerURL,"$labFilesFolder/$wvdBootLoaderInstallerName")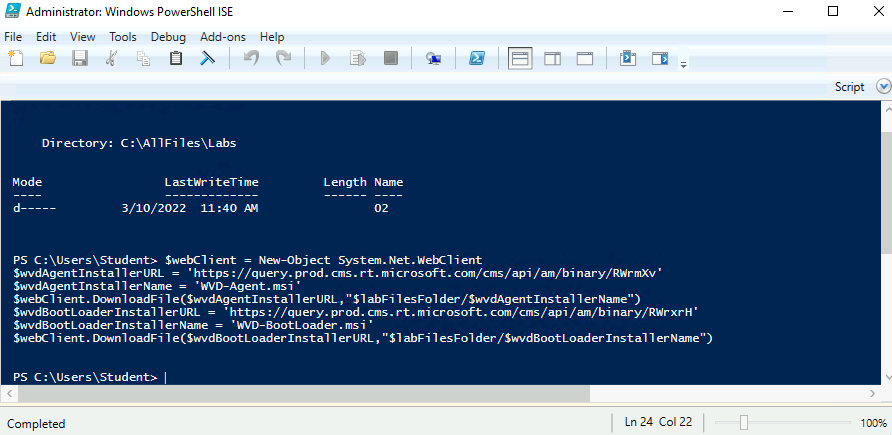
Within the Remote Desktop session to exceed-24-p3-0, from the Administrator: Windows PowerShell ISE script pane, run the following to install the latest version of the PowerShellGet module (select Yes when prompted for confirmation):
[Net.ServicePointManager]::SecurityProtocol = [Net.SecurityProtocolType]::Tls12
Install-Module -Name PowerShellGet -Force -SkipPublisherCheck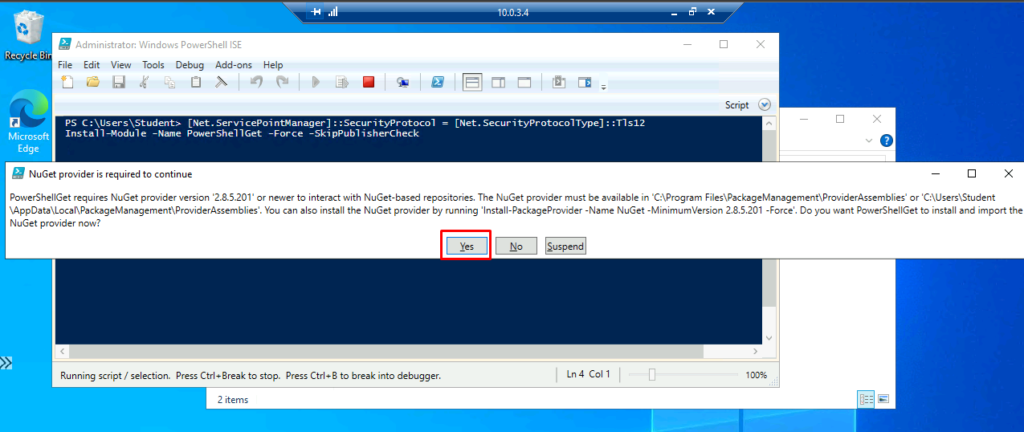
From the Administrator: Windows PowerShell ISE console, run the following to install the latest version of the Az.DesktopVirtualization PowerShell module:
Install-Module -Name Az.DesktopVirtualization -AllowClobber -Force
Install-Module -Name Az -AllowClobber -Force
From the Administrator: Windows PowerShell ISE console, run the following to modify the PowerShell execution policy and sign in to your Azure subscription:
Set-ExecutionPolicy -ExecutionPolicy Bypass -Scope CurrentUser -Force
Connect-AzAccount
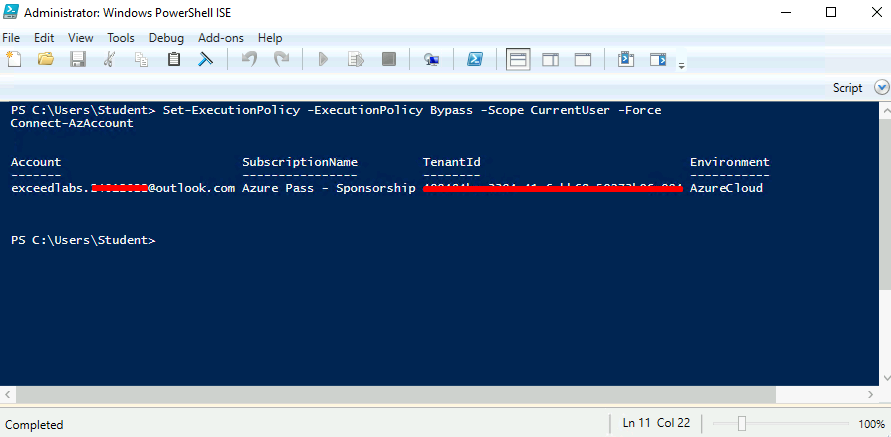
- When prompted, provide the credentials of the user account with the Owner role in the subscription you are using in this lab.
- Within the Remote Desktopliveid session to exceed-24-p3-0, from the Administrator: Windows PowerShell ISE console, run the following to generate the token necessary to join new session hosts to the pool you provisioned earlier in this Lab:
$resourceGroupName = 'exceed140-24-RG'
$hostPoolName = 'exceed140-24-hp3'
$registrationInfo = New-AzWvdRegistrationInfo -ResourceGroupName $resourceGroupName -HostPoolName $hostPoolName -ExpirationTime $((get-date).ToUniversalTime().AddDays(1).ToString('yyyy-MM-ddTHH:mm:ss.fffffffZ'))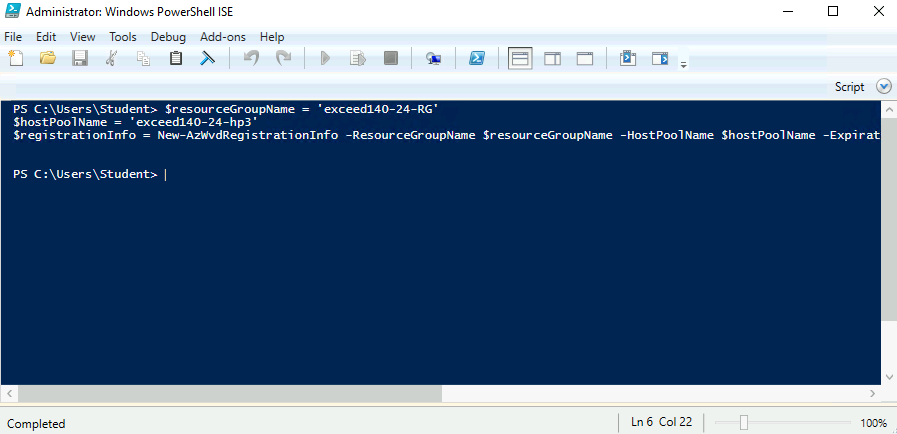
Note: A registration token is required to authorize a session host to join the host pool. The value of token’s expiration date must be between one hour and one month from the current date and time.
- Within the Remote Desktop session to exceed-24-p3-0, from the Administrator: Windows PowerShell ISE console, run the following to install the Azure Virtual Desktop Agent:
Set-Location -Path $labFilesFolder
Start-Process -FilePath 'msiexec.exe' -ArgumentList "/i $WVDAgentInstallerName", "/quiet", "/qn", "/norestart", "/passive", "REGISTRATIONTOKEN=$($registrationInfo.Token)", "/l* $labFilesFolder\AgentInstall.log" | Wait-Process
Within the Remote Desktop session to exceed-24-p3-0, from the Administrator: Windows PowerShell ISE console, run the following to install the Azure Virtual Desktop Boot Loader:
Start-Process -FilePath "msiexec.exe" -ArgumentList "/i $wvdBootLoaderInstallerName", "/quiet", "/qn", "/norestart", "/passive", "/l* $labFilesFolder\BootLoaderInstall.log" | Wait-process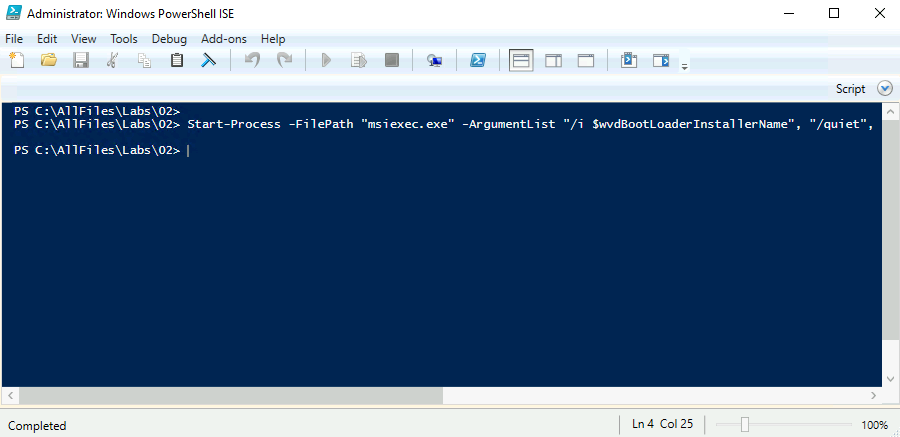
Task 5: Verify the deployment of the Azure Virtual Desktop host
- Switch to the lab computer, in the web browser displaying the Azure portal, search for and select Azure Virtual Desktop, on the Azure Virtual Desktop blade, select Host pools and, on the Azure Virtual Desktop | Host pools blade, select the entry exceed140-24-hp3 representing the newly modified pool.
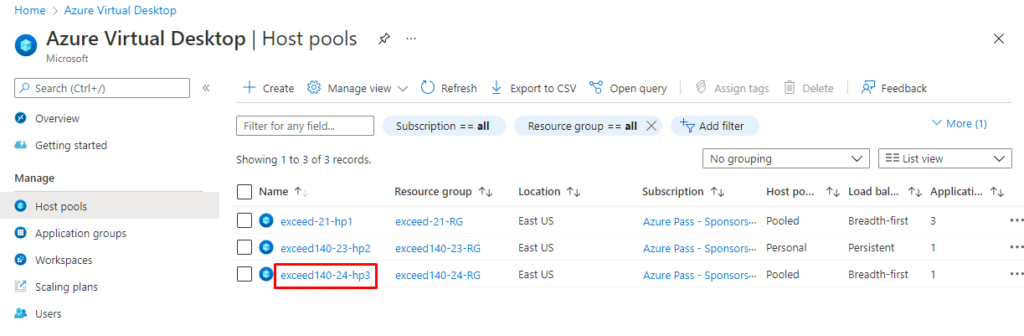
On the exceed140-24-hp3 blade, in the vertical menu on the left side, in the Manage section, click Session hosts.
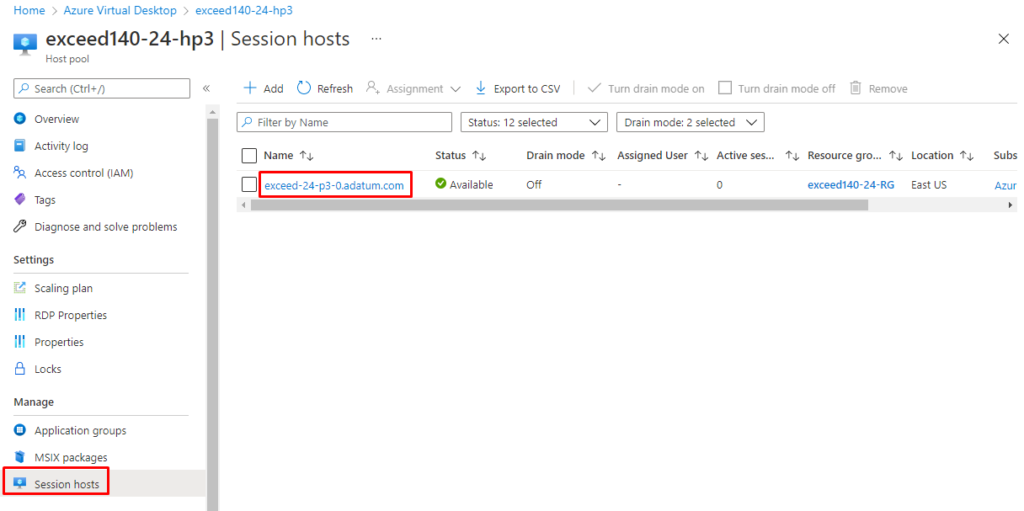
- On the exceed140-24-hp3 | Session hosts blade, verify that the deployment includes a single host.
Task 6: Manage app groups using PowerShell
- From the lab computer, switch to the Remote Desktop session to exceed-dc-vm11, from the Administrator: Windows PowerShell ISE console, run the following to create a Remote App group:
$subscriptionId = (Get-AzContext).Subscription.Id
$appGroupName = 'exceed140-24-hp3-Office365-RAG'
$resourceGroupName = 'exceed140-24-RG'
$hostPoolName = 'exceed140-24-hp3'
$location = (Get-AzVirtualNetwork -ResourceGroupName 'exceed140-11-RG' -Name 'exceed-adds-vnet11').Location
New-AzWvdApplicationGroup -Name $appGroupName -ResourceGroupName $resourceGroupName -ApplicationGroupType 'RemoteApp' -HostPoolArmPath "/subscriptions/$subscriptionId/resourcegroups/$resourceGroupName/providers/Microsoft.DesktopVirtualization/hostPools/$hostPoolName"-Location $location
Within the Remote Desktop session to exceed-dc-vm11, from the Administrator: Windows PowerShell ISE console, run the following to list the Start menu apps on the pool’s hosts and review the output:
Get-AzWvdStartMenuItem -ApplicationGroupName $appGroupName -ResourceGroupName $resourceGroupName | Format-List | more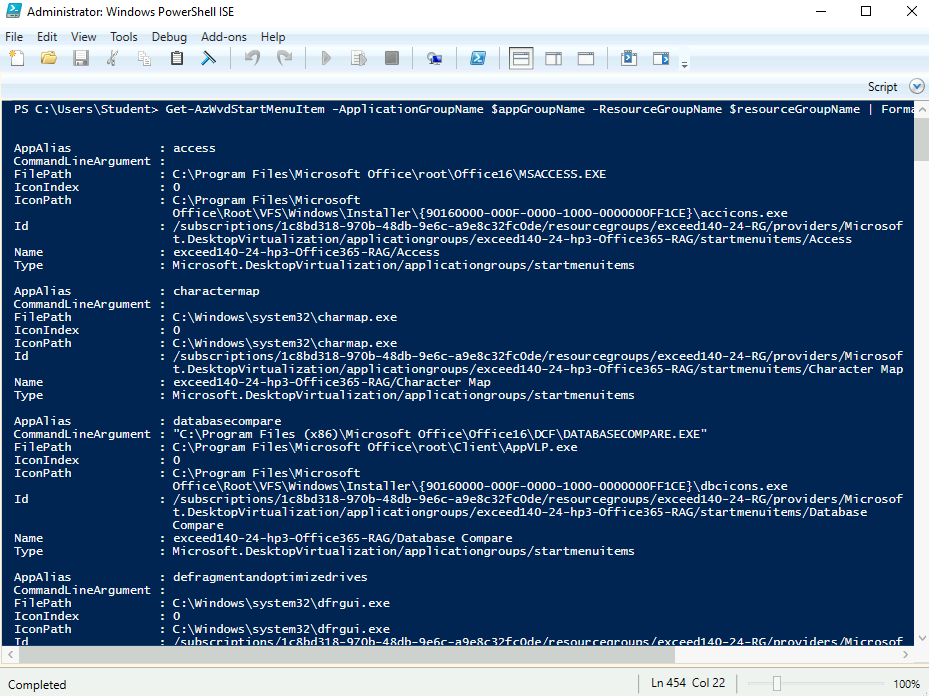
Note: For any application you want to publish, you should record the information included in the output, including such parameters as FilePath, IconPath, and IconIndex.
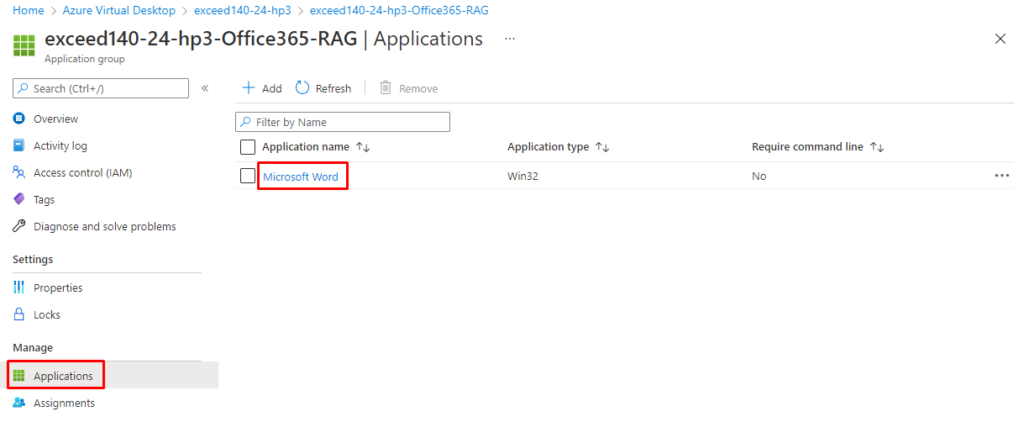
- Within the Remote Desktop session to exceed-dc-vm11, from the Administrator: Windows PowerShell ISE console, run the following to publish Microsoft Word:
$name = 'Microsoft Word'
$filePath = 'C:\Program Files\Microsoft Office\root\Office16\WINWORD.EXE'
$iconPath = 'C:\Program Files\Microsoft Office\Root\VFS\Windows\Installer\{90160000-000F-0000-1000-0000000FF1CE}\wordicon.exe'
New-AzWvdApplication -GroupName $appGroupName -Name $name -ResourceGroupName $resourceGroupName -FriendlyName $name -Filepath $filePath -IconPath $iconPath -IconIndex 0 -CommandLineSetting 'DoNotAllow' -ShowInPortal:$true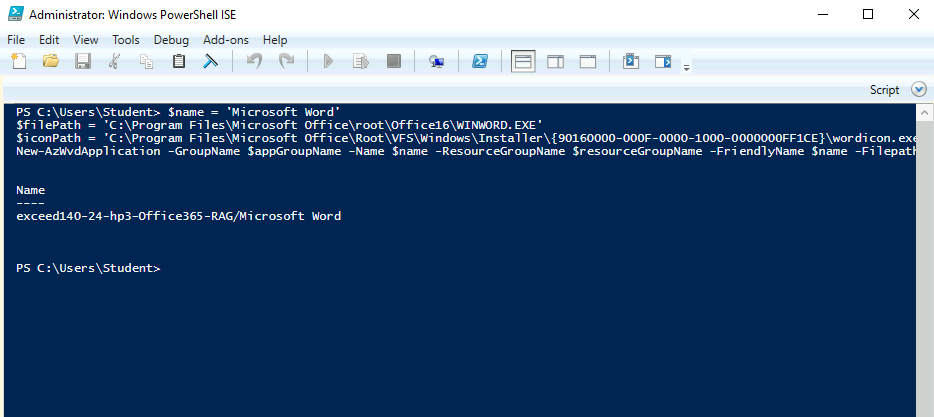
Within the Remote Desktop session to exceed-dc-vm11, from the Administrator: Windows PowerShell ISE console, run the following to publish Microsoft Word:
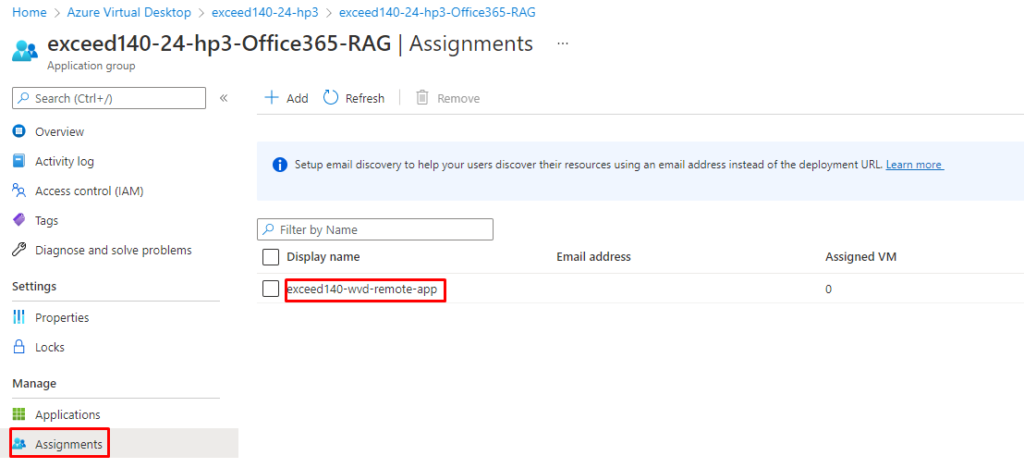
$aadGroupObjectId = (Get-AzADGroup -DisplayName 'exceed140-wvd-remote-app').Id
New-AzRoleAssignment -ObjectId $aadGroupObjectId -RoleDefinitionName 'Desktop Virtualization User' -ResourceName $appGroupName -ResourceGroupName $resourceGroupName -ResourceType 'Microsoft.DesktopVirtualization/applicationGroups'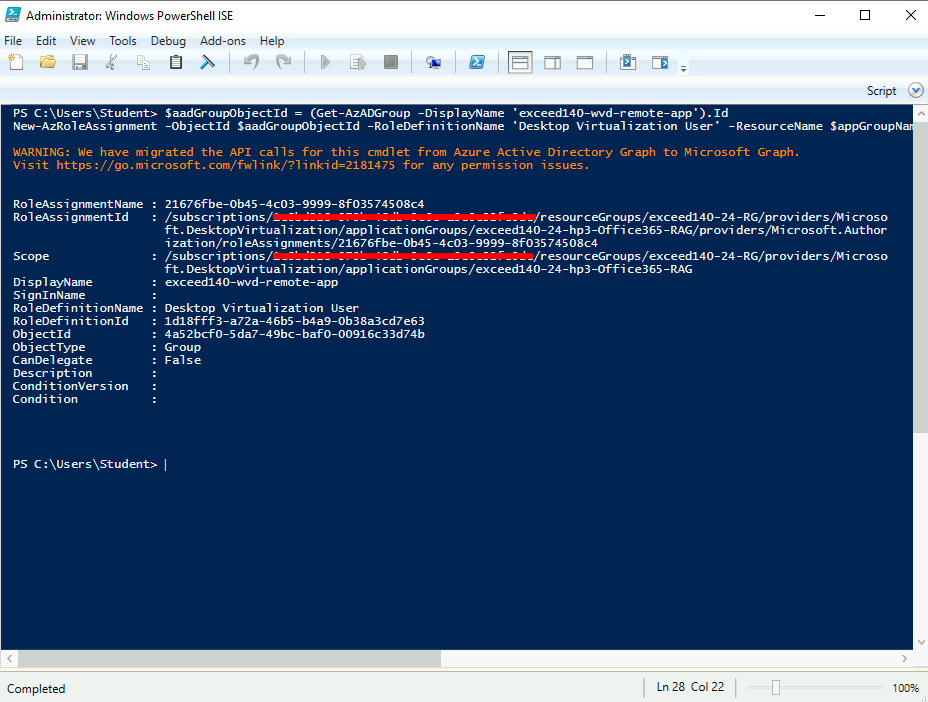
Switch to the lab computer, in the web browser displaying the Azure portal, on the exceed140-24-hp3 | Session hosts blade, in the vertical menu on the left side, in the Manage section, select Application groups.
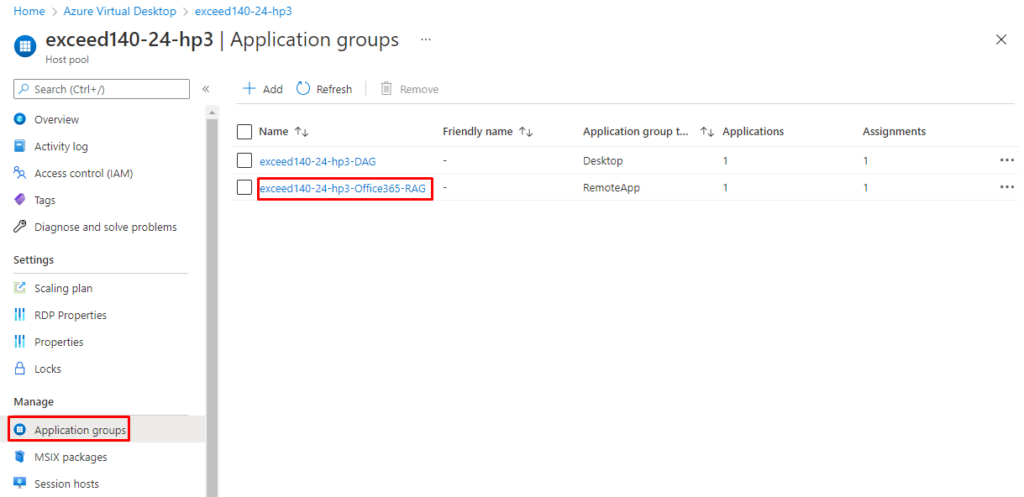
On the exceed140-24-hp3 | Application groups blade, in the list of application groups, select the exceed140-24-hp3-Office365-RAG entry.
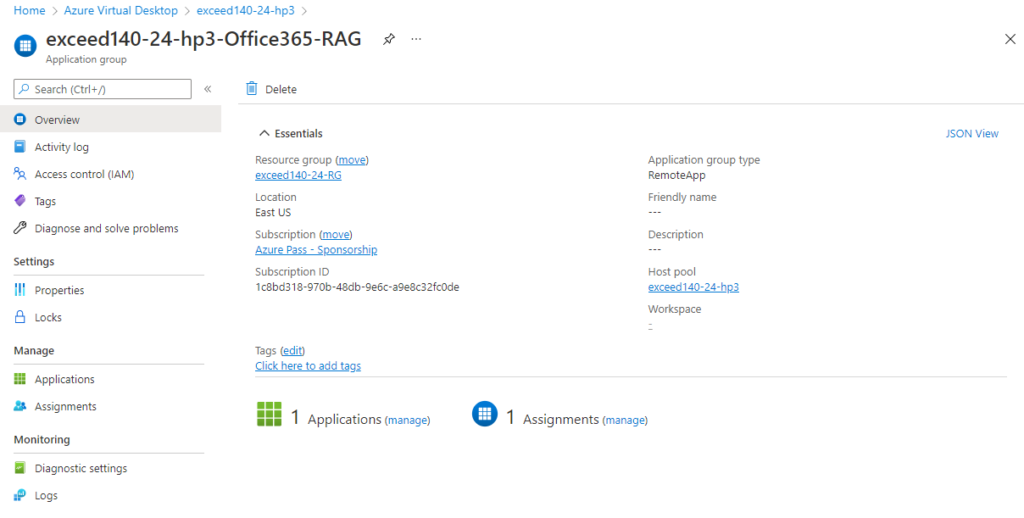
On the exceed140-24-hp3-Office365-RAG blade, verify the configuration of the application group, including the applications and assignments.
Lab 2: Stop and deallocate Azure VMs provisioned in the lab
The main tasks for this Lab are as follows:
- Stop and deallocate Azure VMs provisioned in the lab
Note: In this Lab, you will deallocate the Azure VMs provisioned in this lab to minimize the corresponding compute charges
Task 1: Deallocate Azure VMs provisioned in the lab
- Switch to the lab computer and, in the web browser window displaying the Azure portal, open the PowerShell shell session within the Cloud Shell pane.
- From the PowerShell session in the Cloud Shell pane, run the following to list all Azure VMs created in this lab:
Get-AzVM -ResourceGroup 'exceed140-24-RG'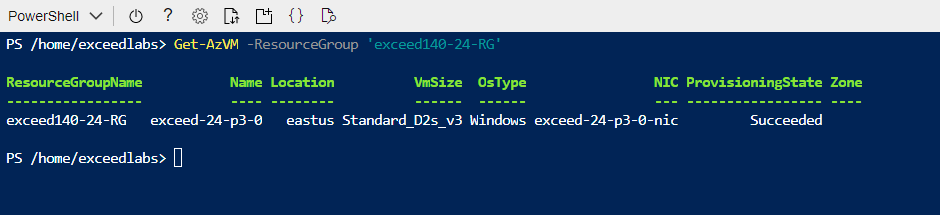
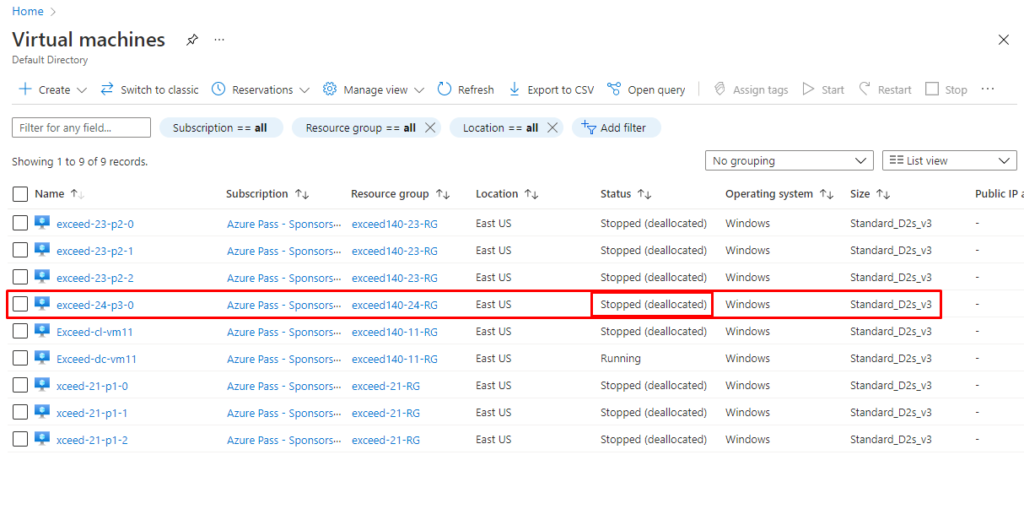
From the PowerShell session in the Cloud Shell pane, run the following to stop and deallocate all Azure VMs you created in this lab:
Get-AzVM -ResourceGroup 'exceed140-24-RG' | Stop-AzVM -NoWait -Force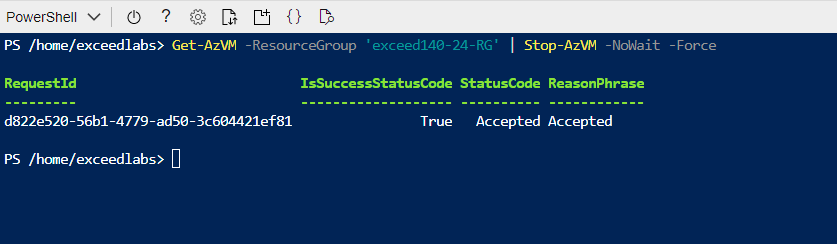
Note: The command executes asynchronously (as determined by the -NoWait parameter), so while you will be able to run another PowerShell command immediately afterwards within the same PowerShell session, it will take a few minutes before the Azure VMs are actually stopped and deallocated.
Congratulations, you are now able to automate deployment of Azure Virtual Desktop host pools and hosts by using PowerShell in an Active Directory Domain Services (AD DS) environment.
Reminder: Don’t forget to delete or shutdown all unused Azure resources after your labs for cost saving
Leave a Reply